
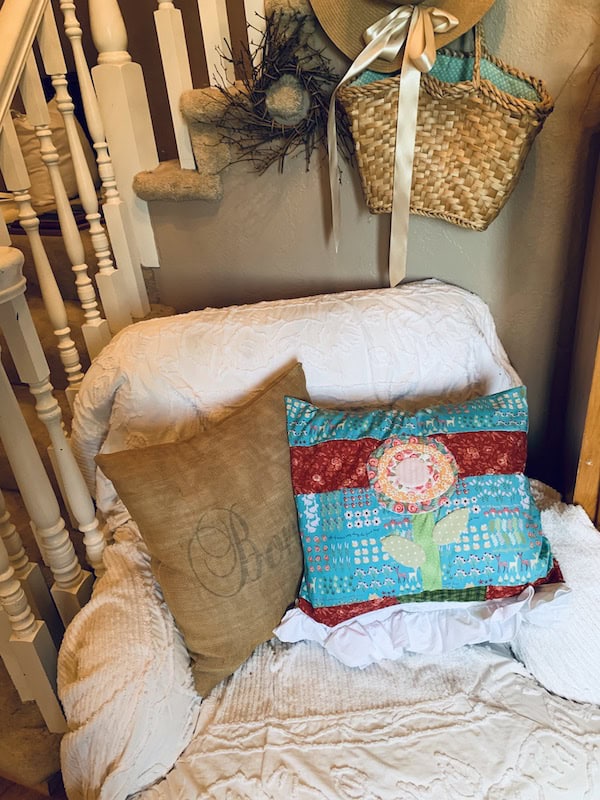
If you’re looking for a quick pick me up for a bedroom, family room, entry way or living room how about simply adding a pillow. This pillow is easy to make and won’t take you a long time to make it. Once you sew it up, add a cute flower applique you will have an eye catching accent for any room you put it in.
Create your DIY pillow with flower applique:
- How big do you want your pillow to be?
- How to choose two or three fabrics for the main pillow.
- Fabric for backing.
- Add a few scrap fabrics for stem, leaves, and the four round flower parts.
- Cut your pattern out.
- Sew your strips together to form the front of your pillow.
- Sew the stem of the flower to the middle of the main fabric strip towards the bottom of your pillow.
- Sew on the 3 bottom strips to your pillow.
- Prepare your flower applique and leaves. Sew it on to your pillow.
- Cut and sew your backing fabric to the front side of your pillow.
- You will need some poly fill stuffing or a pillow form. (I used a pillow form for my pillow.)
- Bring some creativity to the project and make your DIY pillow the way you picture it to be.
Ok time to get excited. This pillow is cute, fun, and so easy to sew up and applique. I know you can do it! I love any project that uplifts and decorates my home. I love any quilty project that makes me happy. So here goes. Hope you enjoy making this pillow or at least inspires you to get creative and make a similar pillow with your own spin on it. (Smile and wink from me.)
Size Of Pillow
Take a look at the space where you want to put your pillow. Is it a main pillow? An accent pillow? Are there other pillows you are putting with it? Answer these questions and then decide how big you want your pillow to be. If you are putting your pillow on a couch, you will want to keep your pillow in proportion with your couch and the other pillows. Same thing if you put it on a bed. Do you want your pillow to be super big to lean against or just a nice size to be a focal point? Survey your space and decide on the size you want to make it. The pillow I made measures about 17″ tall x 20″ wide. You would add about 1/2 inch to the width and height of your fabric when cutting it for your pillow after you measure how big you want it to be once it is sewn.

How To Choose The Right Fabric Colors For Your Space
Pause for a minute and look around your room. The room where your pillow will be displayed. What is the vibe of the room as far as your design style? What are the colors in that room? Pick colors for your pillow that will coordinate with the colors in the room. Or here is another way to do it. If you find a fabric that really sings to you, you could always design your room around your pillow fabric. Be creative in your thinking. I mean after all this is a pillow for your space and you want to love it so not only be creative, but think creatively!
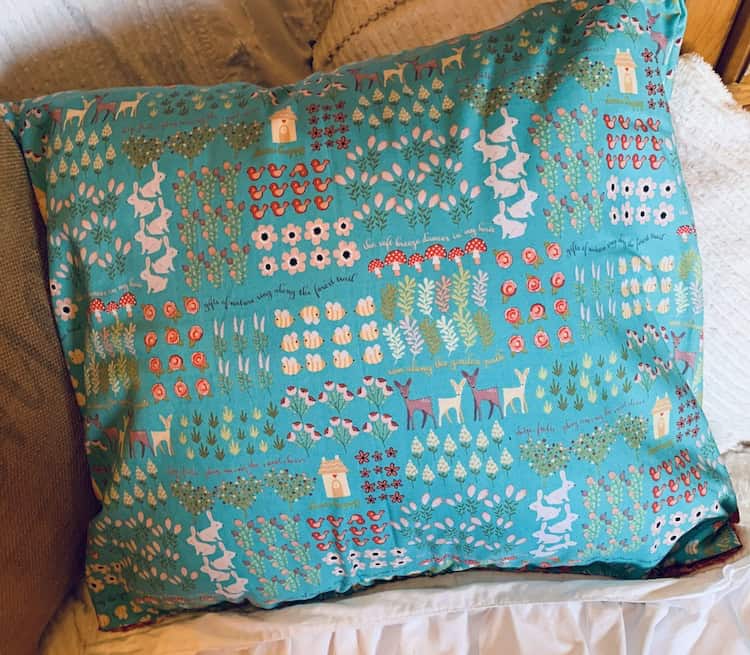
Backing Fabric
This can be an easy choice in making your pillow. I chose backing that matched my main color that is on the front of my pillow. Your backing fabric doesn’t have to match your pillow front. You can choose a fabric that coordinates with your main fabric or even is a compliment on the color wheel from your main color on your pillow if it looks good with the colors in the room. I have confidence though you will make a great choice here.
Gather Fabrics For Your Flower Applique
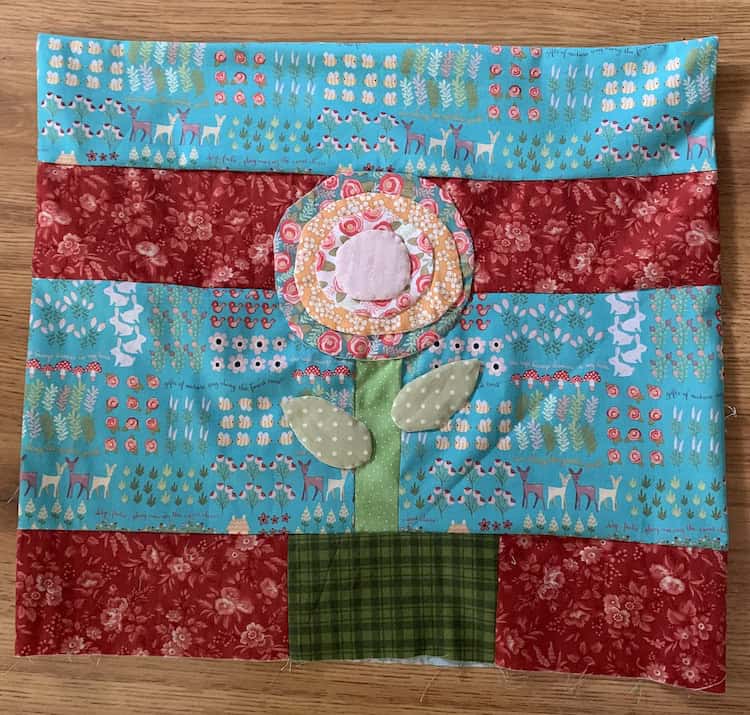
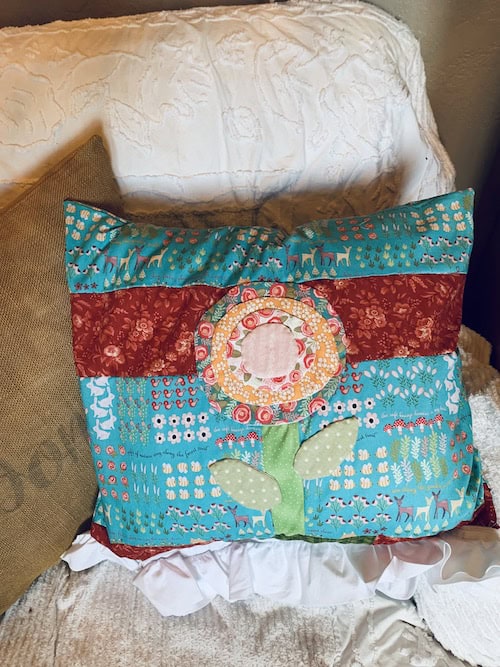
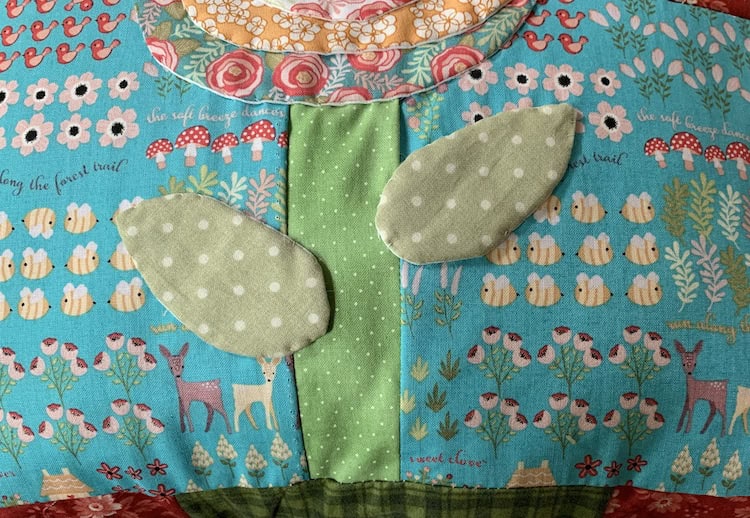
If you refer to the picture of my pillow above, you will notice that I used 4 fabrics for the rounds of the flower bloom and 2 green fabrics, one for the stem and one for the leaves. I chose fabrics for the flower bloom coordinated with the main fabric of my pillow. The green also coordinated.
Cut Your Pattern Out
My pillow as I mentioned previously measures about 17″ tall x 20″ wide. I chose one main fabric for the pillow front and added a coordinating red fabric to my pillow. So to make a pillow like mine:
- Cut top strip of main pillow fabric about 20.5″ long and 4.5 wide.
- Cut next strip of contrasting fabric about 20.5″ long and 4″ wide.
- Cut main fabric strip measures 20.5″ across and 7.5 wide.
- There are 3 shorter strips across the bottom of the pillow. Cut 2 out of the same contrasting fabric like the 2nd strip on your pillow. Cut them 7″ long and 2.5″ wide.
- The green middle short strip that goes in between your 2 contrasting strips of fabric cut 6″ long and 2.5 wide.
Time To Sew
Start with the biggest piece of fabric you just cut out for the front of your pillow. Cut out your stem. It should be about 2″ wide and 7.5″ tall to match the width of your large piece of fabric. Cut your fabric piece in half.
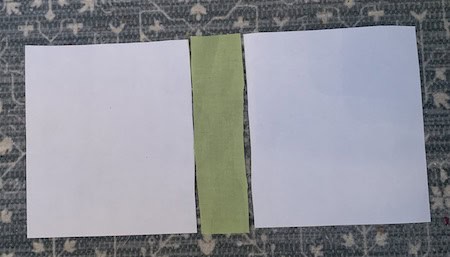
After sewing your stem in between your main pillow fabric. Sew your first and second strip of fabric together. The photo below shows one piece of paper on top of the stem fabric. This represents your first two strips of fabric sewn together. You will now attach those to your sewn in stem fabric piece.
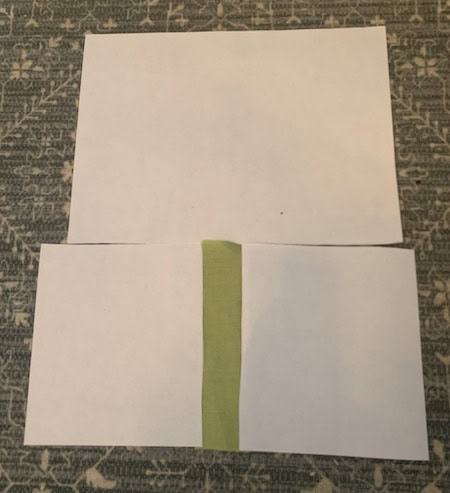
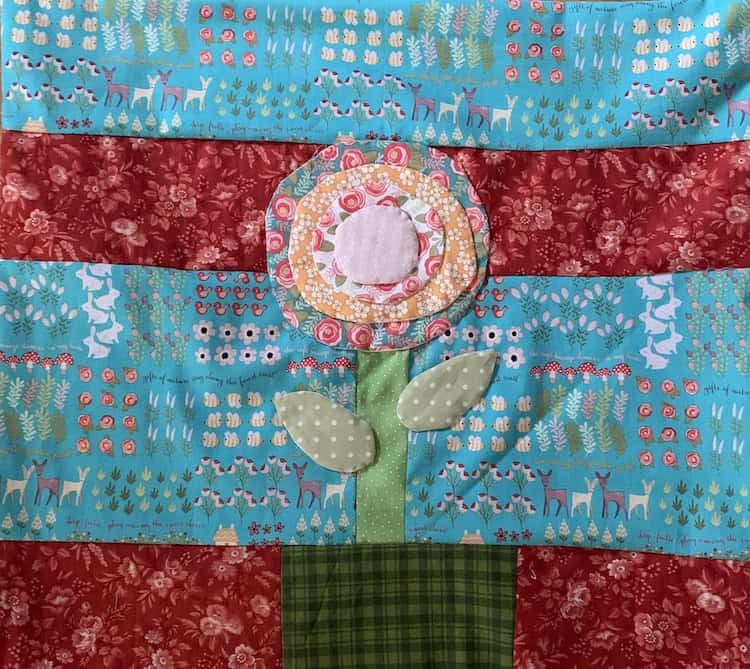
Sew the three smaller strips together contrasting fabric, green fabric, and contrasting fabric in that order together. Sew this strip below your stem. Line this fabric strip up under the stem so the green fabric lines up with the stem. It will look like your stem is growing out of the green fabric in the middle of your contrasting fabric. At least I hope it looks like that haha. You may have to trim the ends of this strip a bit on each side so it lines up with the edges of your pillow case.
Applique Your Flower And Leaves
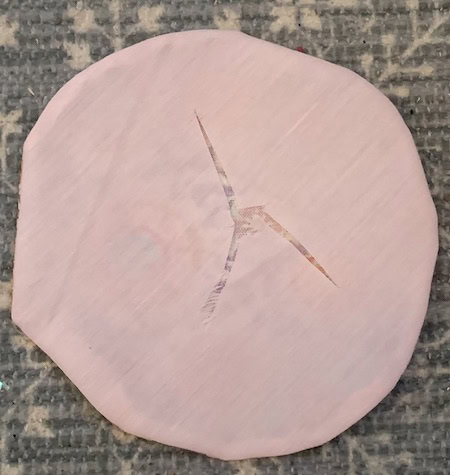
- Cut out 4 round pieces of fabric different sizes. (Use cookies cutters, masking tape, small plate, etc…Cut them a size you can stack and sew each round so that each round bloom shows.
- Draw freehand or trace a leaf pattern. Cut out 2 out of green fabric that is different from your stem fabric.
- Take each applique piece and cut out a rectangle from scrap fabric or similar color of the applique piece.
- Sew around each applique. Trim the fabric around your applique piece.
- Turn applique inside out.
- Press.
- Pin largest round bloom to the top of your stem.
- Hand sew your round pieces on. Sew largest round. Then add the next and the next until you have sewn a stack of bloom rounds on your flower. Place the leaves where you want them to go. Sew each leaf on.
Add Backing
Lay your backing fabric wrong side up on the floor or the table. Place your pillow front on the backing. Cut the backing fabric to match your pillow front. Then place your backing and your pillow front right sides together. Then sew around the sides and the top. Leave the bottom of your pillow open.
Pillow Form Or Batting
I had a pillow form on hand. So I used it for this pillow. I make a lot of pillows though and I love using poly fill for pillows as well. Use what you have on hand or what is available to you at your local store. I slid my pillow form inside my pillow case. Hand sew the opening at the bottom of your pillow closed.
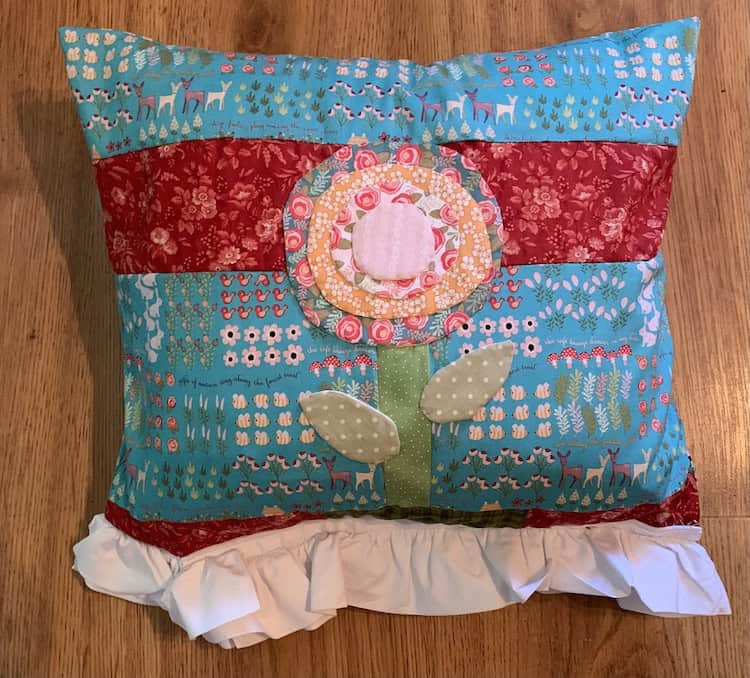
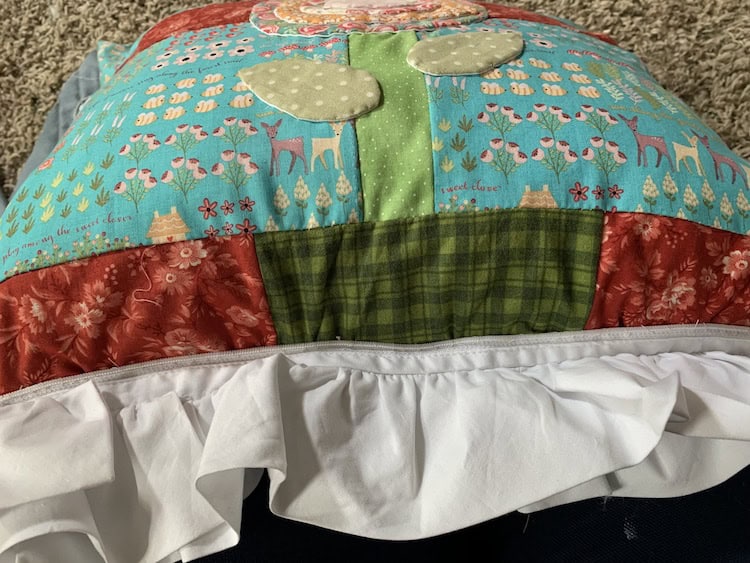
Add A Ruffle Trim Optional
This step is optional. I had a piece of ruffled trim that I have had in my fabric stash for years. Finally I knew what to do with it. I top sewed it on to the bottom of my pillow. You can add ric rac, lace, or a fabric ruffle. Or, you don’t have to add any accent at the bottom. It is up to you.
Use Your Creativity
Bottom line here is YOU make a pillow that shows what YOU love. My pillow is just a simple pattern to inspire you to create this accent pillow. It’s fun to actually sew something and applique a project that shows off your talents. Don’t stop there. Make a pillow for someone as a gift. You could give a pillow as a wedding, birthday, or Christmas gift if you get really creative. It makes up pretty fast and you could make more than 1 in a day. Happy creating!
You May Also Like…
Did you know you could make a wall hanging with puffy raw edge applique letters? Take a look here Puffy Raw Edge Alphabet Letters Applique Technique Using Low Loft Batting .
It’s never too early to start a Christmas gift project or making a birthday gift for someone. Fun Easy DIY Quilted Raw Edge Flower Applique Table Runner.
Experts have said that sewing such as hand quilting or hand applique can help you reduce stress. It can be rewarding and fun too. Add Some Calm Stitching To Your Quilt Project And Add Instant Charm By Using 2 Embroidery Stitches .
Want to take your quilt applique to the next level? Give this a try How To Make Your Quilt Applique Stunning And Bespoke .
Recent Posts
Wondering how to become a more confident quilter and how to zero in on what type of quilting really sings to you? How do you identify if you are a maker of quilts and keep believing in your abilities...
Do you need a quilt to give as a gift and need it like yesterday? Here is a fun quick quilt you can make in a day (maybe less) once you have your supplies. It features homemade raw edge, scrap back...