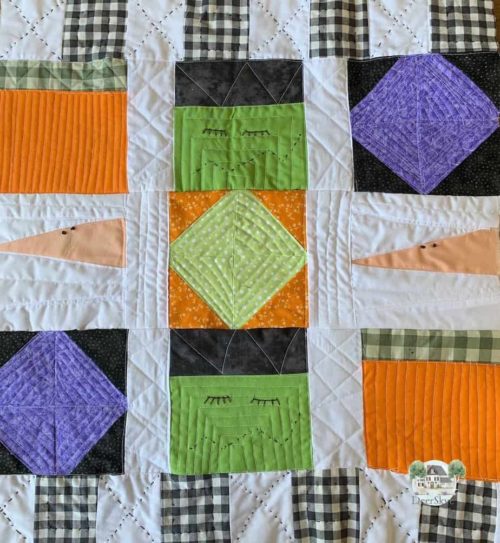
If you are a beginner quilter and you want to add to your supply of festive holiday quilts why not start with a fun Halloween quilt? You can make this simple but cute quilt in a couple of days or so even one if you are really serious about it. You can hang it on the wall for Halloween decor, lay it over a chair, or even put it on your kitchen table. It’s fun to make and
To get started you will want to pick up a few assorted Halloween supplies for this quilt.You will need fabrics in orange, purple, white, black, assorted greens, and white. They can be solids or patterned fabrics. You will need a 6 1/2″ plastic quilting ruler or make yourself a pattern out of cardboard or heavy paper. Grab some matching thread. Make sure your sewing needle is sharp. Change it out if you need to. Also your rotary cutter blade should be sharp and ready to go. Then cut out your easy to sew pattern pieces to make a monster, a haunted mansion, a pumpkin, and a mummy along with some spider web patchwork pieces and get sewing!
I don’t think I have enough Halloween home decor for our home. Even though our six children have all grown up I still enjoy decorating our home for the holidays. Truth be told I am the biggest kid at heart and love holidays. Someone once paid me the biggest compliment of all and said I was young at heart. I want to keep it that way. Holidays are special and Halloween still falls in that category for me. Quilts are a great way to decorate your home with especially if they have a holiday theme to them. Halloween is no exception. This mini or maxi quilt (just make more of the mini pattern to make a larger quilt) has a lot of decor options. Hang it on the wall, put it on a table, or hang it on your porch (out of the sun’s reach). It will definitely be a favorite of your Halloween decor.
Fabric For Your Quilt
As you know Halloween colors are typically orange, green, black, white, and purple. You don’t have to stick with the traditional colors if you want to go out on a limb and try something non traditional. Blacks and whites could make an interesting Halloween quilt too. You can use prints in orange, green, black, white, purple, or just solids. Intermingle both if you like. Check out some of the really cute Halloween prints too. They would work for pumpkins or your spider web quilt blocks. A Halloween print would be great for binding fabric too.
Quilt Ruler
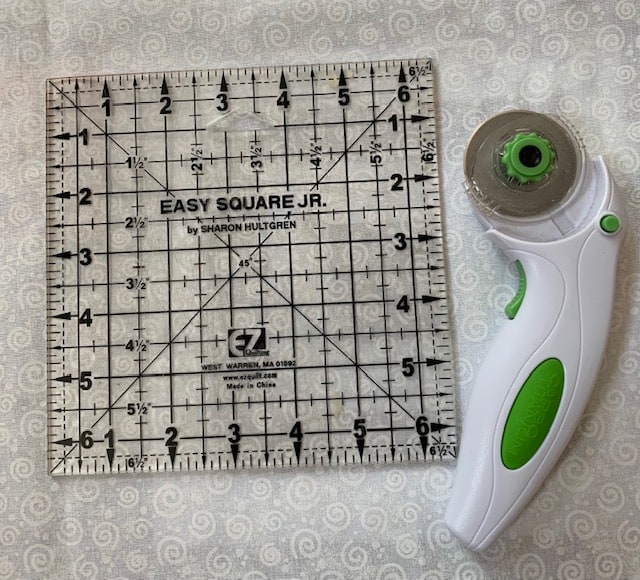
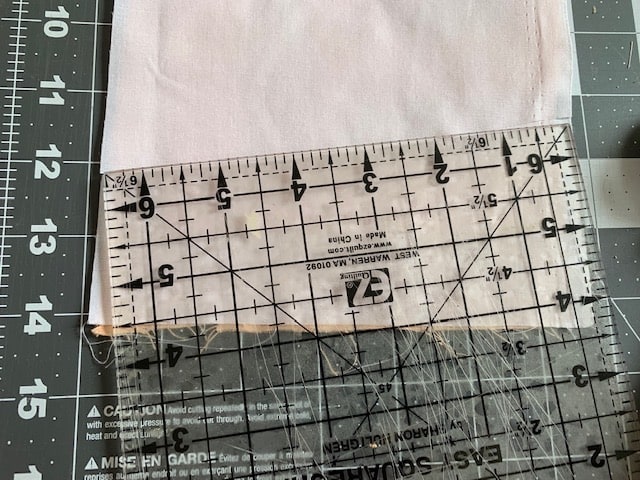
There are many quilt rulers on the market to choose from. I have a confession to make. I only use one quilt ruler and I use it a lot (and that is an understatement!) I will eventually branch out and try some more but this really works for many of my quilting projects. For this project, most of the quilt blocks are the size of this square ruler. I use an Easy Square Jr. (no financial gain for mentioning it) 6 1/2 ” EZ Quilting by Sharon Hultgren. You can make yourself a pattern out of cardboard or wood but the clear heavy plastic ruler has measurements that make your quilting life so much easier!
My next quilting ruler purchase will be a long rectangle quilt ruler. For now this is my go to. One little side note you may or may not know. You can buy already pre cut fabric for your projects like Jelly Roll bundles or charm packs. These options save you tons of time cutting fabric. So if you want to speed up your quilting process, give those a try.
Other Supplies You Need
Check a few things before you get started:
- Is your sewing needle nice and sharp and ready to rhumba? When was the last time you changed it out? Believe it or not it does affect your sewing. I have first hand experience with that haha!
- Grab some matching thread. I have found a sewing thread that works well for my machine. I know some quilters recommend Aurofill brand but I like Coats and Clark Machine Quilting thread. My trusty and very old Huskystar Sewing Machine is very temperamental when it comes to thread. My machine use to give me more trouble than it was worth until I finally found this thread. Can you say smooth and less frustration! Experiment a bit and find the thread that works well with your machine. Less frustration is a really good thing!
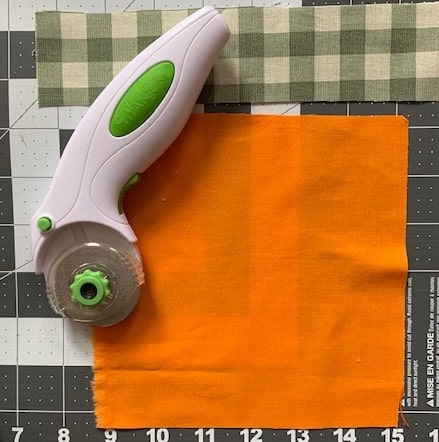
- It makes a tremendous difference as you cut your fabric if your rotary blade is plenty sharp. It saves time, frustration, and your fabric edge from being shredded. Once you notice it getting a bit dull, head to the store and replace it. Totally worth the investment!
- Now cut out your pattern pieces. I will describe each pattern piece below. They are super simple, super sweet, and super Halloween cute!
Let’s Get Started
I will give you suggestions for colors corresponding with the quilt blocks I have designed. Feel free as we discussed above to change the colors according to what you envision your Halloween quilt blocks to look like.
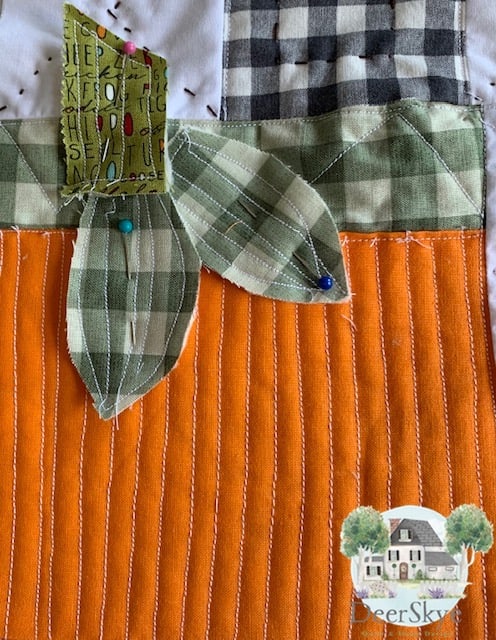
Pumpkin Quilt Block
- Cut out (2) 6 1/2 inch blocks.
- Cut (2) 6 1/2″ x 2 1/4 ” piece of green fabric across the top of your block. Using your rotary cutter, trim off the bottom of the pumpkin block so that the entire block measures 6 1/2″ x 6 1/2″.
- Once I have my rows sewn, I added low loft batting and machine stitched straight lines on each pumpkin. I appliquéd stems and leaves to each pumpkin top to complete the look.
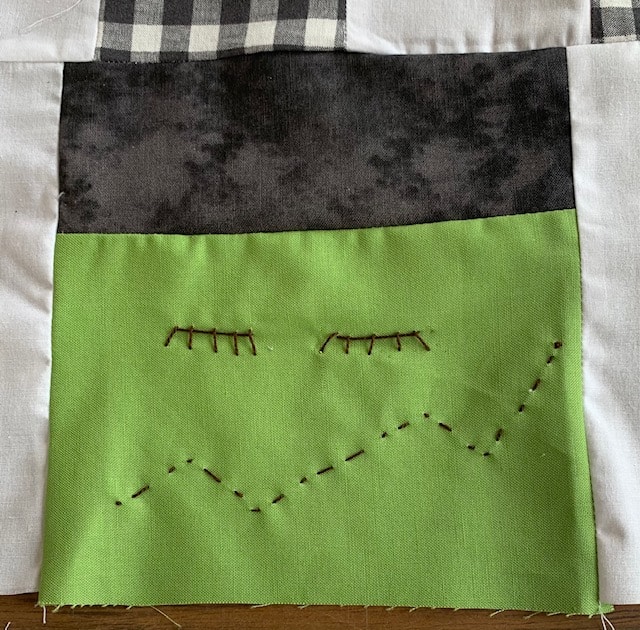
Monster Block
- Cut (2) lime green 6 1/2″squares using your ruler to measure and your rotary cutter to cut the squares.
- Cut (2) pieces of black fabric about 6 1/2″ x 2 1/2″ and sew to the top of the monster head. Then cut off the bottom of your quilt block so it measures 6 1/2″. (Do you have 6 1/2″ memorized yet. I will be saying it a lot!)
- With brown or black DMC Cotton Perle thread embroider eyes and a mouth. You could also use a Sharpie black pen to add a couple of dots for eyes and draw on the mouth. I would iron afterwards to set the permanent ink.
Mummy Blocks
Oh these turned out sooo cute! I am going to let you free style a bit here but don’t panic!
- Cut out (2)peach skin colored 6 1/2 ” Squares of fabric and (2) White 6 1/2″ squares of fabric.
- Lay the white fabric on top of the peach fabric.
- Take your rotary cutter and cut a piece of fabric through both fabrics straight across and about 2″ wide of the square.
- Remove the peach colored fabric.
- Then cut through both thicknesses on an angle. Don’t make it too skinny. Remove the peach fabric.
- Sew the 2 pieces of white fabric you cut together.
- Now cut another piece of fabric strip on an angle from your two fabrics. Save the peach colored piece and discard the white piece of fabric. This will be the mummy’s face and sew it to your quilt block.
- Sew another randomly cut piece of fabric on an angle and sew the white piece to your quilt block. Discard the peach piece.
- Cut one more piece of fabric this time with a straight edge and sew it to the top of your quilt block.
- Take your DMC dark colored thread and sew 2 french knots for eyes on your peach fabric. Voila! Mummyville!
- Following the above directions, make another mummy quilt square.
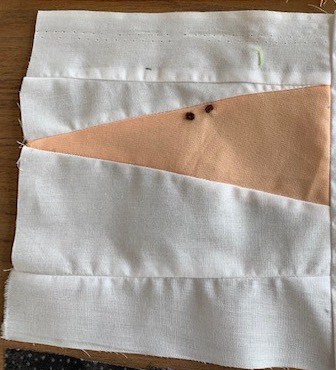
It is so cool to see your mummy quilt block take shape. It really looks like a mummy!
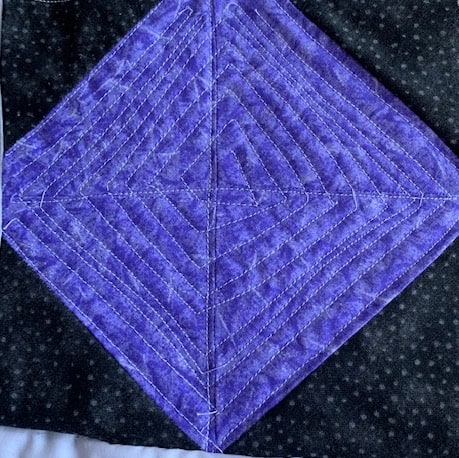
Spider Web Quilt Squares
- Cut out (2) 6 1/2″ squares of black fabric. Cut out (2) purple fabric 6 1/2″ squares.
- Place 1 purple square on top of 1 black square right sides together.
- Sew a straight 1/4″stitch all the way around the 2 squares.
- Cut from corner to corner on the diagonal with your rotary cutter.
- Then cut again so you have 4 Half Triangle Squares.
- Iron each seam open on the back of the little squares.
- Sew 2 half triangle squares together. Sew the other 2 together. Iron seams open.
- Sew the top and the bottom together with purple pieces right sides together to make a diamond shape.
- With your rotary cutter, square the quilt block up. Cut off excess. It should measure 6 1/2″.
Middle Quilt Spider Web Block
- Cut 1 green square and cut 1 orange square measuring with your 6 1/2″ quilting ruler. Then follow the above directions. This will go in the middle of all your quilt blocks. Stacked in between both monster quilt blocks.
White Sashing
Cut (6) white sashing strips that measure 6 1/2″ x 2 1/4″. These will be placed in between each quilt block on your mini quilt.
Top and Bottom Rows
- Take your quilting square ruler and cut out (2) white squares and (2) black check squares with your rotary cutter.
- Fold your squares in half and cut down the middle with sharp scissors.
- Cut in half again to create about 3 1/2 ” squares.
- Sew 8 together for the top row.
- Repeat and sew 8 across to create the bottom row.
Finishing
I am going to let you fly solo here on the finishing. I decided to “quilt as I go” and sewed the top 2 rows together and had fun quilting the quilt topper to some batting on my sewing machine. The straight stitches on the pumpkin gave it a cute pumpkin look and sewing around and around on the Spider Webs gave those quilt blocks real definition of what it is. I added some decorative hand stitches to the patchwork on the top and bottom of the mini Halloween quilt. Or you could quilt the whole mini quilt by hand. Is Hand Quilting Easy? Sew all your rows together.
I will then add the backing and bind my quilt. You can use this easy method of binding What Is The Easiest Way To Bind A Quilt? Or a more traditional method.
To finish it off, I will add pumpkin stems and leaves to pumpkins and spiders to the webs.
I love the way it turned out. It is a fun pattern and very easy. You could possibly finish this mini quilt in a day. If you want to make a bigger quilt, just repeat the whole pattern or add more patchwork to your quilt.
You Might Also Like
Here is a great Christmas in July project to make for your table. How Do You Make A Simple Christmas Table Runner?
Mini quilts like this Halloween “Monster Mummy Mash” are fun to make. If you are wondering what to do with them take a look at this, What Are Mini Quilts For? Really Unique Ideas
Looking for more inspiration for starting and finishing a quilt? What Is A Quilt Along?
Recent Posts
Wondering how to become a more confident quilter and how to zero in on what type of quilting really sings to you? How do you identify if you are a maker of quilts and keep believing in your abilities...
Do you need a quilt to give as a gift and need it like yesterday? Here is a fun quick quilt you can make in a day (maybe less) once you have your supplies. It features homemade raw edge, scrap back...