Throw quilts are nice to have around when it is a bit chilly outside or you are heading out on a picnic. Whatever the occasion they come in handy. They are not as big as a regular size quilt so they can sew up pretty fast depending on the style of quilt you choose to make.
- To make your throw quilt, you will need to decide the size you want it to be. Usually a throw quilt is 50″ x 60″.
- What color or colors will your throw quilt be? Here are three ideas for choosing colors for a throw quilt. A. Browse quilts online or in a quilting magazine and notice what colors look good together. B. Find a fabric you like that has other colors in it. Choose your colors from that piece of fabric. C. Gather a variety of paint chip color strips. Get samples of colors you like. Then mix and match colors so you know what will look good together.
- What type of fabric will you choose to make your quilt with? Flannel, cotton,minky, or fleece?
- Choose a style or design or pattern you can use to create your throw quilt?
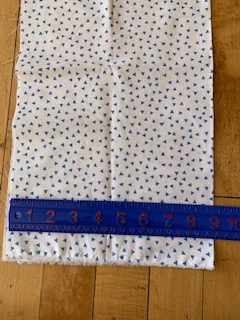
- Cut out your quilt pieces out.
- Sew your quilt together.
- Finish Your Quilt. Sound easy. It will be. Trust me!
What Size Should I Make A Throw Quilt?
A throw quilt isn’t as big as a quilt that fits your bed so that is a plus. It will sew up quicker and won’t take you as long to create. A general size for a throw quilt is 50 “x 60”. However you can totally break that rule which isn’t really a rule but a general suggestion, you can make a throw quilt whatever size you choose. After all, you are the captain of that ship right? What I mean is YOU will be making the quilt. Choose the size that you want it to be. I am going to stick with the 50″ x 60″ size. Once you know what size you want your quilt to be you can go on to the next step.
Choosing Colors For Your Throw Quilt
I’m telling you once I design a quilt pattern, the hardest most time consuming thing for me is choosing colors and fabrics! Can you relate? Color choice can really be that one thing that makes or breaks your quilt. So I like to carefully choose what color combos I will use for a quilt. Now don’t go hide in a corner and throw up your hands in the air and think ,”I can’t do this”, because you really can. I can teach you how. Keep reading and keep trusting…trust me and trust yourself. Have confidence in yourself that you can make a beautiful throw quilt. Let’s dive in!
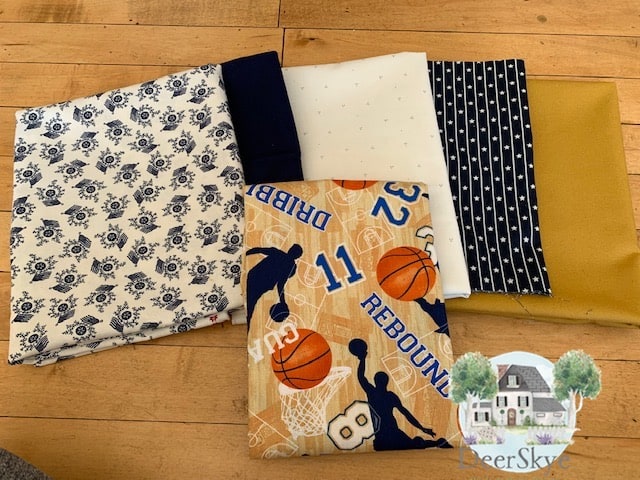
Browse different quilts online or grab a quilting magazine or two. Look at the choice of colors. What strikes your fancy. More often than not, I head to the quilting store for fabric with an idea of what I want but then get side tracked and totally change course after seeing a fabric that stands out to me. I then plan my colors around that. My original plan was to create a quilt in navy blue and white. Navy blue was out of stock so I scratched that plan and went with gold and creamy whites with navy blues. I ended up finding some solid navy at another store.
Here are several ways to choose colors for your quilt.
- Quilting sites online are a great resource for looking at colors that quilters use on a quilt. Also, quilting magazines can be helpful as well as skimming through the pages looking at samples of “beautifulness”. Browse online fabric sites like Moda, Riley Blake, etc… for more ideas of fabrics and colors that would look good together.
- Choose a patterned fabric with more than one color in it. Decide on what color will be your main color and then choose other fabrics that will look good with your main color pulled from that fabric.
- Paint chip color strips can be really useful. Grab some color combinations that you like. Mix and match until you find the colors you want. Think color wheel. Opposites on the colors wheel like shades of green and red, orange and blue, yellow and purple look nicely together if you want to go that route.
- Super simple way to choose fabric is to buy fabric charm packs, layer cakes or jelly rolls (sounds yummy doesn’t it?). This makes mixing and matching so much easier because it is done for you. Fabric colors and design are already put together for you in a pack of the same size squares and strips.
Creating Your Quilt With The Right Type Of Fabric
Here we go again with the choices! You can make quilts from cotton, flannel, minky, fleece, etc…but not all fabric is the same. Make sure you choose quality fabric. I like to get the most bang for my buck like everyone else. No question, you usually get what you pay for. If you are going to take the time to make a throw quilt, you should carefully consider what fabric you want for your quilt. For my throw quilt, I bought high quality cotton. I love how it looks when it is quilted and it is washable. I decided to add a flannel backing fabric so it will be a little softer fabric to wrap up in. Fabrics like Riley Blake, Moda, and a lot of other well known fabric companies make good high quality fabric in every color you can imagine! Do the light test. Hold the fabric up to the light and see how well you can see through the fabric. If you can see through the fabric easily, it is most likely not as high quality. It will not hold up as well as a higher thread count fabric will.
Easy Pattern
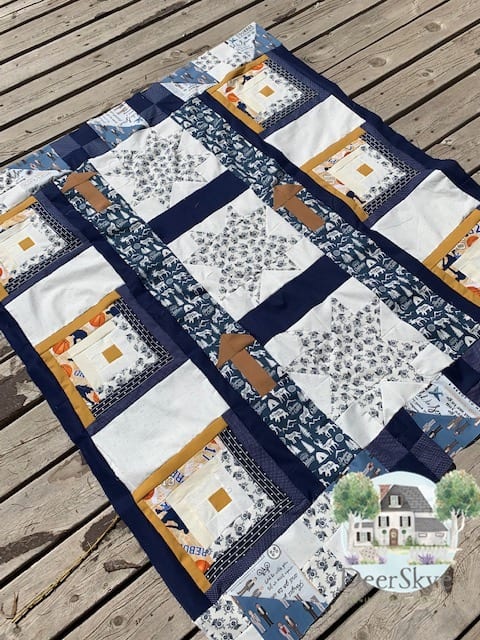
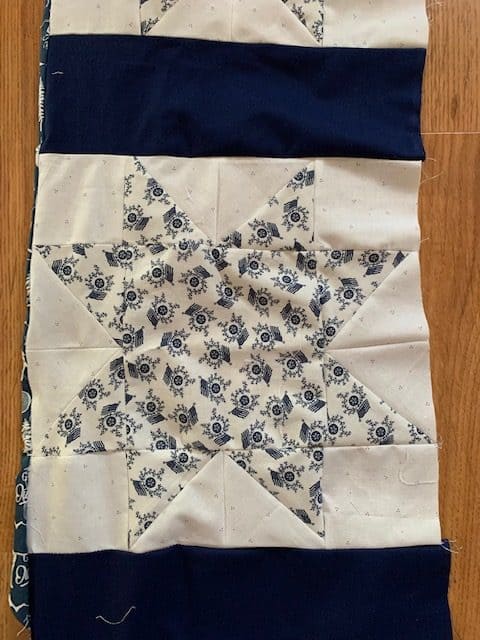
For this quilt I chose two easy quilt blocks and designed my throw quilt around those. I am all about easy and fun when it comes to quilting. First I really wanted to tackle a star quilt block. I chose a pretty easy one among all the star quilt blocks out there.The Sawtooth Star Quilt Blocks were the quilt block I had in mind so I used a 6.5″ square ruler for the middle which when sewn translates into a 5″ block. I chose two different colors of fabric for the stars. Then I sewed half square triangles to make the star look. I have learned a lot from professional quilters online. I like the method of sewing a square block with 2 fabrics cut the size of square you want. Put right sides together. Then sew a quarter inch seam around the entire block. Take your rotary cutter and cut on the diagonal from corner to corner. Then cut diagonally the other way. Choose two fabrics and go with those to create your star blocks. If you want, you could create your entire throw quilt with just a star blocks with sashing and cornerstones sewn around each block.
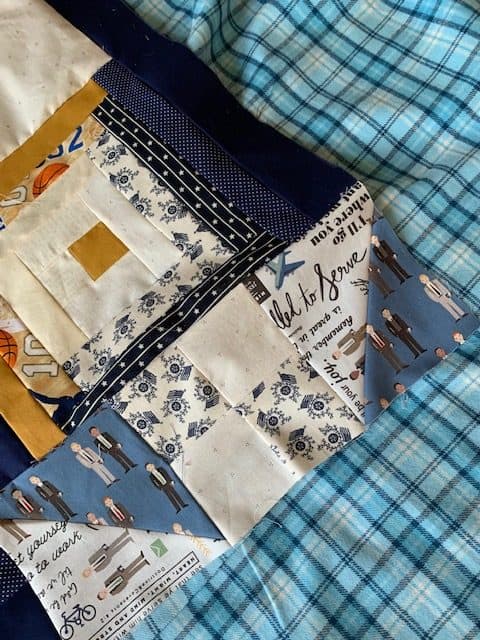
The second block I chose is a log cabin quilt block. This was fun to sew and design. The easiest way to make a Log Cabin quilt block is to use fabric Jelly Roll precuts. But you don’t have to. I hand cut each strip and did two strips on the right and then two strips on the left. Back and forth and it wasn’t bad! These quilt blocks make up pretty fast too once you have your system down.The sky is the limit when it comes to color design when making these. My quilt is made up of navy blues, whites, creams, and gold. On one side I started with a small gold block and then sewed dark blues on one side and the other side of the block sewed creams and gold and basketball fabric that matched the solid gold fabric.
Choose whatever fabric makes sense to you when designing your two block quilt. I have a grandson that loves basketball. He has a special birthday coming up. He is turning 8. Our family belongs to The Church of Jesus Christ of Latter Day Saints and when a child turns 8 they are baptized a member of our church. (I’ve mentioned this in a previous post.) Anyway, I added some basketball fabric to the log cabin square and the backing will be more of this fabric.
I just couldn’t bring myself to surround the creamy white and blue star squares with basketball patterned fabric. You will notice it a bit of bball fabric in my log cabin squares. Nothing against basketball fabric but I just couldn’t bring myself to make it a focal point with the navy blue flags on creamy white background and the navy blue fabric in between. It looked so striking and for some reason the basketball fabric looked animated to me. Sorry just the quilter in me that wants to make it a beautiful quilt and not so “manly” or boyish looking haha! No worries! I promise this throw quilt will be tailored to fit him. Once it is quilted, I will take it to a friend who will embroider words on this quilt like, “Hear Him”, “Stay on the Covenant Path”, “Let Jesus be your north star and let the Scriptures be your guide.” Some words like this to be a focal point and to remind this sweet boy to always make good choices. Aren’t grandkids the best!
Sew Blocks Together
Take your two blocks you have chosen and draw out how you want to put them together. Start sewing them row by row. You can sew sashing and cornerstones around each of your blocks as you put them together. It’s a pretty easy and good looking way to finish the quilt topper. If you want to know how to do that, (I am adding creative strips of fabric to mimic a path on each side of my stars instead of sashing and cornerstones) here you go.

How to sew strips of sashing and squares of cornerstones around your blocks. It looks very crisp and formal doing it this way. It is a nice way to finish your quilt blocks. (I don’t have a picture of this because I didn’t finish my quilt blocks this way. But you go right ahead if you want to complete your blocks this way. It really is a great way and pretty easy way to finish your blocks.
- Grab a piece of paper and hand draw your quilt blocks on paper with a pen or pencil.
- Take your quilt block and measure the length of the top of your block. Add up how many tops and bottoms of your quilt blocks that you have. Then measure the sides of your blocks unless they are the same as your top and bottom of your block. Add up how many you will need.
- Cornerstones are to be placed in the corner of each block where your sides meet. So each quilt block will need 4. Cut your cornerstone blocks the same width you are going to make your sashing strips.
- Word of caution, cut your sashing strips across the width of your fabric not on the length. Believe me I know this by sad experience! Your sashing will stretch and distort the size of your block if you don’t follow this rule. Make it easy on yourself!
- Once you determine how many sashings and cornerstones you will need, cut them out. Then sew sashings and cornerstones in rows to attach to your quilt blocks across the top of each row of blocks. Attach sashings on the sides of the quilt blocks then sew together into a row. Next sew sashings and cornerstone blocks to make a row. Sew it to the bottom of your quilt block row you just sewed together.
- Repeat that method until your quilt topper is sewn together.
Here is my quilt with fabric strips sewn on each side of my stars. I put arrows on my path. Sewed half triangle blocks for the pointed arrow look. The bottom part of the arrow measures about 2″ across and 5″ long when sewn. I used a 6.5″ square ruler to cut out a Riley Black Adventure Blue square. I then cut that square in half. I sewed each blue half on each side of the 2″ x 5″ brown fabric. Once I sewed it, I cut each side of the blue fabric with the rotary cutter to fit the size of my strips sewn on each side of the stars. Then sew the bottom of the arrow to the pointed top. You can skip this part altogether. I just threw in a path that will symbolize making good choices for my grandson. Make it simple as you like for you.
Finish Your Quilt
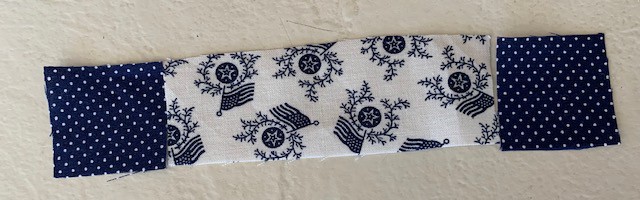
To finish the outside of my quilt topper, I put some half triangles cut and sewn from 2 fabrics alternated with a four patch square from 2 different fabrics. I sewed these around the outside of my quilt topper to finish it. If you just want to do four patch squares all the way around your quilt that works too. My quilt has a few mistakes but I will point out to my grandson that we all make mistakes and it’s ok. It’s what we do with those mistakes that matters.
Sandwich your batting in between your topper and backing. You can hand quilt your throw quilt or take it to a long arm quilter to complete your quilt. Bind it and then enjoy! Once again you can let your creativity shine through!
You might be interested in making a really, really easy scrap quilt. Check out my How Do You Make A Simple Scrap Quilt? It makes up quickly and you can make this quilt in a myriad of colors.
Need to know how to bind a quilt? Quick and easy (two of my favorite words when it comes to quilting). What is the easiest way to bind a quilt?
One more idea for you. Is hand quilting easy? Answer is YES! I show you really easy way to quilt in a whimsical way.
Recent Posts
Wondering how to become a more confident quilter and how to zero in on what type of quilting really sings to you? How do you identify if you are a maker of quilts and keep believing in your abilities...
Do you need a quilt to give as a gift and need it like yesterday? Here is a fun quick quilt you can make in a day (maybe less) once you have your supplies. It features homemade raw edge, scrap back...