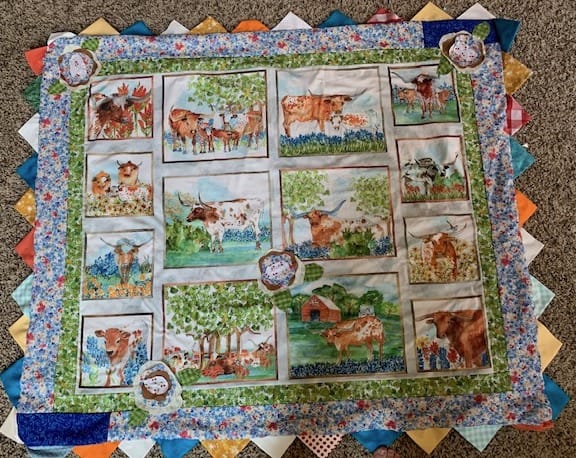
If you are a beginner quilter, and you want to learn to applique, here are two easy applique techniques that you can start with when appliquéing a quilt. You will be appliquéing in no time. and hopefully loving it! First, you can learn the running stitch sewn by hand around the edge of your applique piece which not only secures it in place but gives it a whimsical look . Second, is the raw edge or soft edge cabbage rose applique sewn on a sewing machine (don’t let this scare you!) When you wash it, it frays and becomes cuter with each washing.
- For the running stitch you will need black embroidery thread or black Crosheen thread.
- A square of fabric or a quilt top.
- A cutout of a house, heart, etc…whatever you are going to applique.
- Quilting Pins
- Sewing Needles the right size for your needlework.
- Sharp scissors
- Fabric spray glue
- Spray the back of the cutout and glue it to your quilt top or quilt square.
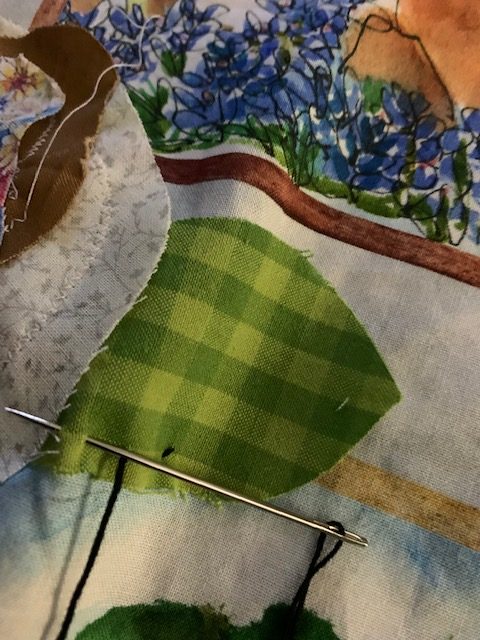
- Thread your needle with black thread.
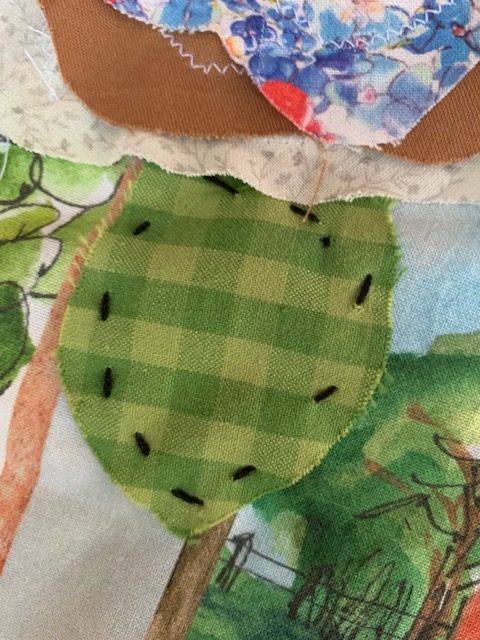
- Stitch around your cutout using the running stitch.
- Pin your cutout to your fabric square with the quilting pins.
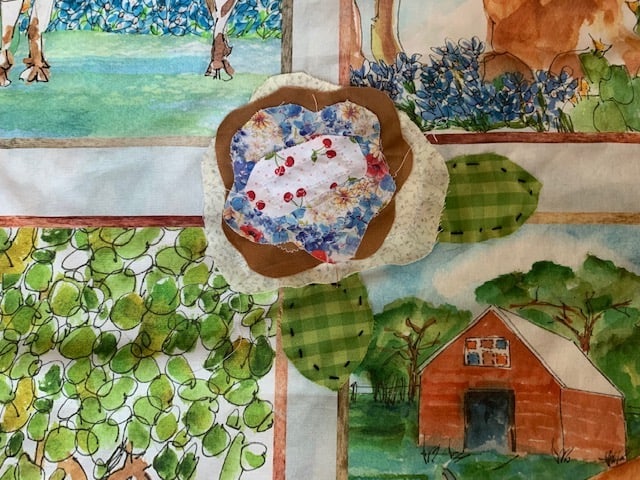
- Create a paper pattern of the raw edge cabbage rose. You will have 5 pattern pieces. ( 4 rose petals and 1 leaf pattern.
- At least 5 different fabrics to cut out your roses from.
- Cut out each pattern piece.
- Start with the biggest pattern cutout on the bottom. Lay it on your fabric square or quilt top.
- Sew around your largest rose pattern piece on your machine. Don’t sew next to the edge.
- Layer each piece and machine sew to your quilt block.
- Once you wash your quilt, it will fray making a cute edge around your rose pieces.
If you really want to learn to applique, you are in luck because there are many beginner ways to applique. I love the running stitch because it is easy to do and you can sew to your hearts content. The cabbage rose applique has a raw edge and what’s called a soft edge and is also an easy way to applique and you layer and sew each piece individually on your sewing machine.
Running Stitch: Gather Your Supplies
Choose a simple pattern for your applique. Hand sketch a pattern or download a pattern from online. Sometimes coloring books are a good place to find patterns as well.
Choose your foundation fabric. This is the piece of fabric that you will applique your design on. It can be a solid or a patterned piece of fabric. It is also your background.
Choose the fabric for your applique. Make sure it coordinates with your background fabric.
Choose your needle for this project. Make sure it is the right needle for the job you are about to do. I like to use black cro sheen thread for my running stitch applique. It shows up and makes the pattern pop. Choose a needle that has an eye big enough to thread this type of thread because it is thicker. Then be careful not to choose a needle that is too thick. That will make it tougher for you to get it through your fabric.
Choose your thread. Like I mentioned, Cro- Sheen thread is my go to. Perhaps you would rather use embroidery floss. That is definitely an option.
The running stitch is very versatile. You can use a running stitch without applique as well. You hand sew on your fabric a design using this stitch.
Get Ready To Sew
Cut a block of fabric for your project. You can choose a solid fabric background or a patterned fabric depending on the fabric you want to use for your applique. (For a really quick make it fast quilt, I like to use quilt panels for my quilt top that already have a pattern and then I add appliques to the top.) So figure out what you are going to applique your pattern on.
Grab your needle and thread it. Spray your applique pieces with fabric glue ad place them on your foundation fabric block or quilt panel. Now for the fun part. Hold your fabric in your less dominant hand. I am right handed so I hold my fabric in my left hand. Sew with your dominant hand. Another option, if you don’t want to use the fabric glue spray, then use pins. to secure your applique pieces in place while you sew them to your fabric.
Knot your thread and bring your needle up through the back of your fabric. Pull it through until the knot catches the fabric. Then put your needle down through the fabric and back up to the top side as closely as possible. Pull your needle through. Keep your stitches even and evenly spaced.
Continue sewing a running stitch around your applique pieces until finished. To finish each piece of fabric applique, knot it off and put the needle through the knot and pull the thread through. Repeat until your applique is finished.
Cabbage Rose Soft Edge & Raw Edge: Gather Your Supplies
Choose your cabbage rose applique pattern. I actually just eyed a pattern I found online and then sketched my own. It should be pretty easy for you to do the same. Your pattern should include four different flower petals and they will all be a little smaller than the bottom petal.
Choose fabric for your cabbage rose applique. You will need four different types. You can alternate solids with prints or just choose a variety of floral, stripes, and dots. Whatever you think will coordinate best.
You will need a sewing machine with a zig zag stitch on it. Or if you prefer, you can use a straight stitch. I just prefer the zigzag for this applique.
Have some sharp scissors handy.
Get Ready Set Sew!
I recently went on a pioneer trek. My fourth to be exact. What is that you ask? It is where you are assigned a family (I was the “Pioneer Ma” my husband the “Pioneer Pa” and you are assigned children (young teens from our church group) to be in your family. We belong to the Church of Jesus Christ of Latter Day Saints and this three day retreat help teens gain an appreciation and understanding for the handcart pioneers that made the trek to Utah. There were about 5oo of us trekking through the mountains of Utah dressed in pioneer garb and pushing and pulling handcarts.
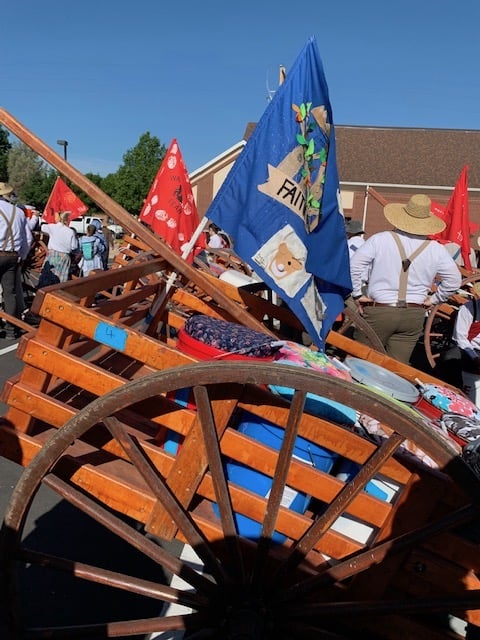
We trekked for the ill fated Willie and Martin handcart companies who sacrificed life and limb due to a lack of food and severe cold weather conditions to make it to Utah to enjoy the blessings of the Temple, the House of the Lord to be sealed as a family by the proper Priesthood authority to seal their families together forever. They were quite an extraordinary bunch of people! Strong, faithful, lived the golden rule, and committed to God!
We trekked over thirty miles in three days and hiked an elevation of 1600 above sea level in just one day to get to our camp on the second day. You camp together, eat together, push and pull the handcart with your camping supplies in your handcart until you reach your final destination where families wait to greet their teens and congratulate them on their endurance and completion of the trek! There are also special firesides and activities along the trail.
It was an amazing experience and we had really tough young kids that helped push and pull the whole way. We bonded as a pretend family by the end of the three days making a lasting impression on them that they can do hard things. I can do hard things! It was the hardest physically challenging trek I’ve been on but so very amazing. Funny thing is I would do it again! My husband agreed. It was a special privlege to trek for these people. There is such a strong spirit that accompanies you when you trek for the pioneers. Very humbling indeed!
Any way, to thank the organizer of the event, I am making he a quilt. She spent countless hours putting the food, trail map, reserving campsites, arranging medical personnel, etc…I wanted to adorn the quilt with some cabbage rose appliques and sewed on leaves with a running stitch. I started with a quilt panel of cows. It is a really cute quilt top! It was the closest thing I could find to represent pioneers. Then I sewed prairie points for the binding. Love how it looks! Back to the task at hand…
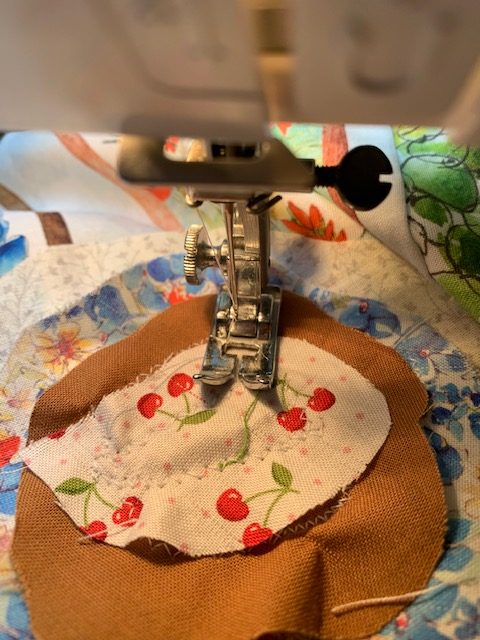
Take your first large rose applique petal and pin or spray to your quilt top or fabric quilt panel. Sew a bit away from the edge of this petal using a zigzag stitch. Set the next petal on top of the large petal you just sewed on and sew it the same way. Continue sewing each petal on until you have all four rose petals zigzagged on. Add your other roses in random places or place them where you think they will look best.
You can practice these roses on separate blocks of fabric instead of stitching them to an existing quilt top and make them into a quilt top eventually by sewing the individual quilt blocks together.
The cool thing about this soft edge, raw edge applique is that once you wash it, it is suppose to fray and add a cute edge to your rose. I would love to make a whole quilt just made out of these rose appliques. I have seen a few quilts online done in this type of applique and they look amazingly beautiul!
Side note: sew these roses to your quilt top before you put your quilt together.. Once they are all appliquéd on, you can add the quilt back and backing fabric to finish your quilt. Take your time and don’t rush. If you are careful as you go, you won’t have to unpick anything. It isn’t precise and that is what I love about it! It really is pretty easy.
Practice & Have Fun!
Take some free time and practice these two applique methods. There is no right or wrong here. Just dive in and sew a bit. The running stitch is easy to take on the go. You can applique if traveling along in the car or sitting at the ballpark. The running stitch is a good way to applique a pattern on the front of a Christmas stocking and then sew the back of the stocking on. Cut a stocking pattern out of felt and then your applique pieces can be out of felt too. Also take some cream or white fabric and write a name in black or gold permanent marker then use the running stitch to attach the name to the Christmas stocking. Cute, fun, and easy. Sorry I get going and the ideas just keep flowing. You could make a stocking as a gift for a new baby. Felt is pretty easy to work with. The running stitch is an easy way to attach felt to a stocking or even make a felt table runner and applique leaves on it. All kinds of possibilities!
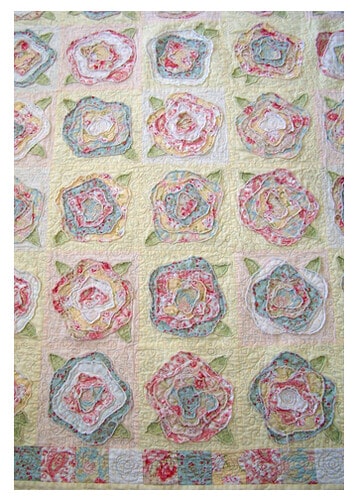
The raw edge, soft edge applique roses look amazing as a blanket full of soft looking roses. I love this quilt. It’s not my own but if you want to take a closer look I put the source underneath the picture. It truly is gorgeous! If you don’t want to tackle a quilt try a table runner for starters. Or start smaller and applique one rose to a fabric square and frame it to put in your home display on a table or hang on the wall.
Have I convinced you yet that you can do this? Start small and then go big! Explore more options using these two ways of appliquéing. I imagine the projects are endless!
Recent Posts
Do you need a quilt to give as a gift and need it like yesterday? Here is a fun quick quilt you can make in a day (maybe less) once you have your supplies. It features homemade raw edge, scrap back...
You know those orphan blocks you just can't bring yourself to throw away? They took some time to make but they just didn't fit in the quilt you were making? Well I've got a solution for using them. A...
