Thinking about making a baby quilt? Why not consider creating your own pattern. Step outside the box and create your very own design. Here is how:
- Have a main idea for your baby quilt. Come up with something you can build your quilt around like a simple animal shape.
- You will put this in your center quilt block and build and sew a log cabin type quilt design around the quilt block in the center of your quilt.
- Draw a rough sketch of what you have in mind for your design. Graph paper works great for this!
- Pick out fabric and colors for your baby quilt. Choose for the topper and the backing. You will need batting or a heavier backing for your quilt like fleece.
- Cut out pieces of your quilt starting with the animal shape. Square up your quilt block.
- Cut out and fit your other quilt pieces around it.
- Hand Quilt or machine quilt each individual piece of your quilt as you go.
- Add backing.
- Add details to your animal quilt block.
- Sew around your quilt close to the edge.
It might sound hard to do but I tried my hand at creating my own baby quilt design recently. There were a couple of glitches and mistakes along the way but the good news is that I can share what not to do so you can navigate creating your baby quilt without making the same mistakes. I’m no perfect quilter but you don’t have to be to make your own baby quilt.
Begin With Your Center Quilt Block
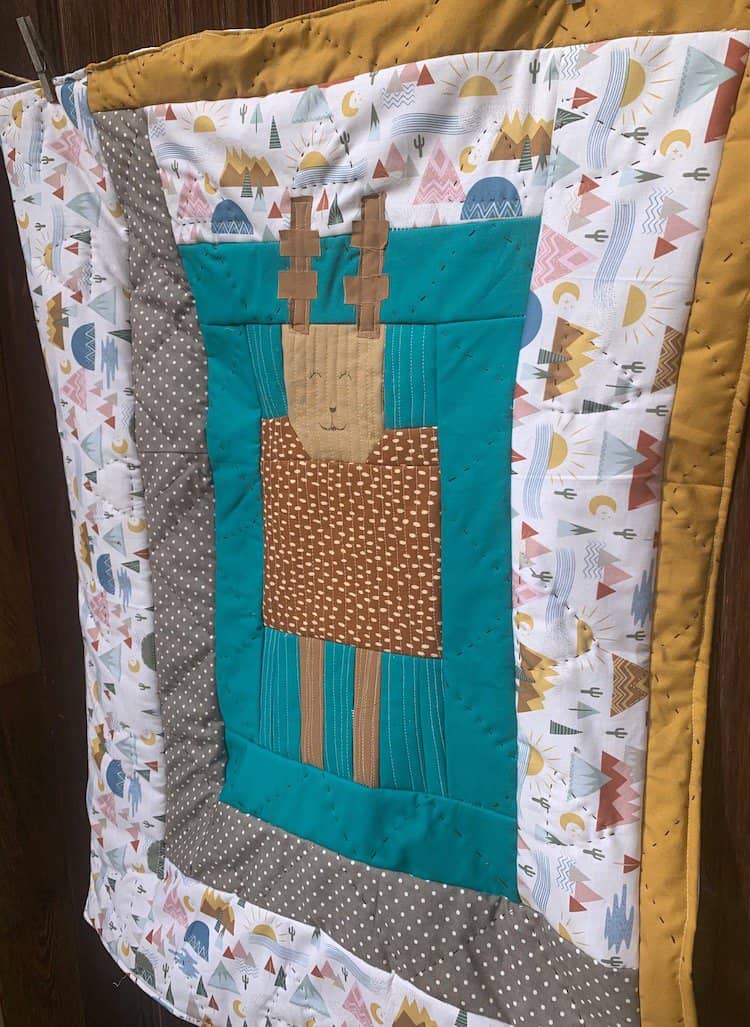
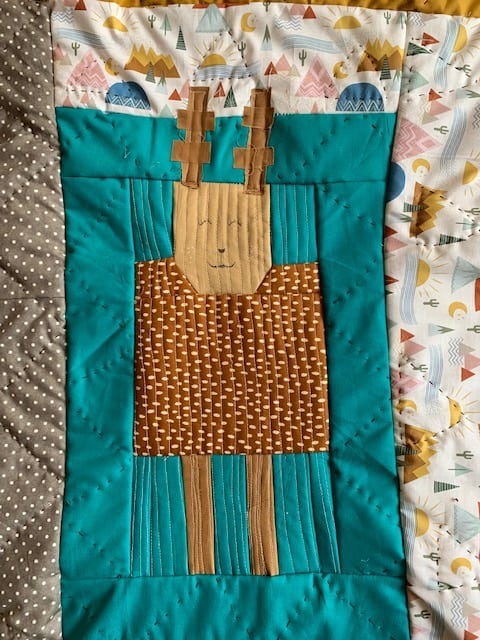
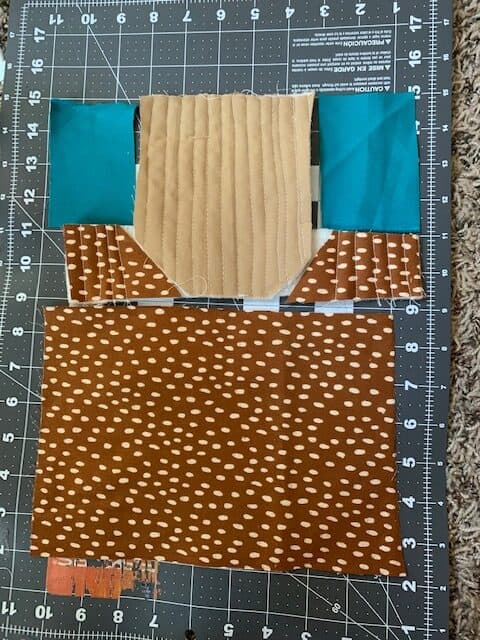
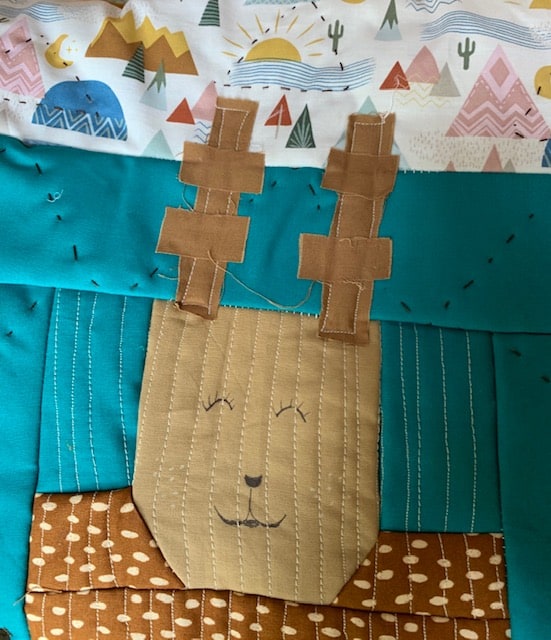
I was invited to a baby shower recently and wanted to create something whimsical for my friend. I chose to make a deer quilt block for the center of my block and then measured, cut out, quilted and sewed quilt pieces around it. I love Scottish Highland cows and wanted to figure out a way to make one of those. That was a little out of my scope though because I was in a hurry to get this baby quilt done. Mistake #1 don’t be in a hurry. Give yourself plenty of time. I settled for a cutesie whimsical deer. I designed the deer piece by piece.
Rough Draft
It is a good idea to draw out your quilt idea. Just have some fun coloring squares on graph paper for your potential quilt. Even use colored pencils and try different color combos. Experiment a bit. I created the deer and then added fabric in a log cabin style around my deer. By putting your idea on paper you have a place to start from. It helps you be more accurate when designing your quilt.
Fabric Choice
I used four main fabrics and then backing fabric for my baby quilt design. I used white fabric for my backing. I think next time I would choose fleece or flannel for the backing fabric. I quilted this as I went but you could see through my white fabric. Mistake #2. Use a colored fabric or textured soft fabric for backing when quilting as you go. If I can make a quilt on the fly, you can do it too.
Cut Out Your Animal Pattern And Square It Up
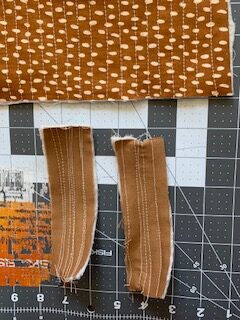
I had to experiment a bit to get my animal pattern just right. I knew I wanted to put a solid teal colored fabric around the deer. Once I cut out my pattern, I cut low loft batting for each and sewed these on my machine with a vertical straight stitch close together across the fabric .
Make your animal quilt block square. I did this by adding teal fabric sewn around my animal pattern.
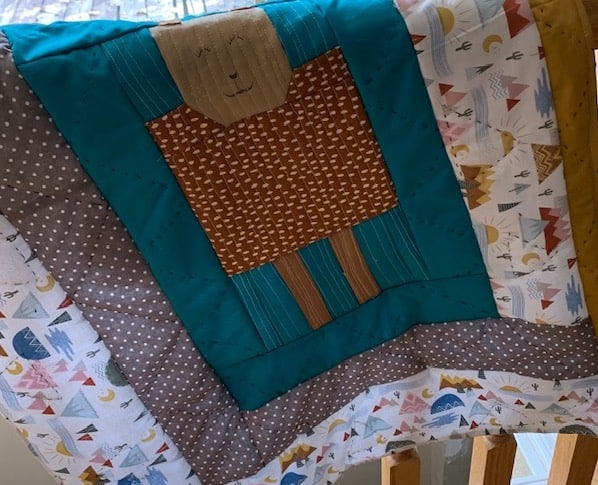
Add Strips Of Fabric To Create A Log Cabin Style Baby Quilt
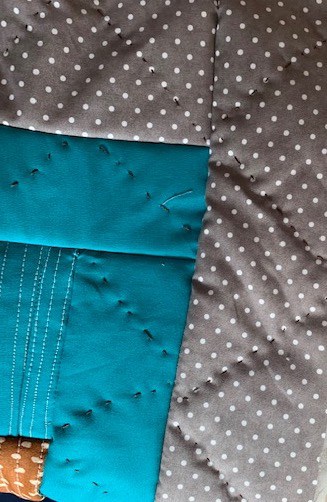
Now turn your baby quilt into a log cabin style by adding strip by strip around your center quilt block. I measured the top of my center quilt block and cut out a piece of fabric as wide as I wanted it to be and the length of the top of my quilt block. I cut out a matching piece of fabric and cut it the same width as my top piece and cut it to the entire length of the right side of my deer quilt block. Continue this around your quilt with other designs of fabric. Sew in sets of twos around each side and top and bottom of your quilt to create a log cabin look. Iron each strip after it is sewn to your quilt.
Quilt Then Sew Your Quilt Together
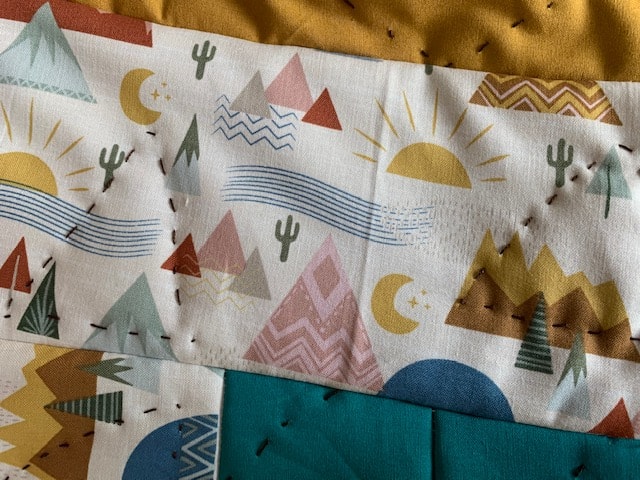
Each piece of your quilt can be machine or hand quilted. I chose to do a combination of hand and machine sewing quilting. I made little tree shapes as I hand quilted strips of fabric with batting. Some of the fabric strips I hand quilted mountain wide V shape stitches. I combined hand quilting with machine sewing quilting on my baby quilt. I liked the combination. I used dark brown Perle Cotton thread to hand sew quilt strips.
I sewed each quilt strip after I hand quilted it and sewed it to my quilt strip by strip. Then ironed each strip before sewing the next.
Add Backing
Time to put your quilt together. Fit your backing to your quilted topper. Then place front to back wrong sides together. Smooth the backing out. Sew around the quilt edge but leave the bottom un sewn. Turn inside out and sew raw edges together after tucking both sides carefully under.
Add Details To Your Animal
Finally add some detail to the face and head of your deer or other animal. I drew a face on my deer with a sharpie. Just free handed it. Then I ironed it. I also added some white gel pen dots on the face. Mistake # 3 I tried to machine sew the antlers on the head of the deer. The problem was that it caught my fabric on the back. I used some iron on fusible webbing and it worked much, much better. So do that instead. Notice anything I forgot…mistake #4 ears….aargh! It still looks cute though.
So why be so transparent about my mistakes? I am hoping this gives you confidence to try and design your own baby quilt. I am not a perfect quilter but I am okay with that because I am trying to improve quilt by quilt. It’s a leap of faith each time I design a quilt but very rewarding giving it a try! What have you got to lose? Go on give it a try. Keep it easy, take your time and enjoy the journey!
Finish Off Your Quilt
To complete my baby quilt, I sewed a straight stitch around the edge of my quilt. The bottom edge of my quilt I had already top sewn because that is where I turned my quilt inside out and sewed it closed.
You Might Also Like
Try your hand at making a simple table runner. How Do You Make A Simple Christmas Table Runner?
How about making a giant quilted checker game? What Can You Make Of Quilt Squares? Quick Sew Woodland Animal Checkerboard Game
Wondering what do to with old worn quilts? Consider these ideas to put new life into them What Can I Do With Old Worn Quilts?
Recent Posts
Wondering how to become a more confident quilter and how to zero in on what type of quilting really sings to you? How do you identify if you are a maker of quilts and keep believing in your abilities...
Do you need a quilt to give as a gift and need it like yesterday? Here is a fun quick quilt you can make in a day (maybe less) once you have your supplies. It features homemade raw edge, scrap back...