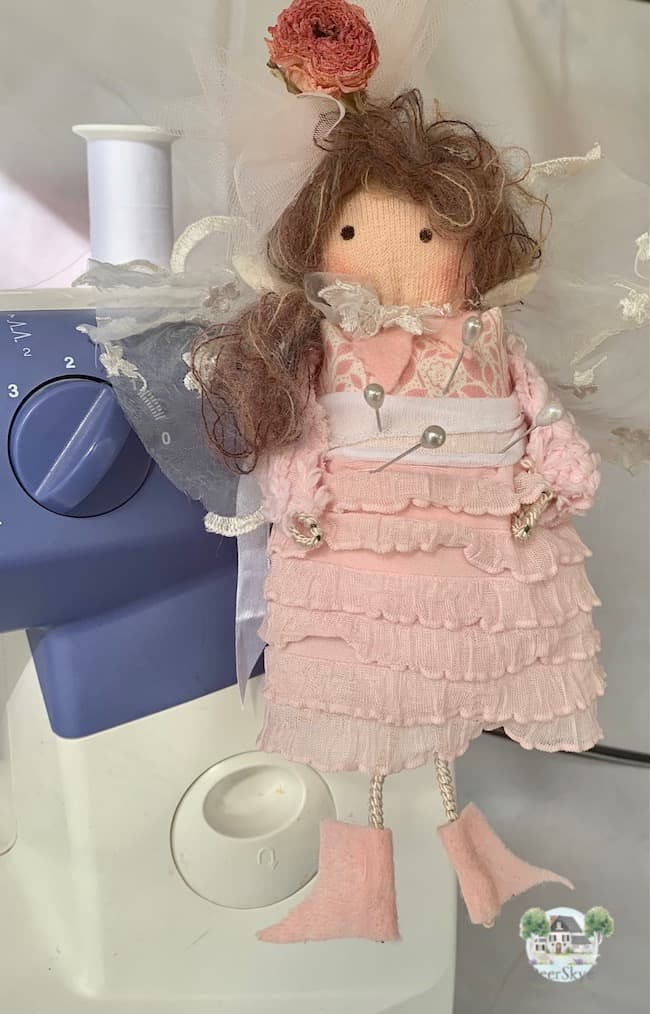
Making a pin cushion that attaches to your sewing machine is so smart. It keeps your pins close at hand and your pins are convenient to get to as you need to grab a pin or put pins back in to your pin cushion. Here is a simple creative way to make a pin cushion angel pixie from a small sock that you can easily attach to your sewing machine. Here is the how to.
Here is your supply list:
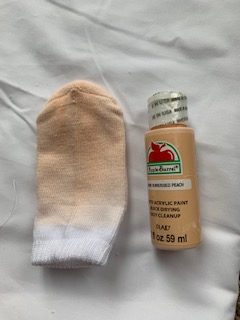
- Small child’s white sock
- Craft paint light peach for face, black for eyes
- Blush
- Fabric Scraps
- Stuffing
- Half yard of fancy lace
- Yarn for hair
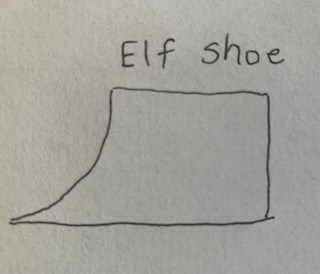
- Felt, cream for ears, light pink for elf shoes
- 2 long pieces fairly strong florist wire
- Cream colored cotton crochet thread
- Piece of bridal tulle
- Wire, small twig wreath, or pipe cleaner for head wreath
- Dried or faux small rose
- Glue gun and glue sticks
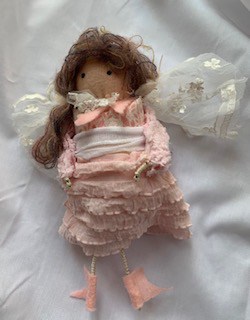
I’ve been using a free standing pin cushion for years that sits close to my sewing machine. It would always get in my way when I was sewing or it would slide away from me while holding my quilt in one hand and trying to put a pin back into the pin cushion with the other hand. You know the feeling frustrating and annoying. I didn’t know that attaching a pin cushion to a sewing machine was a thing. It is so convenient and is right where you need it, when you need it. So I designed my own version of a whimsical pin cushion you can hang on your machine. This cheery little angel pixie is helpful, easy to make and cute to look at. It was inspired by the cutest elf cookie cutter I came across recently. Here are the steps to make it.
Step 1: Paint The Stocking
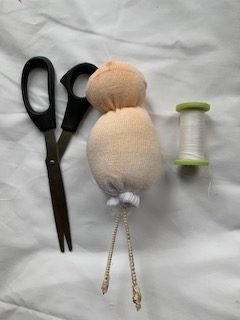
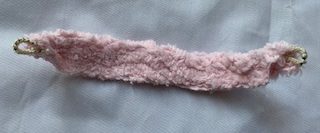
This is pretty easy. I like to make dolls sometimes and using a sock for the body works really well. Take a small children’s sock (you can see by the picture above that the sock is about the same length as the paint bottle I used) and put a dab of paint on a plastic lid. Mix some water with the paint stir with a small paint brush. Then paint the top half of the sock. The paint will bleed to the back and down the sock a bit but don’t worry about that. Let it dry.
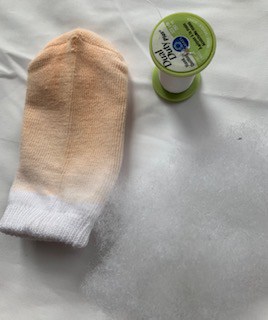
Step 2: Stuff The Top
Did you know that pin cushions date back to middle Europe. What a nifty invention huh? Next question. What goes inside a pin cushion? Ground walnut shells are a top filler because they help keep pins sharp however if you have a nut allergy watch out! Fine sand, fabric scraps, saw dust, steel wool, soap, ( soap? I know that is what I thought too at least it would smell great), human hair (not going there), and polyester fiber fill to name a few. I used simple plain old polyester fiber fill and I think it will work perfectly. One word of advice if you do use something like fine sand or ground walnut shells, put them in a small plastic bag inside your doll pin cushion. That way they won’t spill out through the fabric or leave a stain. Stuff the top of your painted sock with stuffing.
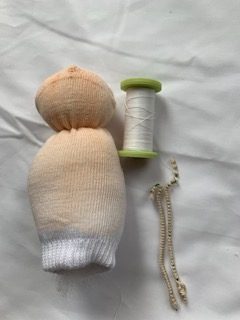
Step 3: Tie Off The Top
So far so good? If you have your supplies altogether, you can make this angel pixie pin cushion in an hour and a half maybe less once you get going. After you put the stuffing in the top part for the head, you will take some strong thread (I used quilting thread) and tie off the top and secure it by tying a knot.
Step 4: Legs
You guys these pin cushions would make such a great gift to give a friend or family member who sews! They are pretty cute once you get them to come to life or in other words once you create them. Package it in a crafty box and there you go. An unexpected darling pin cushion to make their sewing life a little easier since they can attach it to their sewing machine.
Legs are next. They are simply made from a piece of florist wire and cotton cream colored crochet thread. Fold your wire in half and then cut it into 2 equal pieces. Start at the top of the wire and glue the thread to your wire. Wrap the wire to the end and glue the end of your thread at the bottom of the wire so it is secure. The top and the bottom will not show so it is fine if you see a drop of glue at the top and the bottom of your wire.
Step 6: Body
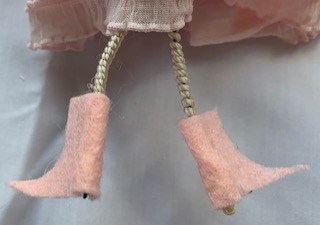
Stuff the body under the head with your stuffing. Next take your legs and stick them into the body and tie off the bottom of the sock with quilting thread like you did the head. You can put a dab of hot glue on the top of the legs and glue them inside if you are worried about them coming out. I chose not to because I felt they were secure enough. The legs should hang apart. It will look better once you attach your felt shoes.
Step 7: Shoes
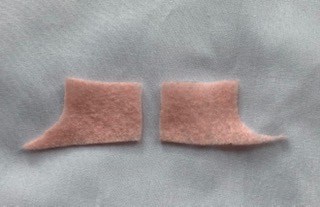
This is probably the easiest step in the whole process. Cut out 2 shoe pieces. One for the left foot and one for the right foot. Put a line of glue on the back of the heel side for the left shoe. Just barely fold the shoe around the wire just enough so that the glue attaches to the felt. Then do the same to the right shoe. Sweet right!

Step 8: Add A Cute Skirt
Next you get to decide if you want your angel pixie pin cushion to be fancy, more country like or Jane Austin fashion looking. I recently watched my favorite fairy tale movie, The Slipper and The Rose. Maybe that is because the movie is filmed at the Castle of Anif in Salzburg, Austria. I mentioned this before that I studied abroad in Austria. (And yes it was glorious. I am saying this as humble as possible because God truly intervened in my life at a time I really needed Him to and a door had just shut and He opened this window for me to study in Europe…truly, truly grateful!) I traveled with my classmates to see this beautiful castle. We only saw the outside but the grounds, the mountains, the water… beautiful and picturesque.

Any way back to the movie. It’s a fun romantic tale of Cinderella with a couple of unexpected twists but all ends up well in the end. I think this may have inspired me to make my angel pixie pin cushion a little more fancy.
I already had the fabric for the skirt and felt it was the perfect fit for this project. It is a layered and ruffled fabric in pale pink. This fabric comes in other colors as well. Measure around the body for the skirt and cut it out accordingly. Then hot glue it to the sock body. Get as fancy or as plain Jane as you want it to be. Make it something fun though because you will see it often when you sit at your sewing machine.
Step 9: Blouse And Belt
Now pick out a fabric that you want to use for the top. Cut a 6 1/2″x 2″ piece of fabric. Fold it in half and glue around the top of the body above the skirt. I mostly put glue on the back where both sides met. Then add a stretchy piece of fabric that you can place over the top of the skirt and the bottom edge of your blouse for a belt. You could also use lace or trim. Make your own belt. You can use your imagination.
Step 10: Arms
Take your second piece of florist wire. Fold it around the body so the arms come to the sides and a little bit in front of the body of your pin cushion. Cut it to size if you need to. Cover the arms like you did the legs with crochet thread. Now take a piece of fabric like the blouse you just made and fold it in half. Glue along the edge with hot glue. Thread the arm wire through the fabric and fold each end of the wire into a circle like hands. I used some pink chenille fabric which works well because it won’t fray. Glue the arms by gluing on each side of the angel pixie underneath each arm. Hold it against the pin cushion body until it is secure.
Step 11: Eyes and Hair
Love how the angel pixie comes together when you do this step. Use a skewer stick or the end of a paint brush to make the eyes. Practice on a piece of fabric or a piece of paper. Stick the end of the skewer or the end of a paint brush and then dot on one side of the head where the face should be. Then make a dot on the other side of the face. Let it dry. Add some blush on each side of the face.
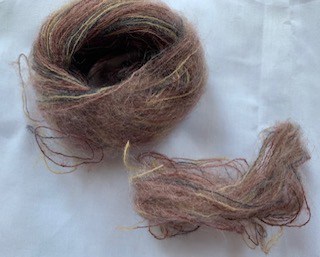
The hair is made out of fine skinny strands of yarn I bought at a a specialty yarn shop. You can use a variety of items for the hair. If you use yarn I wrapped it around three of my fingers until I had the desired thickness and then attached it with hot glue. Try to add the glue in a thin strip because you don’t want drops of glue to show through the hair. Style it the way you want to.

Step 12: Ears
Create your own pattern for ears. This isn’t hard. Cut pointy ears out of the cream felt and glue to each side of the the head of your pin cushion. Adding ears give it a fun little sweet “elfish” look to it. (You will notice I added these before the blouse and belt. Sometimes it takes trial and error. It will be easier for you if you add all the clothing before the hair.)
Step 13: Add The Wings
I was pretty fortunate because I already had a lot of the supplies in my craft room to create my pin cushion. So before you run out and buy anything, check and see what you have laying around that you might be able to use for your pin cushion. Look for some beautiful bridal or vintage lace. If you want to use vintage lace, then maybe check a local thrift shop for some lace. You might find some on an old piece of clothing or curtains. Unique looking lace gives your pin cushion a really fun look. Take a piece and cut a rectangle to the size you want. Then take a piece of thin ribbon and tie a knot around the middle of your piece of lace. Then glue to the back of your pin cushion. It’s looking good no make that its looking adorable!

Step 14: Add The Wreath For The Head
You can craft a wreath out of wire, a faux floral stem, a pipe cleaner or ribbon. Cut a small square of bridal tulle and like the lace take a piece of thread and tie it tightly in the middle of the tulle. Glue this to the side of your wreath form. Then glue on a dried rose, faux flower, or a jewel of some type. Even a glass pin would work to put in the middle of the bridal tulle. Glue it to the head of your angel pixie pin cushion. Style this however you want.
Step 15: Finishing Touches
Add a pinking sheared felt collar and a lace bow. If you like buttons or small ribbon roses add those to personalize your pin cushion. It really is a fun project, quite easy to make, and hopefully will prove convenient for your use. Don’t be afraid to make this little angel pixie your own by designing it the way you want it to look.
To attach the pin cushion to your machine, I took some thin ribbon and looped it and tied a knot. Then I attached it to my angel pixie in the middle of the wings. I hung my pin cushion from the first thread stand that I don’t use on my machine. When I have to fill a bobbin with thread, I will remove my pin cushion while I do it. Then replace it. You will have to play with this part because every machine is different. Velcro might even be a possibility. Love the way my machine just got elevated with an angel pixie hanging from it.
You might like:
Wonder about making your own quilt label? Take a look at How Do I Make My Own Quilt Label?
Need a quick and easy table runner? How Do You Make A Table Runner With Panel Fabric?
You might want to plan a quilt retreat for a few family and friends. What Is A Quilt Retreat?
Recent Posts
Wondering how to become a more confident quilter and how to zero in on what type of quilting really sings to you? How do you identify if you are a maker of quilts and keep believing in your abilities...
Do you need a quilt to give as a gift and need it like yesterday? Here is a fun quick quilt you can make in a day (maybe less) once you have your supplies. It features homemade raw edge, scrap back...