There are a variety of quilts that you can make that are simple in design and you can finish in a day. This quilt is about as easy as it gets! It is a simple quilt and I mean simple! This rag quilt requires absolutely no cutting squares and only requires 1 yard for front and 1 yard for the back to make. (It is a baby quilt size so you could use it for a baby or a lap quilt.) You don’t even have to use batting if you would rather not. Here is what you need for your simple rag quilt. And yes, you could easily make it in a day. You’re welcome!
- Start by choosing your quilt top fabric. You will need one yard quality quilting fabric.
- Choose one yard soft jersey sweatshirt fabric for backing.
- If you want to put batting in between your fabrics, purchase enough for 1 yard however if you choose to back your quilt with sweatshirt fabric you don’t have to have batting.
- Pick out some matching thread to sew your quilt with unless you want it to contrast.
- Sharp scissors are a must.
- Have some sewing pins handy.
- You will need an iron and ironing board.
- Put together a play list of songs you like or put on a movie.
- Sewing Machine.
- Make sure your lighting is adequate in your sewing studio or area.
- Have a comfortable and supportive chair.
- Start sewing your quilt together and as you sew you will create squares without cutting squares. It really is pretty cool because your quilt comes together so quickly!
- Cut sewn seams carefully evenly spaced apart and be careful not to cut through the actual sewn seam. It is like you are cutting fringe.
- Sew through all the layers around the edge of the quilt.
- Wash your quilt cool wash cycle. Put it through a gentle cycle rinse. No soap. You can throw some towels or a blanket in with it.
- Next dry it on low or medium heat. Then watch the fluff begin!
I wanted to make a Christmas rag quilt that would be quick and easy and look cute! It took me a few days to figure out what fabric to use and what pattern to follow. Anytime I can find a pattern that takes a few shortcuts like no cutting squares I am all in. As long as it looks cute of course!
Quilt Top
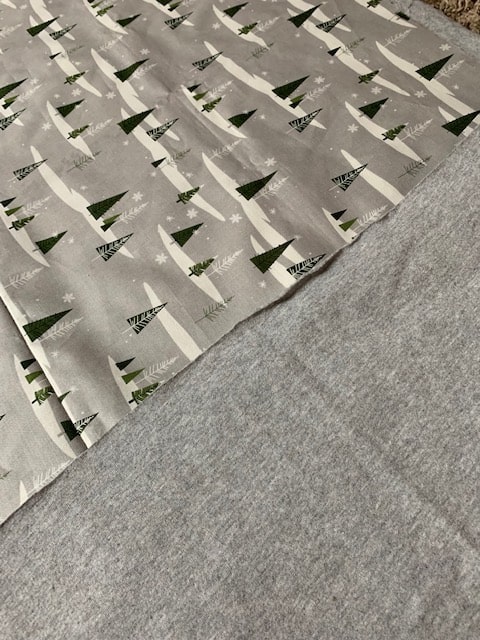
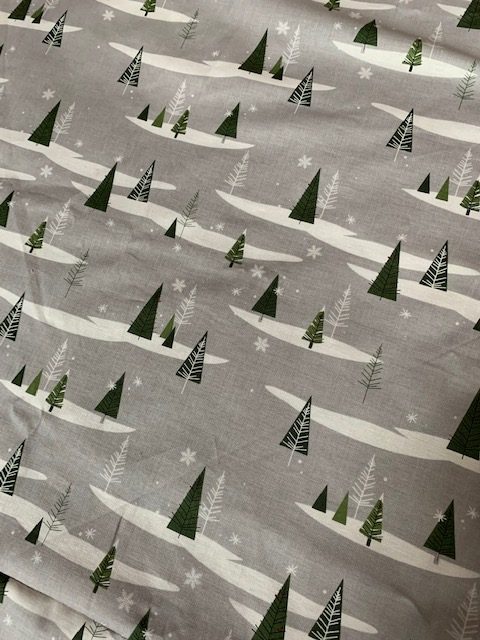
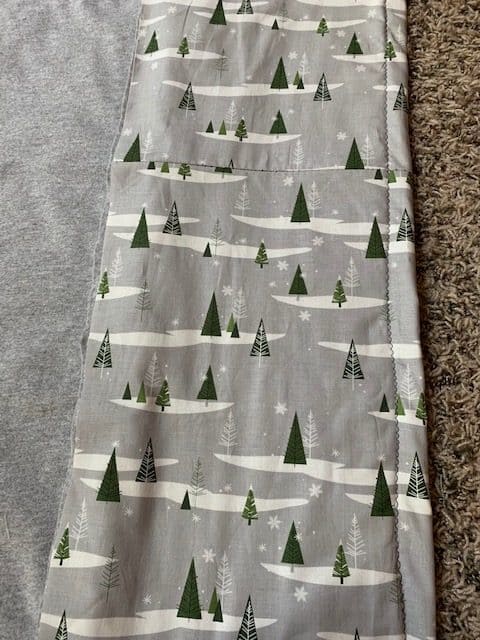
Choose the fabric you want to use for your quilt top. I am using a Christmas type print with trees and winter snow. This is a Riley Blake print (Winterberry with green trees with white snow and a gray background) and it caught my eye. It is so festive and cute. It is a nice quality quilting cotton. You can choose a fabric that isn’t a Christmas print if you don’t want to make a Christmas quilt. This would make a sweet baby quilt as well or a lap size quilt.
Quilt Backing
I tried to match several fabrics to my winterberry fabric. It just wasn’t working. In the middle of the night,when my strokes of genius come, I remembered I had some sweatshirt fabric by the yard I had purchased for another quilt. It is a light gray and very soft to the touch. This is what I chose for my backing. You can buy sweatshirt fabric by the yard. It is thick enough too so that you won’t need to use a batting in between layers. It looks great with my Winterberry and is soft to wrap up in.
To Add Batting Or Not To Add Batting
Ok this is probably a matter of opinion. If your backing fabric is thick enough, you won’t need to add batting to this project. Because this is a rag quilt, you don’t have to add batting at all. However if you want your blanket to be a little heavier and warmer, then sandwich your quilt with batting or flannel fabric in the middle. You will need one yard for this quilt.
Match Your Thread
It is a good idea to match your thread to the color of your quilt unless you want to add some contrast. This is a very creative quilt so you can totally choose if you want your stitching to stand out or if you want the thread to melt away into your fabric. Personal choice again and isn’t it great because you can make this quilt uniquely your own. Show some personality as you choose your thread and fabric.
You Need Sharp Scissors
When you sew and make a quilt, you want the right tools to make it go smoother. This will make your project more enjoyable and go more quickly. If your scissors aren’t sharp, sharpen them or purchase a new pair. Then discipline yourself and only use your scissors for cutting fabric. I’m talking to myself mostly on this point! I have ruined more pairs of scissors using them for other projects than just cutting fabric. Scissors with a purpose are necessary for your success in completing your project!
Don’t even try to cut fabric with dull scissors. It will destroy the edge of your fabric. And destroy your spirits! You want to be successful and that is one reason we are making a quick and easy quilt. You want to build your confidence as you make your quilts. So start by having sharp scissors and any other tools you may need to be successful! Funny what a sharp pair of scissors can do for you!
Have Pins Handy
Pick up some sewing pins and have them ready to go. If you can make or buy a cute pin cushion to hold your pins. It makes them easier to grab as you pin your project together.
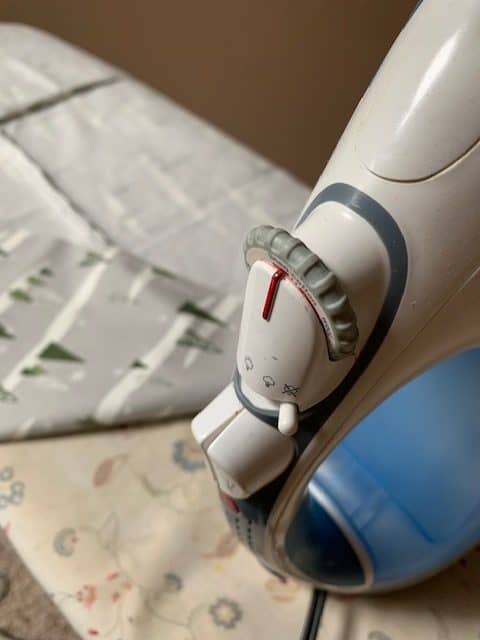
Iron If You Need To
Iron your fabric if it is wrinkled. You will need your fabric smooth and ready to cut or sew. It not only looks nice, it affects the quality of your quilt.
Sewing Machine
Make sure your sewing machine is oiled and in good working condition. Once again this is your most important tool! You can purchase an okay sewing machine for about $ 100 bucks. Once you become comfortable with sewing you can always upgrade after researching and asking other sewers about the best sewing machines.
Lighting
Lighting is something you shouldn’t scrimp on. Make sure you have adequate lighting wherever you choose to sew. This helps make your sewing precise and accurate which make it more fun and easier to complete your projects. Add an overhead or clip on lamp if you need to. Maybe you can move your sewing center closer to a window. Whatever it takes make it happen people! Trust me it matters!
Cozy and Supportive Chair
This probably goes without saying but sometimes you have to sit in front of your sewing machine for long hours as you happily sew away. You don’t want to hurt or injure your back. Your chair needs to support your back and be comfy. This can affect the success of your sewing too. If that chair you are using doesn’t make you feel comfortable for a long time, then you better get your chair search on and find a chair (doesn’t have to be new and you may already have a chair in your home that will work) !
Put On Some Tunes
Make your sewing time enjoyable by adding a play list. Listen to some enjoyable songs or put on a movie that you would enjoy listening to or watching. This will make your sew time more fun.
Time To Sew
Put your backing down on a table or even on the floor wrong side up. Smooth it out. Then place your quilt top fabric on top of the backing wrong sides touching. (If you are using batting or flannel as batting put it in between your two fabrics.) Smooth your fabric. If the edges aren’t even, clip them now.
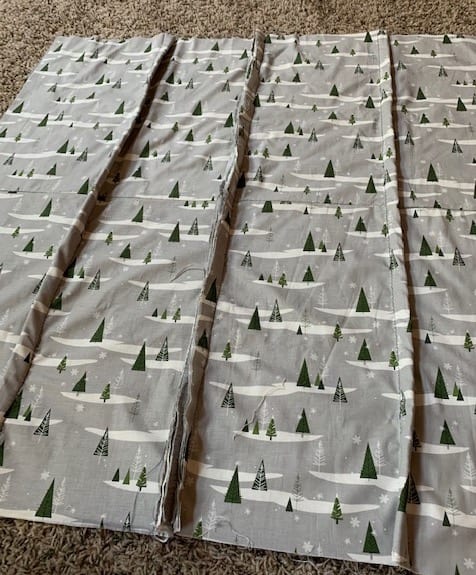
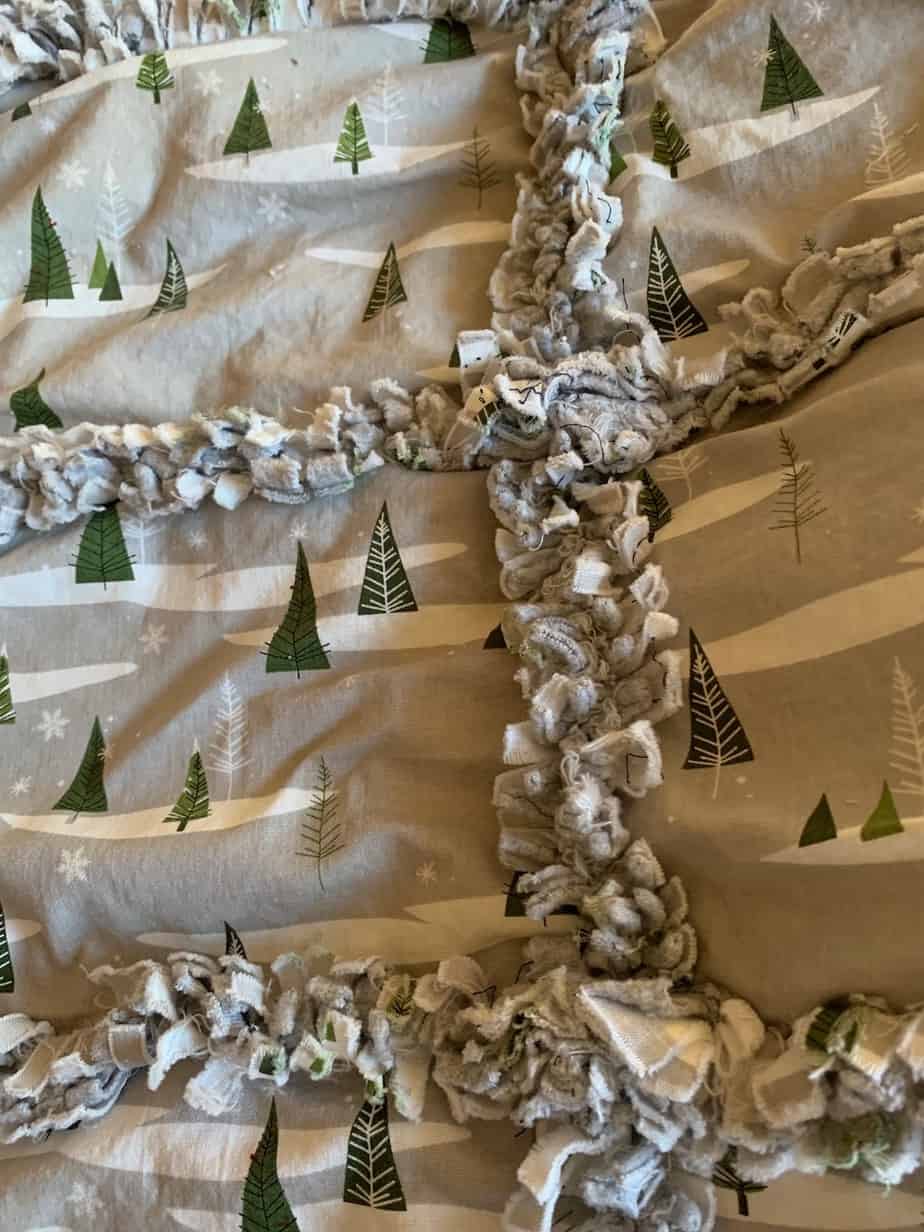
First fold both fabrics in half and pin down the middle. You are going to sew about an inch seam on the quilt topper down the middle of the fabric. Set the fabric back on the table or floor where you are working. You can cut the seams as you go or cut them all after sewing all the seams. I like to cut as I go because there is a lot of cutting to do. If you decide to follow my lead then cut through the top ridge of each seam. Cut all the way through the fabric but be careful not to cut through your seam.
Iron the seam open. So you are ready for the next step. Take your fabric from the right and fold it over to about an inch past the middle seam. Then pin it. Make sure you have your quilt laying right side up to do this. You want to make sure you cut all of your seams on your quilt topper and do not cut seams from the back of your quilt.
Now do the same to the other side. It is a good idea to back stitch your seams. Once your seams are sewn and cut, iron them open.
Now turn your blanket sideways or horizontally and find the middle. Start the process all over again. Pin your fabric so you can sew a one inch seam down the middle of your fabric. Now do what you just did sewing all of your seams but turn your quilt the opposite way you have just sewn.
Sew your quilt seams horizontally, you will fold the right side of your quilt (on the topper side) over just about an inch past your center seam. Sew a seam. Then cut the seam open. Do the same to the left side. Sew over the already sewn seams that you ironed and sew them open.
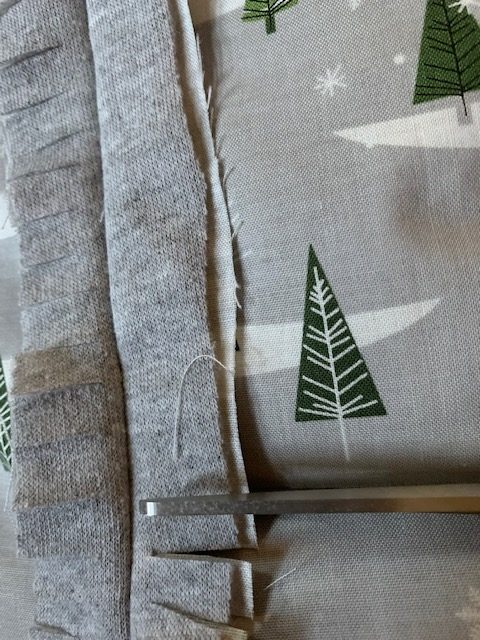
Cut Fringe
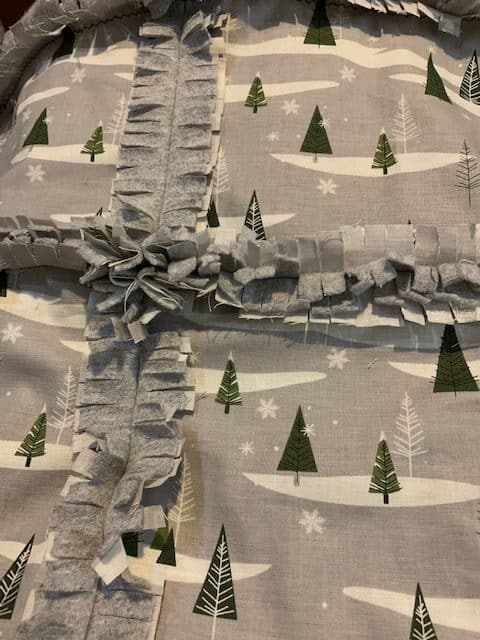
I already mentioned thisstep but just for kicks we will talk about this fun part again haha…well not exactly fun but this is what gives your quilt a fluffy fun look. We will put it that way. Take your scissors and cut each side of seam into fringe. Be careful not to cut through you quilt as you cut your quilt. Once you get that done, your quilt is ready for the wash and dry cycles. Your quilt really does start to come together when you cut the fringe. As I mentioned you may want to cut it as you go because your fingers might tire by doing it all at once.
Sew Around The Edge
This step is very simple. Just sew around the outside edge of your quilt. This will help to finish off the edge of your quilt. Line up your stitch with the presser foot so you can get your stitching as close to your edge as possible. Like I said very simple! Any time you can make something more simple I say that’s a good thing!
Time To Wash It
Now for the magic to happen…throw your throw (quilt) in the wash. Put your settings on cool. You are on the way to the creation of fluffy fringe. So quick to make and quick to finish! Love, love it!
Throw It In The Dryer
Time to dry your quilt. Throw it in your dryer on low or medium heat and watch the fluff begin! It is that easy. You may want to stop the dryer in the middle of the cycle to clean your lint catcher as it will fill up fast with lint from your fabric. Then start it again and finish drying your blanket.
This quick throw can be used in many ways. For example you could use it for a Christmas tree skirt, lap quilt, baby quilt, wrap around your shoulders, etc… you can get creative in your gift giving.
Related Questions
Add some simple applique to your rag quilt. Find out how to do simple applique here: How To Applique: For Beginners.
If you want to make another simple quilt take a look at this, How To Quilt A Quilt The Simple Way
Recent Posts
Wondering how to become a more confident quilter and how to zero in on what type of quilting really sings to you? How do you identify if you are a maker of quilts and keep believing in your abilities...
Do you need a quilt to give as a gift and need it like yesterday? Here is a fun quick quilt you can make in a day (maybe less) once you have your supplies. It features homemade raw edge, scrap back...