A boxwood topiary is an easy way to elevate the look of your home or garden. You can create your own topiary with a few simple tools and a little know how.
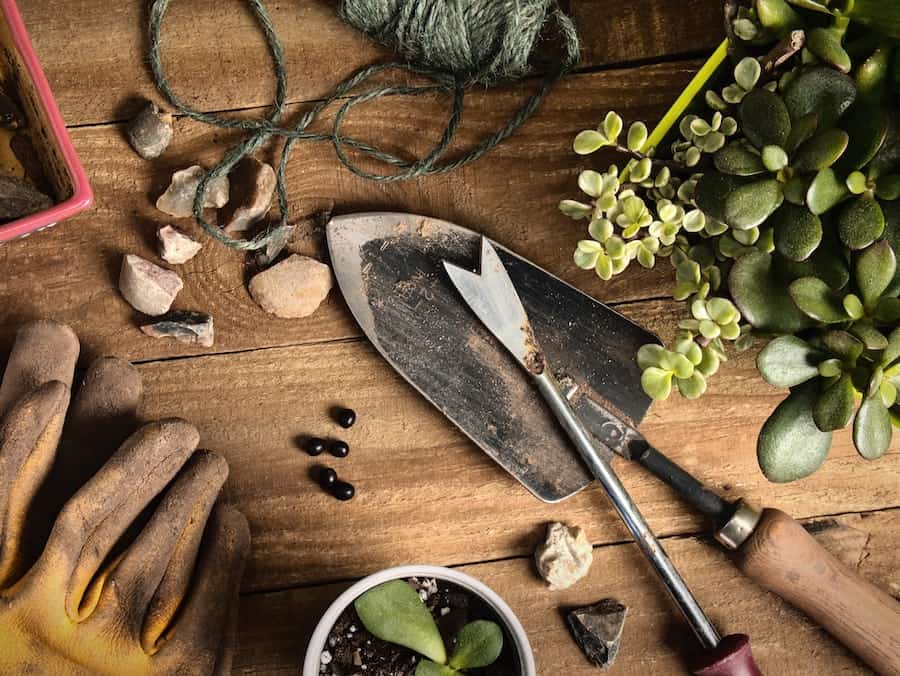
You will need the following tools to make a fresh boxwood topiary:
- Sharp scissors or garden clippers
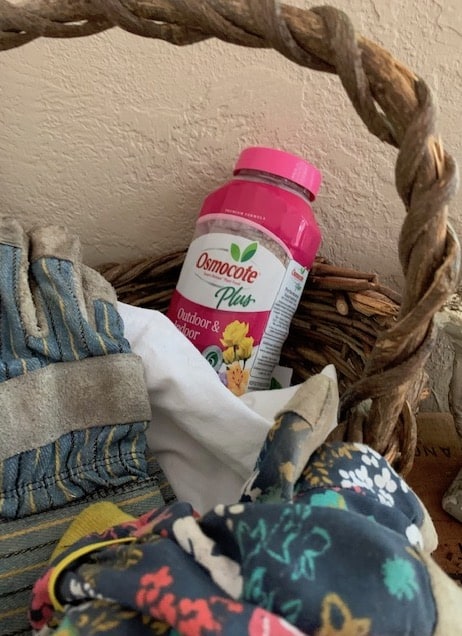
- Garden Gloves
- Winter gem boxwood Plant
- Container big enough for planting your boxwood plant
- Potting Soil
- Hand Trowel
- Fertilizer (I recommend Osmocote Plus)
Follow these steps to create your boxwood topiary:
- Purchase a healthy boxwood plant. The Winter Gem Boxwood variety works well for making a topiary.
- Put your potting soil in a planter. Then plant your boxwood.
- Grab your scissors or clippers and eye your plant.
- Find the best and sturdiest branch in the middle of your plant. You may have more than one branch so you should try to make it look like one branch even if you have to use more than one branch.
- Clip underneath the branches until it looks like one branch. Clip around the remaining branches on the top of the boxwood and make a round shape. Clip the branches so they are even all the way around it.
- Add fertilizer and water your topiary.
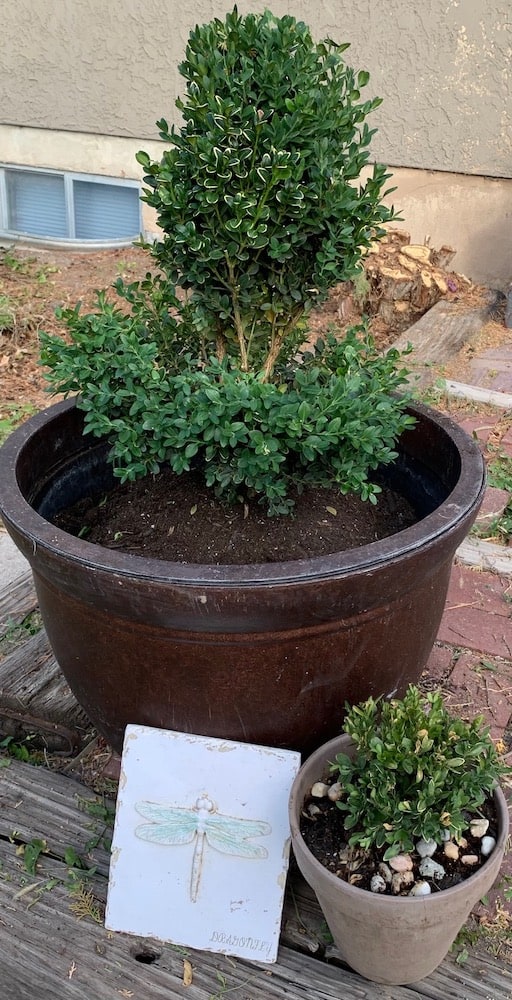
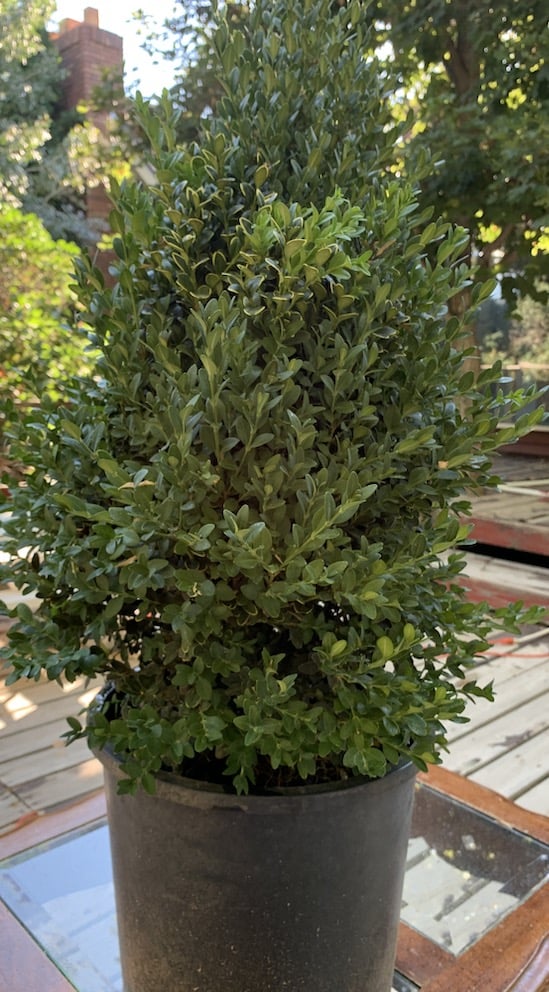
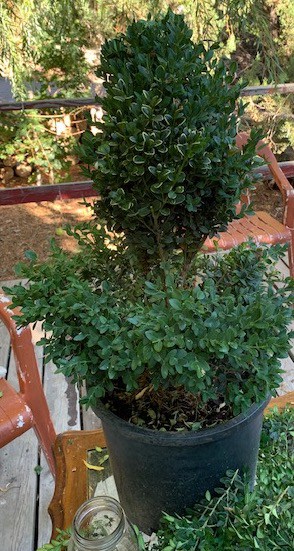
I got really brave and started experimenting this spring by making some small topiaries out of some Winter Gem Boxwood. The topiaries turned out pretty good at least good enough I dared put them on my front porch haha. (You know only the best for your front porch!) So far so good they are still living even in our hot dry weather. I am careful to keep them hydrated. and truth be known I touch the plants gently and talk to them. They add a sort of stately look wherever you choose to place them. Not too hard to make and you can use a lot of creativity in your design.
Artist Tools For The Garden
Sharp scissors or garden clippers are a must in making your garden masterpiece. They are like your paintbrush and paint in a way. Well not really a masterpiece but you might think it looks like one when you finish with your topiary project.You can use either just depending on what you have handy. It is important that your scissors or clippers are sharp. Your boxwood will slowly take shape as you snip away at unwanted branches and leaves on your plant. You might feel like an artist as you create your topiary but you need to have tools that are in good condition and sharpened.
Gloves
A good pair of garden gloves are pretty basic but very handy to have when planting and trimming your topiary. They don’t have to be expensive just choose a pair of gloves that fit you well. Not too small and not too big so your hands are comfortable. I don’t mind getting my hands dirty in the soil but gloves work well when you are pruning and planting your topiary. So shop around and find a pair that you will enjoy using.
Winter Gem Boxwood
Certain varieties of boxwood work better than others for making topiaries. Winter Gem comes highly recommended and I join the club when it comes to recommending this type of boxwood. First thing when shopping for your boxwood plant, make sure it is healthy. Leaves will be a medium to dark green and not wilted or yellow. They will be on the soft side not brittle or withered. When you run your hand over the boxwood, it should stay on the branches and not fall off. They should bounce back to place. You’re pretty safe to purchase the boxwood if it meets this criteria.
Choose The Right Container
The style of container you choose is up to you but it needs to be big enough to fit your topiary. You can always change containers if you need to as your topiary grows. I learned the hard way recently when I tried to plant a large boxwood topiary. I bought a terra cotta pot that I thought was big enough to fit my plant.
I took the time to age my terra cotta planter with lime and once it had the look I wanted, I put my boxwood in it. I underestimated the size of my plant though. A strong wind came up and knocked over my topiary. It was clear to see that the pot just wasn’t large enough for the size of my plant. WAAAA! Had to replant it.
So learn from my mistake and get a big enough container that will fit your plant. Then if your container is on the large size your plant has plenty of room to grow. You can always repot it if your plant grows bigger and needs more room. Check it as your plant begins to grow taller and make sure it still fits your pot. I don’t think there will be a hurry on that though because judging from the boxwood plants I have planted this past spring, they aren’t growing tall very fast. However that said, you will need to continue trimming them week to week so the leaves stay the same height all the way around.
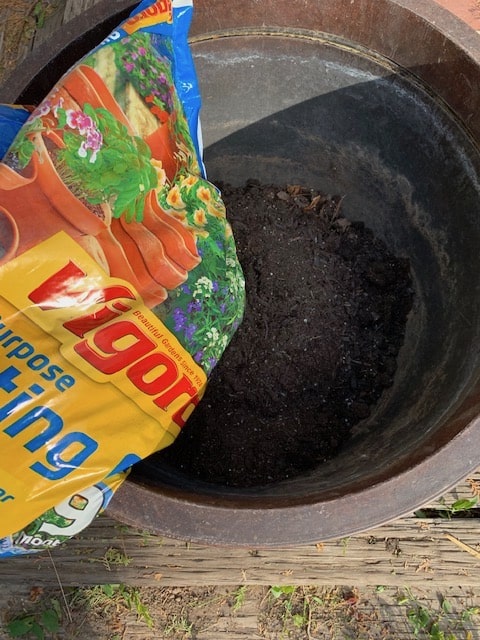
Potting Soil
Choose a good potting soil for your plant. This is key to your plant thriving once it is planted in your container. There are lots of potting soils on the market and I have found one I like that Home Depot sells. It is cost effective and lasts a while. Vigoro is the brand name. Potting soil will baby your new plant along and give it a better chance of thriving…notice I didn’t say surviving. Thriving is what we will hope for! You can definitely choose a different brand if you already have your own favorite soil.
Garden Trowel
A hand trowel is a useful tool to have when trying to plant your boxwood. You can move the dirt around easily in your container starting from the potting soil bag to the container to make sure it covers the entire roots of the topiary. Take a scoop of dirt with the trowel and put it into your container. Continue until you have enough soil covering the bottom of the container. Set your plant on top of the dirt in the container. Hold the plant with one hand and continue to spoon dirt around your plant until the roots are securely covered. Make sure your plant is in the middle of the container. You can move the plant with your hands once it is potted if it isn’t in the middle of. your pot. Take note as you plant it to prevent having to redo it.
Fertilizer
Once your plant is securely planted in its new home (your container), then sprinkle Osmocote fertilizer around the pot and water it thoroughly. This will help give your plant an edge in its new home so that it can continue to grow and do well. Once again, if you like a certain type of fertilizer feel free to use that instead. I like the results I have seen with this brand so I am recommending it ( without getting paid to do so 🙂
Creating Your Topiary
As mentioned above, you need to purchase a boxwood plant and make sure it is healthy. This will affect the growth. The two boxwoods I planted for my porch this spring that I told you about well they were not so healthy and I didn’t really think about that until I got home with them. They were some of the first plants of the spring season. I have nursed them along making sure they are watered enough and I clip off the tops when they turn yellow. They have survived, thrived and are doing pretty good with my tender loving care. To avoid all that worry, start with healthy boxwood plants.
Have your planter ready to go. Use your hand trowel and start “spooning” your potting soil into the bottom of your planter. Add potting soil until it sits in your container where you want to put your boxwood. Make sure your boxwood will sit in the pot where its roots will be sufficiently covered. Don’t place it too high and not too low.
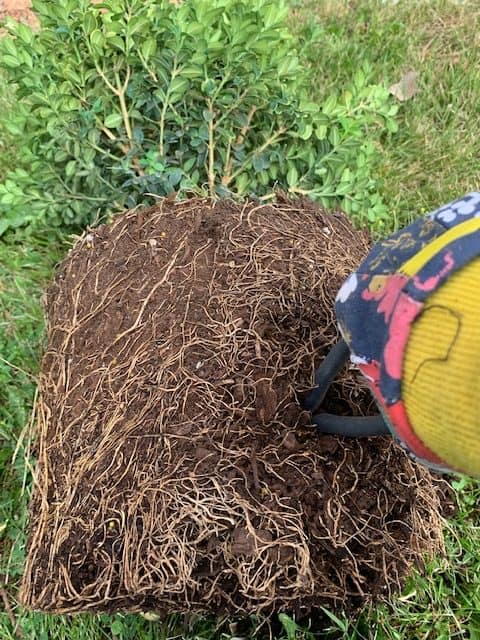
Remove your boxwood from it’s current container. Take your scissors or clippers and loosen the roots around your plant. You may have to cut off part of the bottom of the roots and soil for it to sit at the right height in your pot. If you plant is heavily root bound (roots are tightly wound around the base of your plant) you need to loosen them a bit. If you have to get aggressive to release the roots that are too tight around your plant, no worries. This helps your plant to be ready to grow in its new space. Just go around the plant sticking your shears or scissors into the side of the plant and releasing tight roots.
Clip Away
Set your boxwood in your container and cover the roots. Now you are ready to grab your clippers or scissors whichever you have on hand and get started. Look your plant over carefully. Try to find the sturdiest branch or branches (that you can make it look like one) that goes up through the middle of your plant.
Eye your plant and start clipping off branches underneath your plant. You want to create a shape where the branches are reaching upwards. If there are branches that are sticking out to the side, downwards, or shooting off in a weird way, clip them off.
If you are trying to make a double topiary, find the middle and clip branches away from the middle. After you clear the middle of the plant from branches your topiary will start to take shape. Yay! You will be able to see the vision of the project you are trying to create. You will still want to clip away branches from underneath the bottom section of your topiary shape.
Clip branches so they are an even shape all the way around the top and the bottom. It may take awhile before you get an actual rounded shape as in your plant may have to grow somewhat. So once you have clipped your topiary evenly top and bottom, then don’t panic if it isn’t exactly round or like you pictured it to be. It will take some time. As your plant grows, you can gently coax it into the shape you want and help round it over time.
Fertilize And Water
When your plant looks like you want it to, it is time to fertilize and water it. Sprinkle the Osmocote fertilizer on the top of the soil in your planter. Water, water, and water. In other words, water it well. Each day you need to water your topiary to make sure it will thrive in it’s new home (the planter you planted it in.)
Find the right spot to showcase your work. Fortunately boxwoods can be in the sun or in the shade. However they don’t much like the scorching mid day sun. It will burn the leaves and bronze them. Aahhh again, another mistake on my part.
If you prefer a Christmas tree shape to your topiary, that is a bit easier to make than trying to trim it into a rounded shape. You will still need to clip it on a regular basis depending on what shape your are making your plant into. Or you can trim it rounded in the plant container so it doesn’t show any spaces on the underneath side of the plant. It will grow into a rounded shape on top of your container. You choose the shape and the way you want to keep it trimmed. Trim it on a regular basis to help it keep its shape.
Related Questions:
Make A Unique Garden Indoors. This article will help you make an inspiring garden spot inside your home by telling you how to create 4 different types of container gardens.
DIY Mudroom: How To Create A Mudroom With What You Have. Find a place in your entryway to set up a mudroom with what you have by following these steps and ideas, you can create a useful beautiful mudroom area in no time.
Recent Posts
Wondering how to become a more confident quilter and how to zero in on what type of quilting really sings to you? How do you identify if you are a maker of quilts and keep believing in your abilities...
Do you need a quilt to give as a gift and need it like yesterday? Here is a fun quick quilt you can make in a day (maybe less) once you have your supplies. It features homemade raw edge, scrap back...