
Looking to make a cute quilted drawstring kids backpack in festive Halloween style? This backpack sews up fast, is quilt as you go, is easy to make and a perfect gift for fun or play time for youngsters. What more could you ask for? Your child could use it as a trick or treat bag and then keep art supplies or fun reading books in it. This size Grab these supplies to get started making this cute as ever backpack.
- Halloween fabric
- Fabric to line backpack with
- Ribbon and 2 matching medium size pom poms for the drawstring part of your backpack
- Fabric for the pumpkin face, dress, arms, and shoes, 2 black buttons, white paint
- Low loft batting
- Dark Perle Cotton thread
- Fabric for your quilted backpack strap

Have you ever visited Disney Springs and stood in line at Gideon’s Bakehouse? Last September our crew (aka family) met up in Orlando for a fun family reunion. My daughter in law knew about this bakery and at her suggestion, we all stood line to try it out. (Worth it.) I know the inside has a dark Halloween vibe but found the bookshelves, dimly lit candles, and pictures on the wall delightful. This is what inspired my simple kids backpack. Well sort of. The pumpkin girl applique I put on the backpack anyway.
A quilted backpack seemed to be just the right gift for my granddaughter’s fourth birthday. I can fill it with some fun items for her to enjoy. After all, even though her birthday is the last of September it is close enough to Halloween that I decided to design it with a Halloween theme. She could even use it for a trick or treat bag. I designed this bag to be both very easy and pretty extra cute. You could also make this same bag using my basic pattern and design it for someone grown up.
Step 1: The Bones Of Your Backpack
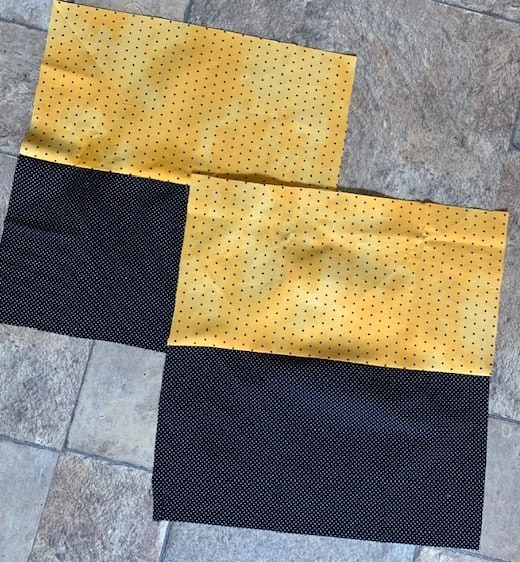
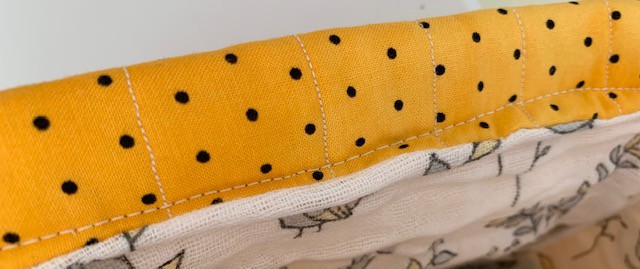
Boo ya! Pick out some cute Halloween fabric for your drawstring backpack. I chose two fabrics to make this with. I wanted it to be more colorful than just using one color of fabric.The top fabric I found at a quilting shop and fell hook, line, and sinker for it. Especially as a Halloween fabric. I bought a small amount and put it in my stash until I found a project just right for it. It is called Gnomes Night Out by Northcott. The black dot on a yellow goldish, orange tinted background goes so well with the black pin dot fat quarter I had in my stash. I just eyed my fabric when cutting out the two pieces. I cut both strips of fabric about 7 1/2″ x 11 1/2″. Sew these two pieces of fabrics together and press on top of the seam.
Step 2: Batting
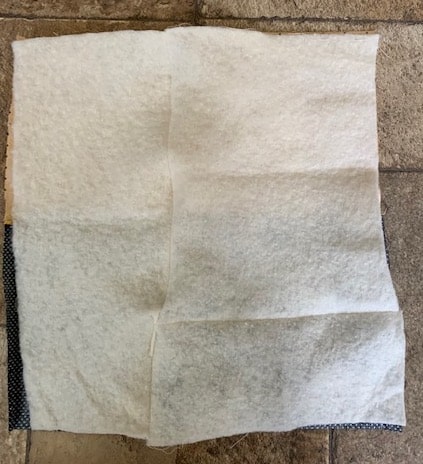
You don’t need a thick batting to quilt your backpack. Use a low loft. It is fun and easy to sew with on your sewing machine. Cut batting to fit both pieces of your backpack. (Tip: To save money if you have pieces of batting that aren’t big enough to use for a quilt, hand sew or machine sew pieces of batting together to fit the size of your backpack). Doing this with your batting is being eco smart and money smart. My batting is actually pieced together. It worked beautifully for this project. If you do this for a quilt, you want to make sure that seams aren’t big and bulky for your quilt.
Lay the wrong side of the batting on top of the wrong side of your backpack section. The right side of the batting square should be up as you quilt on your sewing machine as shown in the photo above.
Step 3: Quilt As You Go
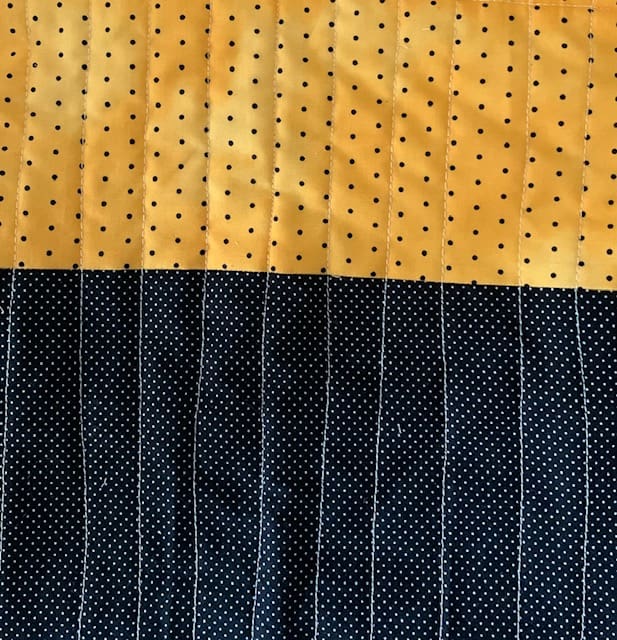
Sew lines down the batting and the fabric sections of your backpack. You can eye it or measure it precisely. I will be accessorizing my backpack and the lines won’t really show so you don’t have to be too precise on your line measurement unless you really want to be. If you want to get fancier with a sewing stitch for your backpack go right ahead. I am keeping it easy and simple so I chose a straight stitch and straight lines for this simple kids backpack.
Step 4: The Silver Lining
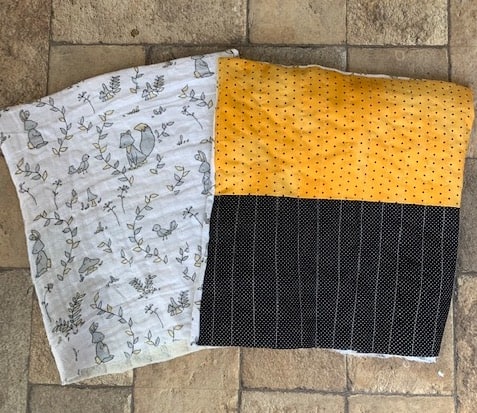
Doesn’t the silver lining mean a hidden light in a dark situation? Well this isn’t that it just sounded good for my header but adding a simple lining finishes the inside of your backpack nicely. It is really easy too! It can be any fabric you have on hand. I had a cute print guaze fabric that I used for my backpack. Once again I use the word perfect only in the sense that it was perfect for my cute granddaughter.
- Cut the lining fabric to fit the two sides of your backpack sections.
- Sew right sides together on each backpack square leaving the bottom open.
Step 5: Make The Band
Fold your top over so it measures about 1 inch and a half. Then sew straight across. Do this to both sections of your backpack. The open ends on each side of your band is where you will thread the drawstrings for your simple kids backpack.
Step 6: Piesta De Resistance Sew Together Sections
Time to put your kids backpack together. This is where it starts to take shape and you start to feel like this was a really good idea to make something fun like this.
- Turn your sections inside out so the lining and the outside piece are turned right side out. The bottom of your two sections are still un sewn.
- Place right sides together and sew from underneath the right side drawstring band to just underneath the left side drawstring band.
- When you start, and when you finish, sewing the two sides together, backstitch where you start and backstitch where you end just for good measure.
Step 7: Accessorize
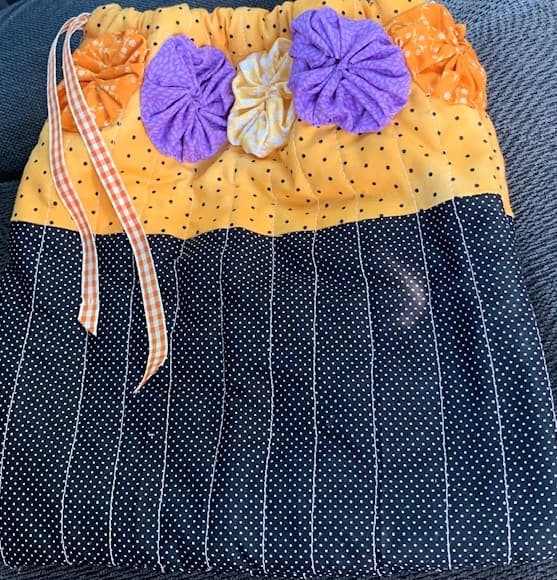
- Fabric yo yo’s add so much pizazz to a quilted project. I think they add an adorable look. Of course if you are making this kids backpack for a boy you can skip this accessory or add something of your own creation like felt bats, small cut out felt pumpkins, or ghosts.
- Sew these accessories underneath your drawstring band.
- Use some festive ribbon to thread through your drawstring band. The ribbon needs to be sturdy so it won’t fray after a few times of using it. On the ends of the ribbon, glue a pom pom large enough it won’t pull through your drawstring band.
The actual Gideon’s Bakeshop inspiration for my cute pumpkin girl is here:
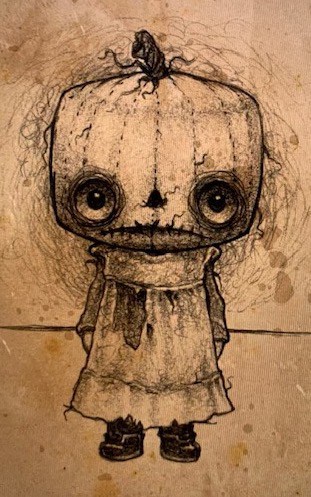
This is my interpretation so to speak. I tried to make the face a little less scary but if you have to have a scary pumpkin girl this example above is still pretty cute. At least I think so. Not into the scary much for Halloween but I think this drawing by Gideon’s Bakehouse is adorbs. Here is the pumpkin girl I designed.
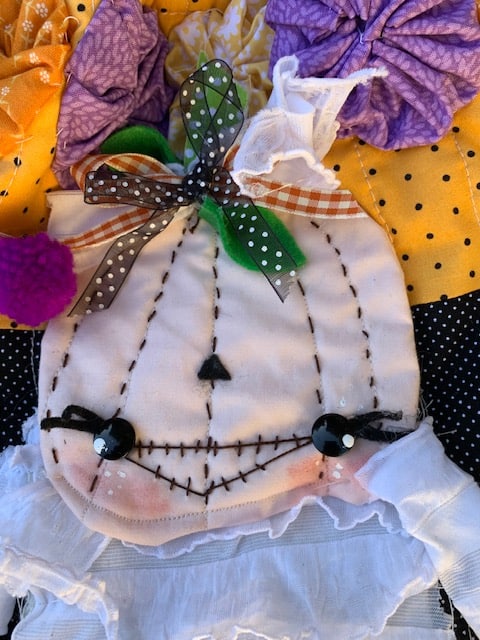
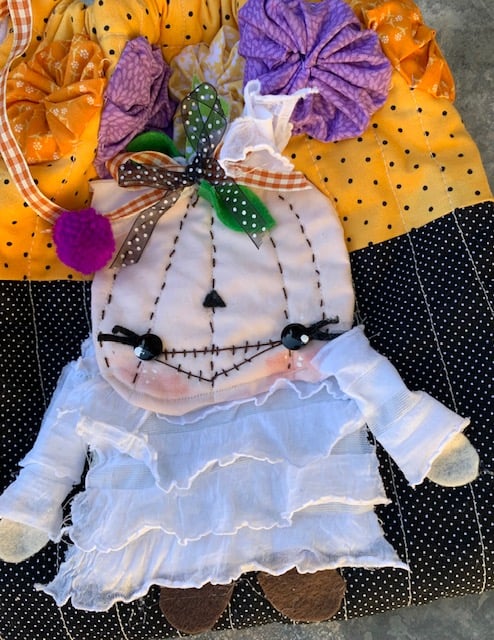
- You can create a pumpkin face and body to attach to your backpack or another type of Halloween item. This is optional. You could add an applique or just go with the yo yo’s. I attached the pumpkin girl to the front of the backpack with hot glue.
- First I fitted the dress to the front of the backpack. (The dress I sewed to some low loft batting before gluing on the front of the backpack.)
- Then I situated the pumpkin face over the top of the dress and glued it in place.
- Add ribbons and frilly fabric for a bow to the top of the stem and face on the pumpkin.
- Then glue in a couple of green felt leaves in the top of the pumpkin head.

Step 8: Add The Strap
- Measure the length of the strap you want to use for your backpack. Cut a long piece of fabric long enough for your strap. It should measure 2 or 3 inches wide.
- Fold it in half, machine sew down the outside edge with 1/4″ stitch. Leave one end open and turn the strap inside out.
- Machine sew along the open end. Press along the sewn seam so it lies flat.
- Fold the strap in half and tack the middle of the strap at the bottom and in the middle of the back of the backpack by hand sewing it to your backpack. I used dark brown Perle Cotton thread. I liked the look of the dark thread on my backpack but you can use thread to match your strap if that is your preference.
- Next secure each side of the strap to the back of your backpack by hand sewing it and securing it to the backpack underneath the drawstring band.
Pumpkin Girl (Optional Of Course)
- To make a pumpkin (which you could easily make this into a pumpkin boy if you want to) begin by cutting out a pumpkin head out of pink or peachy fabric.
- Cut out low loft batting to fit your fabric pattern.
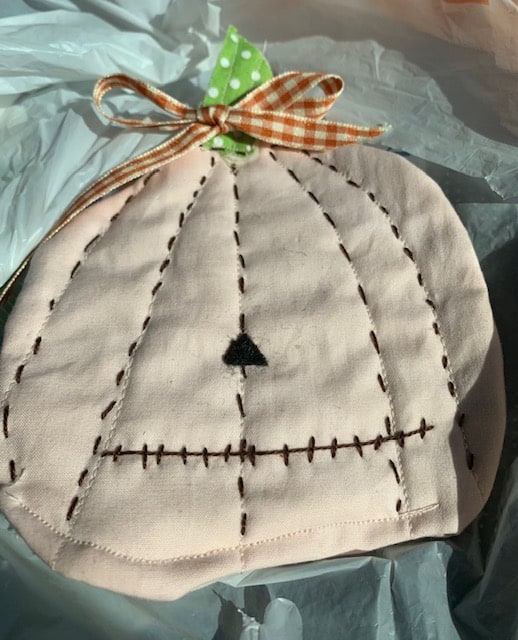
- Sew a straight stitch line on your sewing machine down the middle of your fabric pumpkin.
- Radiate the other lines from the middle line trying to sew even lines on each side of the middle line.
- Cut out another pumpkin face and place wrong sides together and sew around the edge leaving the bottom edge un sewn.
- Take dark Perle Cotton thread and use a running stitch. Follow each sewn line to accentuate the machine lines.
- Sew a long horizontal line and then add short vertical lines on the horizontal line for a mouth. To soften the mouth to look a little less scary, add a rounded line underneath the line you just sewed.
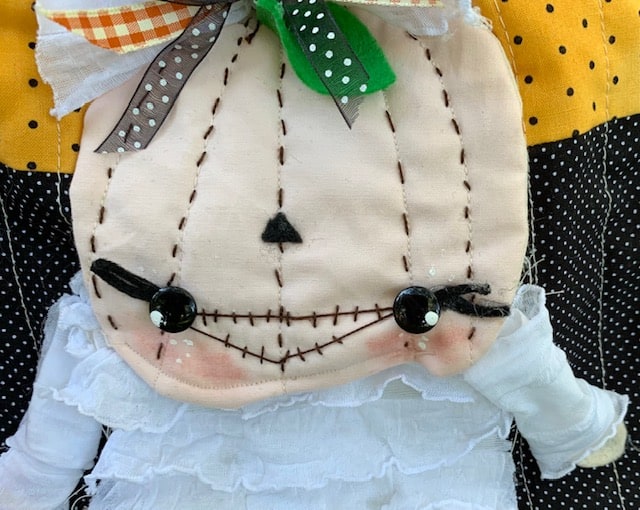
- Cut out a small triangle nose to glue to your pumpkin head.
- Hand sew a black button on each side of the mouth.
- Dot a small dab of white paint on each eye.
- Create 2 black felt eyelashes and glue on each side of the eye.
- Apply some make up blush with a Q Tip underneath each eye. Smooth the blush with your Q Tip until
- Then add white paint dots on the top of your blush.
Whew! Was that creative and fun or not. Now fill your simple kids backpack with fun things like notebooks, paints, colored pencils, Hallween goodies whatever suits your fancy. Truly a very special gift with a Halloween flair. One parting thought, make a small patch that you embroider the child’s name on and then attach it to your drawstring backpack with a running stitch.
You May Also Like
If you are in the Halloween spirit and you want to create a cute Halloween mini quilt, here you go and your are welcome haha! How Do I Make A Halloween Quilt? For Beginners
Here are the instructions for a really cute Halloween mummy mini quilt. How Do I Make A Mini Quilt? Vintage Mummy
Need an idea for decorating your fireplace mantel for Halloween. I’ve got you covered. Simple and cute How Do You Decorate A Halloween Mantel? Easy! Super Cute!
A quilt can actually be a game quilt believe it or not. Here is a fun gift to create or if you need a surprise game to pull out now and then for your kids and their friends Halloween Quilt With Checker Game And I Spy
Here is one more for your viewing pleasure. If you are a beginner quilter and want to learn how to make four traditional quilt blocks and put them altogether in a quilt, take a look here What Is A Traditional Quilt? How To Make Four Traditional Quilt Blocks
Recent Posts
Do you need a quilt to give as a gift and need it like yesterday? Here is a fun quick quilt you can make in a day (maybe less) once you have your supplies. It features homemade raw edge, scrap back...
You know those orphan blocks you just can't bring yourself to throw away? They took some time to make but they just didn't fit in the quilt you were making? Well I've got a solution for using them. A...