There is nothing sweeter than a baby and the best gift to give a new baby is a handmade baby blanket. Here is a tutorial for teaching you how to quilt a baby blanket or any blanket for that matter by hand using a hoop and a few other supplies. All it takes is some time, a few supplies, and some creativity. So let’s get to it!
- Baby quilt topper
- Backing fabric
- Low loft batting
- Basting Pins
- 18″ hoop
- Cover the inside of your hoop with fabric strips, tape, or even gently sand it so it doesn’t fray your quilt fabric.
- Dritz needles size 5
- Needle threader (your favorite) (Or not)
- Perle Cotton thread in the color you want to use.
- Quilt Marking Pens
- Use a straight running stitch to quilt your baby quilt.
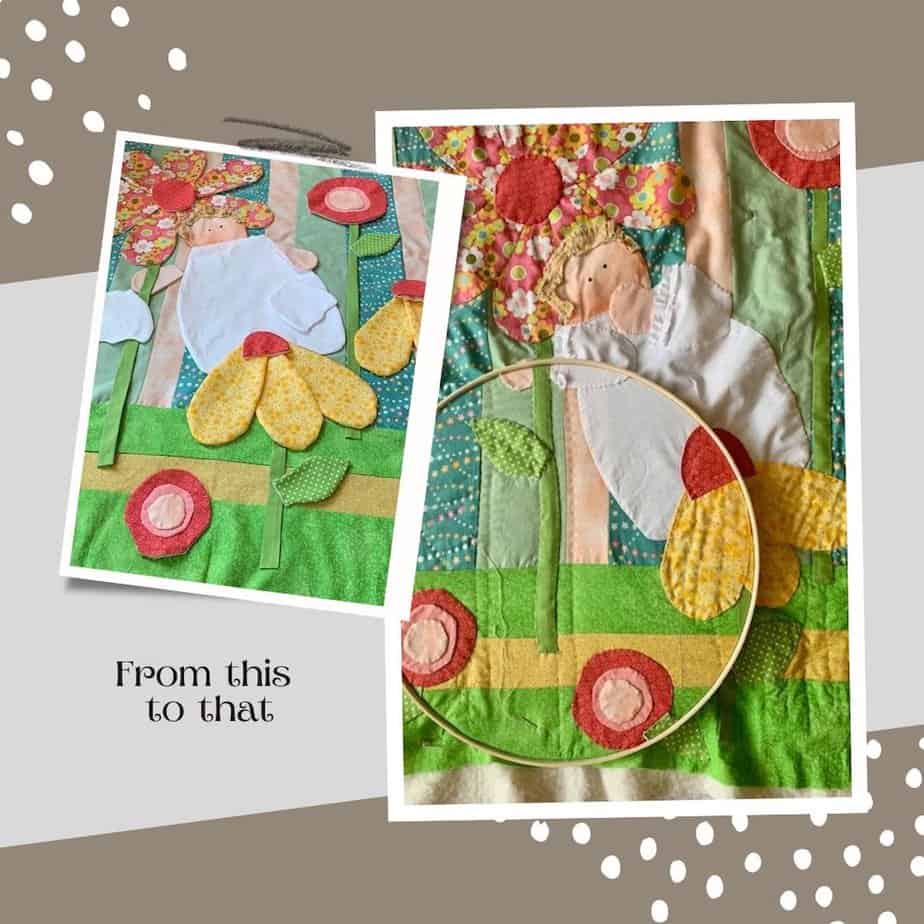
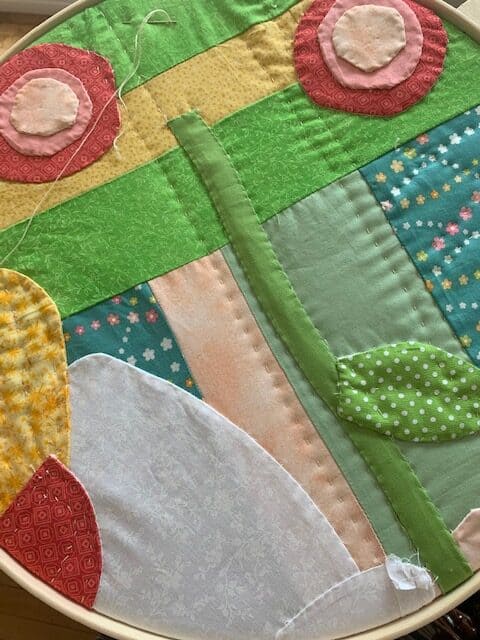
I have been working on my “Baby Blessings” baby blanket for several weeks now. It doesn’t take too long to make and can be relaxing and fun sewing on the appliques. The longest part of creating a quilt for me, is the designing process. I am creating a pattern for purchase so stay tuned if you are interested. It is an adorable bright and whimsical pattern that could also be used as a beautiful wall hanging in a nursery. Hand quilting a baby quilt can really be fun and relaxing.
Inspiration for my “Baby Blessings” baby quilt with applique pattern.
Baby Blanket Quilt Topper
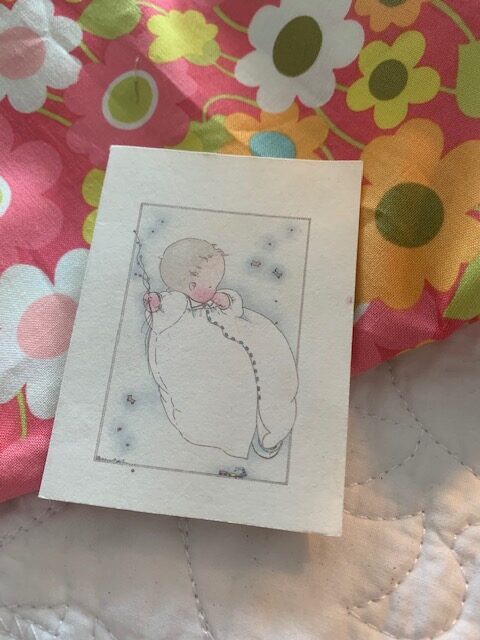
Did you know finding inspiration for making a quilt is a real thing? The ideas for creating my baby quilt came from two greeting cards. One a baby card given to me when my hubby and I brought one of our adopted daughters home from China. And one I happened to see in my “travels” online. I thought it would make the cutest baby quilt topper. It took a while to design but I finally came up with the final results.
Sew strips horizontally or vertically. Make a cute patchwork or make several of one style of quilt block. You can choose the size you want to make your quilt. My “Baby Blessings” quilt is designed at 36″ x 36″. I sewed several vertical strips of fabric side by side and then sewed three horizontal strips of fabric underneath the vertical strips. I added a row of patchwork squares down the side of my quilt. It makes the perfect backdrop for all the appliques that go on the top.
Backing Fabric
Pick a backing fabric that will look nice with the colors you have on your quilt topper. I chose white with pink dots. It is whimsical and cute and coordinates with my baby blanket topper.
Low Loft Batting
I usually use low loft batting for my quilt sandwiches. Even baby quilts. It quilts up nicely and gives my blankets a nice look once they are quilted. If you prefer, you can use minky fabric or fleece for backing, skip the batting and go ahead and quilt your baby blanket.
Basting Pins
Before I quilted this quilt, I put basting pins which resemble large safety pins in strategic places (place your pins in rows on your quilt) on my quilt to keep the three layers together while I hand quilt it. The basting pin is not like a large safety pin though. It has a bend in the middle to catch all the layers of fabric. They are also sturdy and won’t bend once they go through your fabric. Pretty nifty tool to use if I do say so myself. If you want to, you can put an actual basting stitch in place of the basting pins or in addition to them.
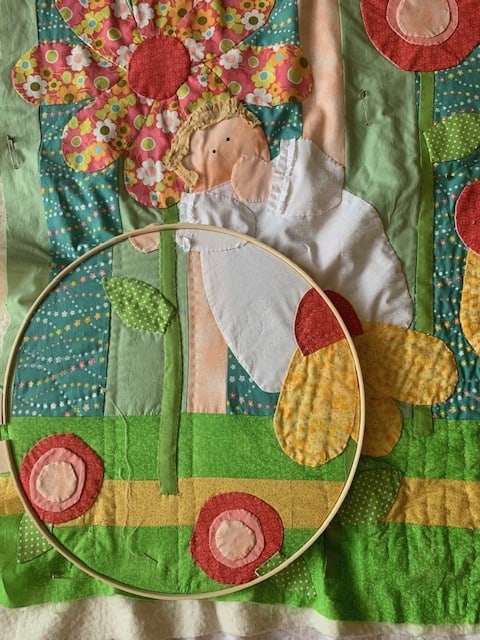
18″ Hoop
You can hand quilt your baby quilt using a wooden hoop. I love using my hoop! It holds your quilt sandwich in place and makes hand quilting doable on your lap no less! I ordered an 18″ sized hoop and got mine off Amazon. You can enjoy a few moments of getting lost in your quilting while watching tv or listening to music. It helps to keep your quilt ready and handy when you want to start working on it. It isn’t like putting up quilting frames that take a while and a lot of room. When you use a large hoop, you can easily move your quilting to wherever you need to be. Even take it in the car to work on if you aren’t driving of course!
Cover The Inside Hoop
Because the hoop is a little bit rugged, I covered the hoop part that fits inside the slightly larger hoop with masking tape to keep my fabric from snagging on the hoop. There are options for covering your inside hoop. You could use fabric strips or just sand the outside edge. My hubby came up with the sanding idea after I had covered mine in tape (of course). It’s all good though. He really did have a great idea and you may want to try that.
Quilting Needles And Needle Threader
To quilt your quilt you will need Dritz size 5 quilting needles. A needle threader makes threading the needle a piece of cake. There are many to choose from so give a few a try and find the needle threader you like the best. You don’t have to use a needle threader but it saves a lot of time if you have difficulty threading your needle.
Perle Cotton Thread
Perle cotton thread comes in a myriad of colors and I love using it for quilting. I buy it at my local quilting shop. It is also available online. This thread is a little thicker than quilting thread but accents your quilting threads so nicely that I really do enjoy using it and like the results when I complete my quilt. If you want your stitches to show less, use quilting thread.
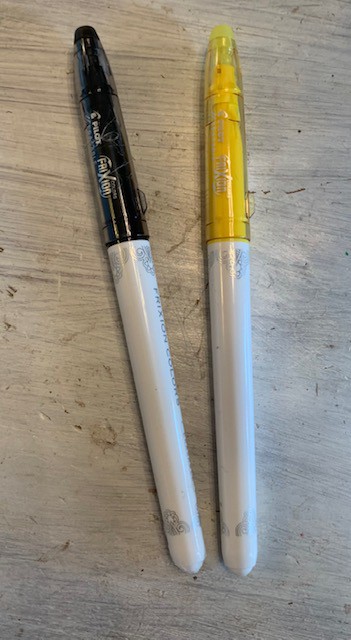
Quilt Markers
Recently while shopping my local quilt shop, I asked for their opinion on what marking pens I should use for my quilts. ( I had just free handed my quilts before this.) Disclaimer here…they recommended I buy Frixion eraseable quilt markers. One dark pen for light fabrics (so the black) and one light pen for dark fabrics (hence the yellow). You can erase your lines with their own built in eraser when you are done quilting. The heat from erasing is suppose to make your lines disappear. Without reading any reviews, I grabbed the two colors I just shared with you. I tried using both on white fabric. I first erased with the pen eraser and then went to my ironing station for better results because I still saw some marks on the fabric. After ironing the marks, the black mark came off but some of the yellow remained. Moral of the story… experiment to find what works best for you. Try it out on a leftover piece of fabric you are using and see what happens. Then once you are confident it will erase, go ahead and use the pen you have found that works for you. Having exact lines to follow on your quilt will make your life a whole lot easier! This should prevent a lot less unpicking if your stitches aren’t exactly where you want them to be!
Quilt It
Once you have marked your stitching lines on your quilt with a pen or pencil, start by putting your wooden hoop at the bottom corner of your quilt. I chose to work left to right. Secure the inside hoop so the quilt inside the two hoops is smooth and tight. Tighten the large silver screw on the side of the top hoop to secure your hoops where you want them to be. Thread your needle and start sewing. When the quilting is done on the fabric inside your hoop, move your hoop to the left. Go back and forth moving your hoop making sure the quilt sandwich behind your topper is smooth and tight inside the hoops.
When you are done quilting, square up your quilt and trim off any extra batting. Add binding to your quilt and enjoy!
You may also like:
Would you like to improve your quilting skills? Not a bad idea so go here to learn how 7 Sure Ways To Improve your quilting skills
Here is a really fun quilting idea if you have a lot of T shirts you would like to use in a quilt. How Do You Make A T Shirt Quilt? Quilt As You Go And No Interfacing
If you want to finish your quilt as you go along, this post can help you out Quilt As You Go: You Can Do It!
Recent Posts
Do you need a quilt to give as a gift and need it like yesterday? Here is a fun quick quilt you can make in a day (maybe less) once you have your supplies. It features homemade raw edge, scrap back...
You know those orphan blocks you just can't bring yourself to throw away? They took some time to make but they just didn't fit in the quilt you were making? Well I've got a solution for using them. A...