Quilting is an adventure. Each time you make a quilt you begin a new journey. A journey of creative discovery. It can be fun to improve your sewing skills. It also develops your design skills. You don’t have to be an expert sewer to make a quilt either. Follow these simple steps to learn this craft. Come on let’s start this adventure together!
How do you quilt a quilt? To keep it easy, start by making a baby quilt or lap quilt. Once you have tried this on a smaller scale, make a larger quilt using this method.
Follow these easy steps:
1. Purchase 1 1/4 yards if using flannel and 1 yard 100% cotton of cute fabric for your quilt top. (Flannel is a good choice for a baby blanket because it is so soft. However quilter’s weight cotton is a nice choice too.)
2. Choose a contrasting fabric for the back of your quilt. You will need a slightly bigger piece of fabric for the back because it needs to be a little bigger than your quilt top. Measure it so it is 2 inches bigger around the entire quilt top on all sides.
3. Check the quality of your fabric before you buy.
4. Pick out your batting. You will need one yard. (Pick the loft according to how thick or thin you want your quilt to be.
5. Wash and iron air dry or dry in the dryer) your quilt top fabric and your backing fabric.
6. Put fabric backing on the floor or table. Center the batting in the middle of the fabric backing. Place quilt top fabric on top of the bating right side up.
7.Secure Your quilt pieces together with pins or sewing clips.
8.. Sew around all three pieces of your quilt by top stitching it into place.
9. Tie your quilt by sticking your needle through all 3 layers of fabric and then pull through and tie a double bow. Dot glue in the middle of your bows. Or just tie knots instead of bows.
10. Fold over the edge of your backing fabric around your quilt covering just past the edge of your quilt top fabric.
11. Pin the folded edge in place.
12. Iron lightly the folded edge.
13. Pin ric rac over the unfinished edge of the quilt.
14.Top stitch it in place using a zig zag stitch. At each corner make a pleat and sew ric rac into place.

Start With The Basics
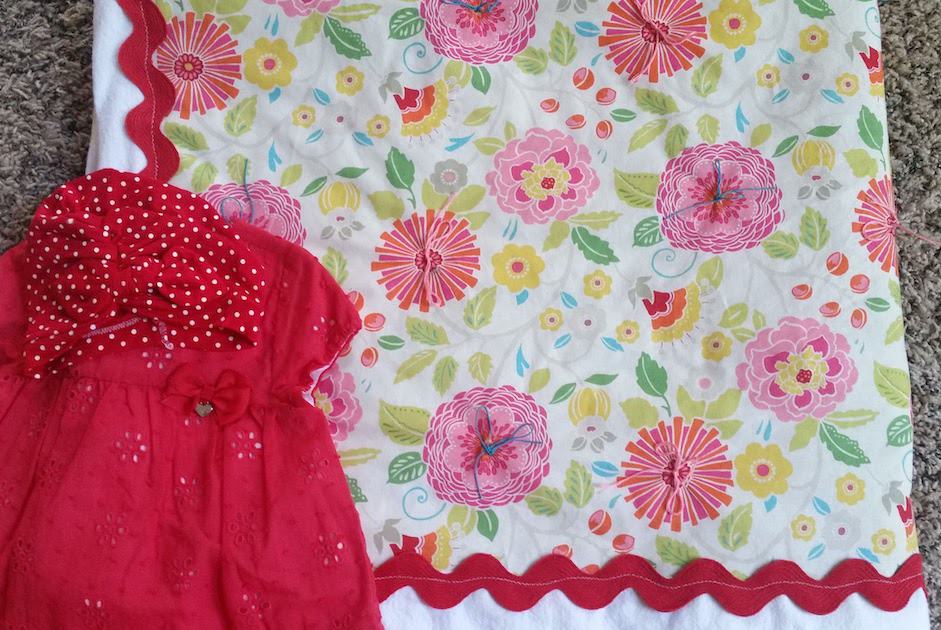
Joyfully we welcomed our second baby grandaughter into our family recently and I needed to make a baby quilt so that I could do what grandmas do and make a visit. I didn’t have time to make an intricate quilt top so I did the next best thing. I came up with a super simple idea to make a quilt that took only a few hours to create. I love how it looks and want to try it on a bigger quilt.
You will not be intimidated by this quilt if you follow each step carefully because it really is very easy! Take it from me…I am a novice at sewing! (My sweet mom tried to teach me but I am not the seamstress she is but I am proof that anyone can quilt a quilt!) However I like to sew and have fun doing it.
Choosing fabric can seem like a daunting task sometimes (it takes me awhile to decide) but look at is this way, you are choosing a backdrop for your work of art. When you set out on a mission to find just the right fabric for your quilt, keep these ideas in mind: I chose cotton fabric for the topper and flannel for the backing fabric. I mixed and matched so to speak.
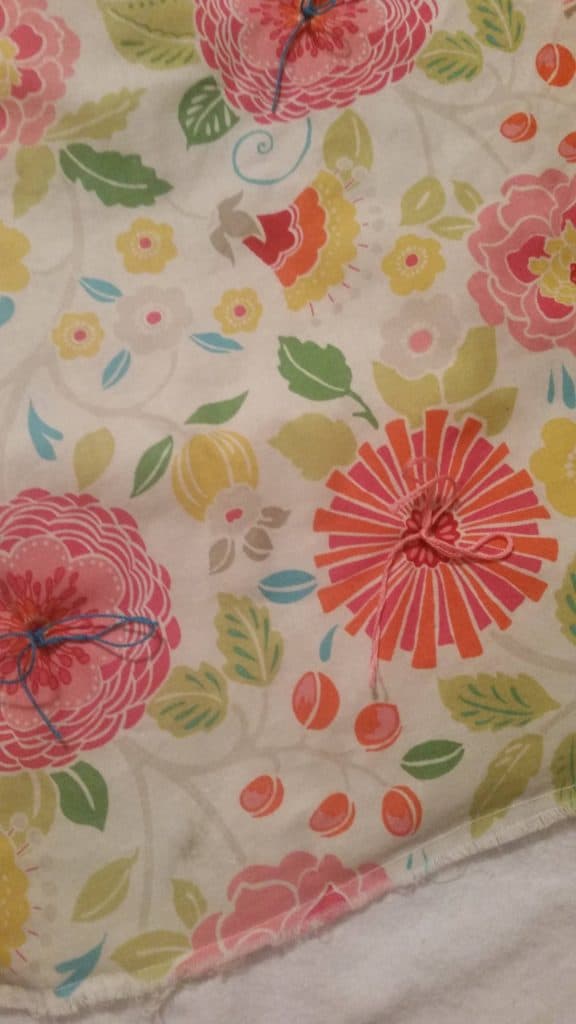
- Start with by choosing a fabric with a pattern for your quilt topper . Choose a print piece of fabric that speaks to you (that you really like.) See just that easy you have a no sew quilt topper!
- Pick a color for your backing fabric out of the colors on your quilt top fabric. Can’t go wrong with this method because color wise it will look good even if you choose polka dots or stripes to contrast with your topper fabric for your backing fabric. (Backing means it will be the backside of your quilt.) The fabric you choose for the backside of your quilt,, needs to be bigger than the piece of fabric quilt top so you will need about 2 inches of the same amount of fabric all the way around to fold over to finish your quilt top with. Ok. I was never very proficient in math. Creativity was and is my strong suit! So figure you will need like I mentioned about 2 inches of fabric down each side and across the top and bottom of your of your fabric. You are going to fold this edge over on your main quilt top to finish the edges of your quilt in a really easy way.
- Something to keep in mind when color coordinating, try choosing coordinating fabric by using the color wheel. Basic art 101 green/red contrast well together, orange/blue, etc…
- If you are still a little timid, out of your comfort zone, find a picture of a quilt that inspires you. Buy fabric based on the colors you see in that quilt. Fabrics don’t have to be the same as the quilt in your picture, it just gives you a template to follow.
- If that doesn’t work, you can always fall back on asking a fabric store associate for help with choosing your fabric. Especially if you go to a quilting store! They love to see you leave happy and ready to start your quilting adventure! Be careful though…you can get lost for hours in a quilting store drooling over all the beautiful fabric possibilities!
Look For Quality
The quality of fabric is not the same. If you are shopping for cotton, look for Quilter’s Weight Cotton. 100% cotton should be your go to here. This fabric is made to last. Like last longer than you or me! Some cottons are way too thin and your finished product will not look as nice. You can shop the sales to save money if you like, but make sure you buy quality fabric because if you are going to put effort and time into your product, then you want to be happy with the end result. Just makes sense.
A word about flannel fabric, Like I already mentioned, it is so soft against a baby’s skin Flannel is breathable and can hold in heat so it is comfy. It is also moisture wicking which is always a good thing. Flannel shrinks when you pre wash so you will need to buy at least 1/4 of a yard more to make up for this. That shouldn’t scare you though. When looking at flannel, if you can see through it, put it back! It isn’t thick enough to be a nice quality.
Batting Up
I like quilting with a thin cotton batting. Bamboo batting breathes well and works well for machine quilting. Cotton batting is comfy and soft. Since you are going to tie this quilt, I would choose a thinner batting. Polyester is usually a lot thicker but stays that way and holds it shape over time. Do you want this baby blanket to be a lightweight blanket or nice and thick and cushy? You choose what you think will work best for your quilt.
Wash And Iron
I know, I know pre wash the fabric and iron it? Really? This is my least favorite step because it adds a bit of time. However it is worth getting any shrinkage taken care of right off the bat. Once the fabric is washed, I skip the dryer part and iron my fabric to dry and press it. There was no science to this I just wanted to try it and see how it worked. Loved the result! Now that being said, let me give you a few hints about flannel should you choose to go that direction.
Flannel well…flannel is a shrinking violet. It also frays. Here are some options when washing it. Remember not to wash your flannel in hot water only warm. Use a mild detergent. Add a fabric softener to your rinse cycle. Then hang to dry or put it in a cool cycle dryer. You can put your flannel in a lingerie bag to wash and dry it. This will help keep your fabric from fraying so much. I liked the result of ironing my wet flannel and take note that you iron it with low heat.
Putting The Quilt Together
Now the fun part….putting your quilt together! Lay your backing fabric on a floor or tabletop. Smooth the fabric with your hands so it lies flat. Center your batting on the top of your fabric backing so that the backing is even all the way around it. Measure around your quilt edge to make sure you have two inches all the way around it. Lay your quilt top fabric for the quilt top on top of the batting.. Measure the backing fabric to make sure it is about two inches all the way around your quilt.
Smooth the fabric with your hands. Then pin the layers together. Check the back to make sure everything is pinned smoothly without excess fabric gathered somewhere on the back. Smooth is critical! Next Sew around the edge of your quilt top through all three of your layers. Admire your work so far, then lay your quilt on the floor or tabletop.
Smooth it out again. Fold the extra fabric you have around the edge of your quilt top. Then make sure the backing fabric is just barely folded over the unfinished edge of the quilt top and secure it with pins. Take a deep breath and sew all the way around your quilt at the edge of the folded edge. Sew through all the layers as you do this.
Tie Your Quilt
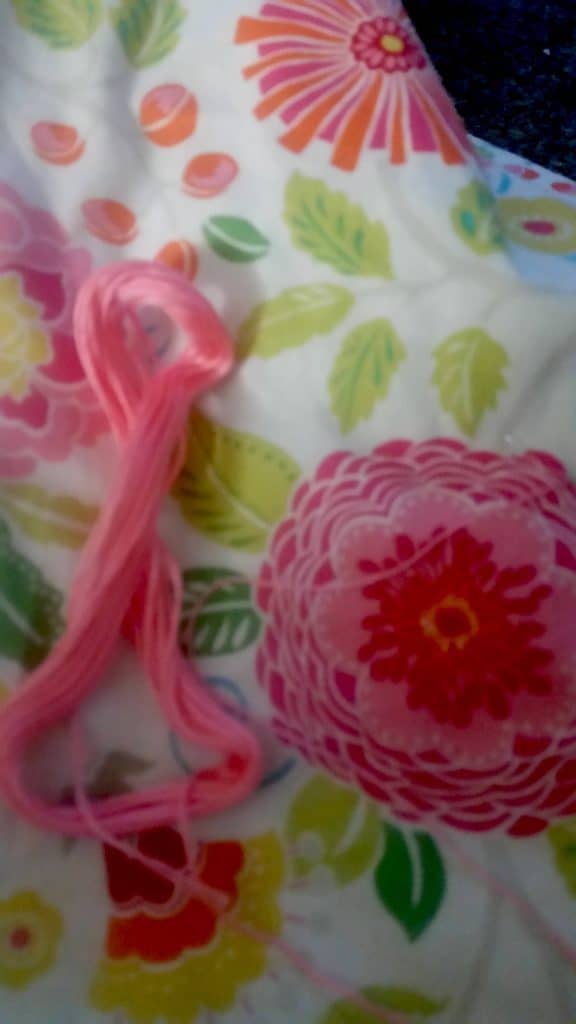
You will need some crochet sheen crochet thread or embroidery thread works well too. You will also need a quilting needle to tie your quilt. If you prefer you can machine quilt or hand quilt your quilt at this point. To keep it super simple I chose to tie my quilt and I consider it a form of quilting. Thread your needle and here we go. I kept my small quilt on my lap to quilt it. Enjoy this time. Put on some music or watch a fun movie to tie your quilt by.
Decide how you will tie your quilt before you start. I chose two colors of thread to use for my quilt. My fabric had a definite pattern to it so I could tie the same flowers with the thread I chose. No worries here. Keep it simple. You can use all kinds of colors on your quilt if you want to. It really is your choice!
Take the quilt with the quilt top up, and put your needle down through your fabric and back up so you can pull your thread through. Grab the two ends of the thread you have just threaded through the fabric and tie a bow. Tie another bow to secure it. Cut the thread so it is even with the other thread hanging from the bow. Do it again until you have enough bows in your quilt to secure the quilt.
Take a small amount of fabric glue and dot the center of each bow to keep it from coming untied. If you don’t want bows and opt for something even more simple, then don’t tie a bow just tie a knot with your thread. Don’t worry about gluing the knot.
Ric Rac A Brac
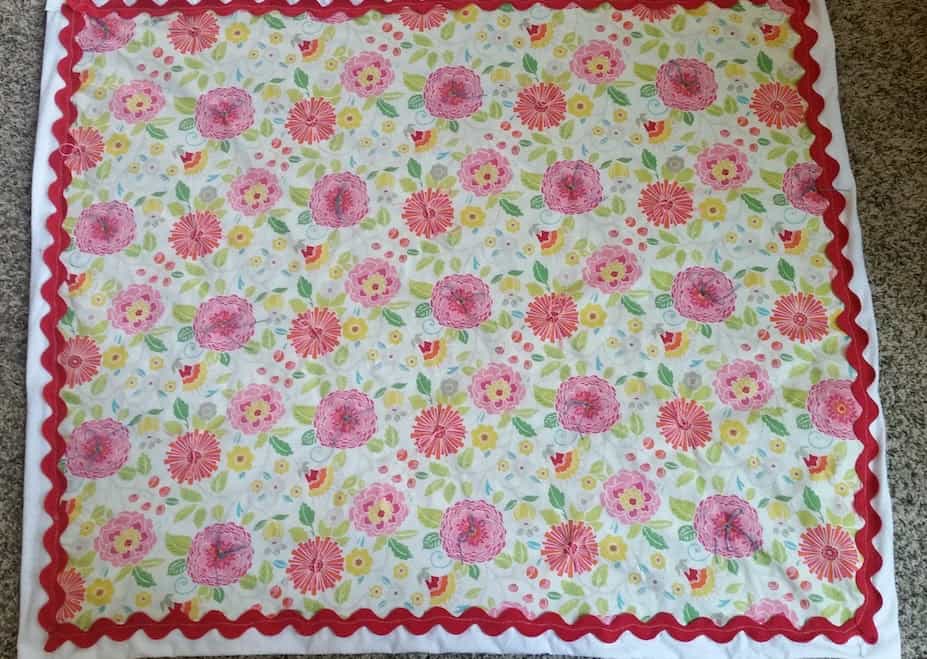
I picked out a really bright color for my trim. My fabric was extra bright and pretty so I went with a red ric rac. It needs to be an extra big size to cover the unfinished edge of the quilt. It makes a beautiful bold statement on my quilt and finishes it off nicely…sorry not bragging here if it sounds like it!
Pin the ric rac around the entire unfinished edge on the top of your quilt. At each corner, put one pleat in the ric rac and pinned it. This makes it easy to turn your quilt and pin down the next side smoothly.
I used a zig zag stitch on my quilt to sew the ric rac in place. I love how it looks. If you want to use some other type of trim be my guest! Use your own creative license! It is so fun and rewarding to see your quilt come together!
Reach Your Quilt Destination
I mentioned quilting being an adventure. Look what you just did! Voila! Success! Serenity can be found as you gain the confidence to try new things like a super simple quilt design! Then delight others with your creativity by giving your quilt away. However there is nothing wrong with keeping your quilt creation and using it to decorate with or hang on a wall in your home.
If you make a few mistakes and you have to unpick some stitches, no worries! We aren’t talking about perfection here. At least not yet. Do your best and be proud of your quilt creation. Hopefully you have enjoyed learning this craft and don’t be afraid to try it again.
Recent Posts
Wondering how to become a more confident quilter and how to zero in on what type of quilting really sings to you? How do you identify if you are a maker of quilts and keep believing in your abilities...
Do you need a quilt to give as a gift and need it like yesterday? Here is a fun quick quilt you can make in a day (maybe less) once you have your supplies. It features homemade raw edge, scrap back...