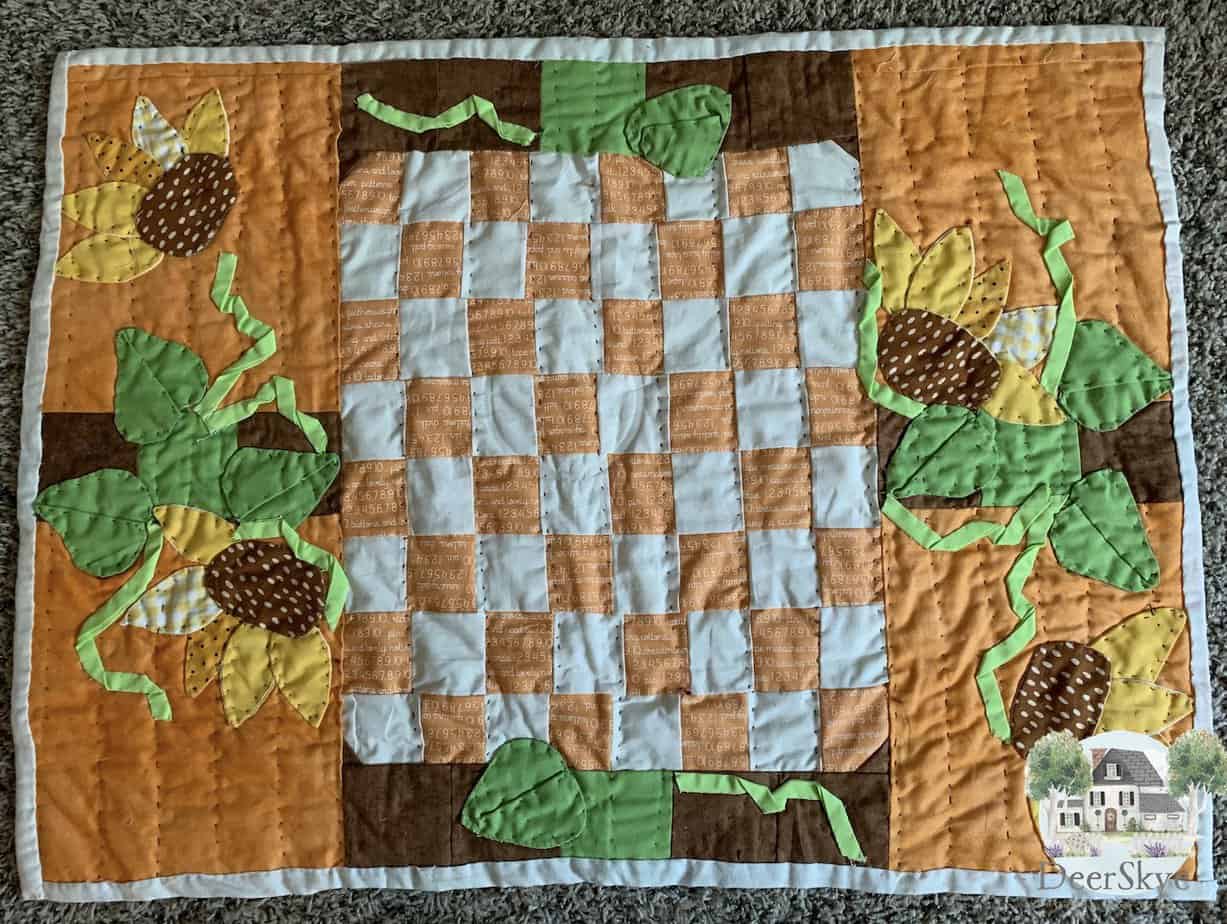
It’s fall and Halloween is coming on strong. This checkers game pattern makes the cutest pumpkin you can decorate your table with and have it at the ready to play a checkers game. Not only great for Halloween decor but can take you on in to November as fall decor. Another of those projects you could give as a gift and make it in other colors if you like.
Pumpkin Checkers Game Board Or Table Runner 23.5″ x 32″
- You will need 2 fat quarter orange fabrics
- 2 different colored green fabric scraps
- 1 dark brown fabric fat quarter and small amount of brown fabric scrap of a different pattern.
- Assorted yellow or gold cotton fabric.
- Green bias tape.
- 1 1/2 yards Muslin for backing fabric and fold over binding edge and pumpkin squares.
- Brown Perle Cotton Thread for quilting your checkers game and table runner.
- Checkers for your game board store bought or handmade. (Spray paint red checkers orange, yellow or green to go with the black checkers.)
I came up with this pattern design with the idea of putting it on a table as a conversation piece. Looks cute and gives you something to do while you are watching tv. What a simple way to engage a grandchild or a child, a friend or even your handsome hubby in a conversation while challenging them to checkers. It’s not really hard to make and sews up pretty fast.
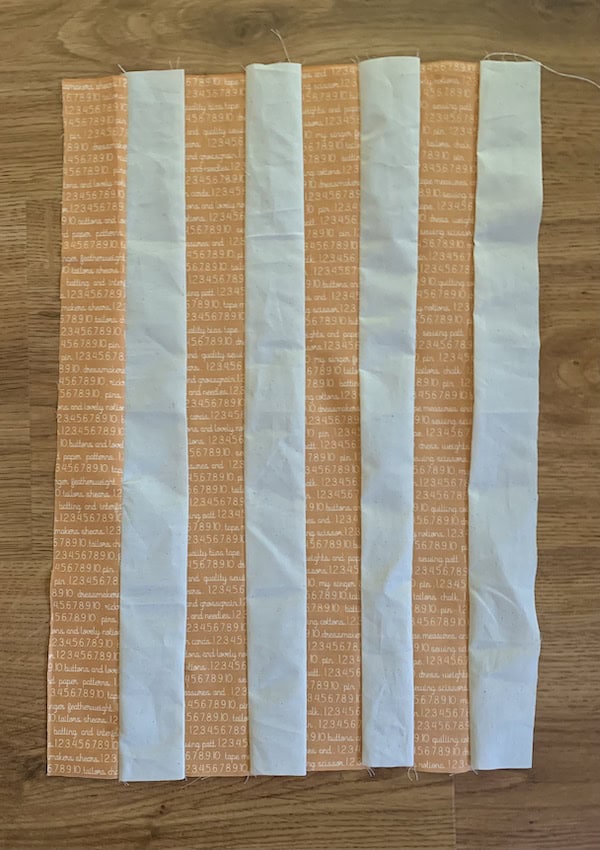
Start With Strips Of Orange And White
You can use about any orange fabric you want for the strips you are going to make. Plain muslin works well with about any fabric. Using your rotary cutter (this will be your best friend haha while you sew this fun project because you will use it a lot!) Cut 4 strips of muslin and 4 strips of your main orange fabric that measure about 17.5″ each long and 2.5″ wide. Sew orange, muslin, orange, muslin,etc… Refer to the picture above.
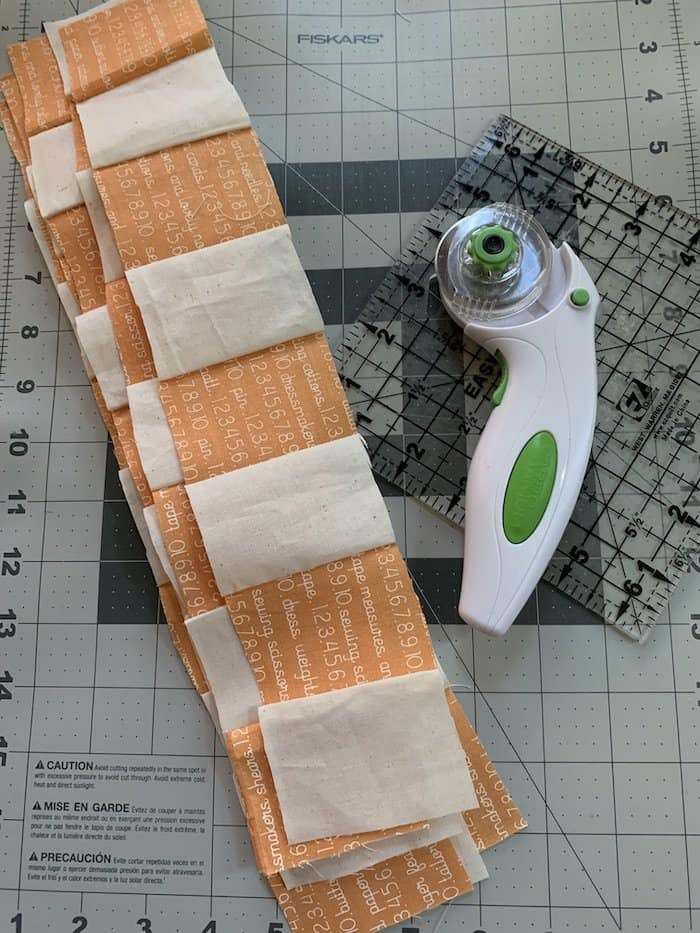
Next Step: Cut Strips Into rows
See this really is pretty easy. You thought you would have to sew all those little squares side by side to make this pumpkin but no. I’ve saved you the trouble with a few shortcuts. Your next step is to grab your rotary cutter (remember your best friend haha…don’t know what I would do without mine) and cut 8 horizontal rows out of the strips. Now don’t panic you don’t have to measure each row. This is how I do it. Fold your 8 sewn strips in half and cut down the middle. You now have 2 halves of 8 strips cut in half. Take one of the halves and cut in half. Repeat this step. Now do this with the other half of you sewn strips cut in half. When you’re done, you should have 8 rows of 8 squares.
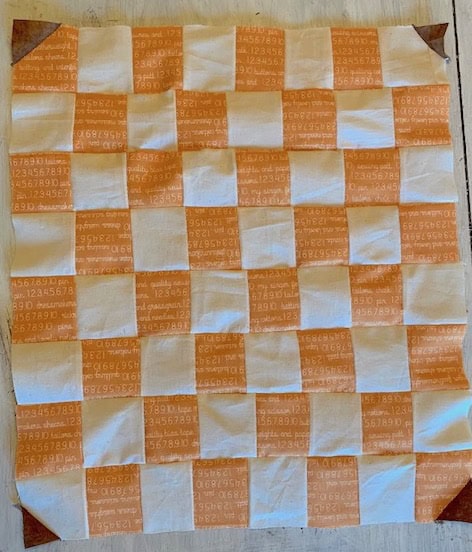
Make Your Pumpkin Shape
Sew your 8 rows together horizontally or lengthwise. At each corner, take your handy dandy rotary cutter and cut a small piece off on the diagonal. With your dark brown fabric measure the piece you just cut off and cut out a piece of brown fabric the same size. Sew it on each corner to replace the piece you just cut off. Now your project looks like a pumpkin. Press. Now your pumpkin is squared.
Add Patchwork Squares To Your Pumpkin Shape
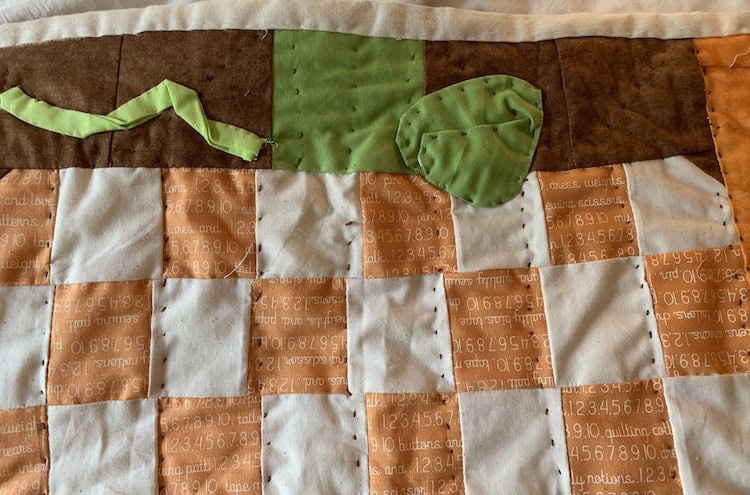
- Cut 8 brown 3.5″ X 3.5″ squares.
- Cut 2 green 3.5 x 3.5 squares.
- Sew two rows of the squares you just cut out side by side in this order: brown, brown, green, brown, and then brown.
- Sew one row to the top of your pumpkin. Then sew the other row to the bottom of your pumpkin.
Easy right? Now your pumpkin has a stem on the top and on the bottom. Your pumpkin is starting to look like a checkerboard right?
Add Some Applique
Applique is my thing. I love it! it makes any quilt look magical.
- Cut out 2 leaf shapes from green fabric as big or as small as you want.
- Cut out a square of fabric from a scrap that is a little bigger than your leaf shape.
- Put the right side of your leaf on the right side of your scrap fabric square. Sew around the edge of your leaf.
- Cut around your leaf shape.
- Cut a slit in the back and turn inside out.
- Press.
- Sew one of your leaves to the side of the pumpkin stem at the top of your pumpkin.
- Repeat this same process on the other side of your pumpkin.
Add Some Bias Tape For An Accent
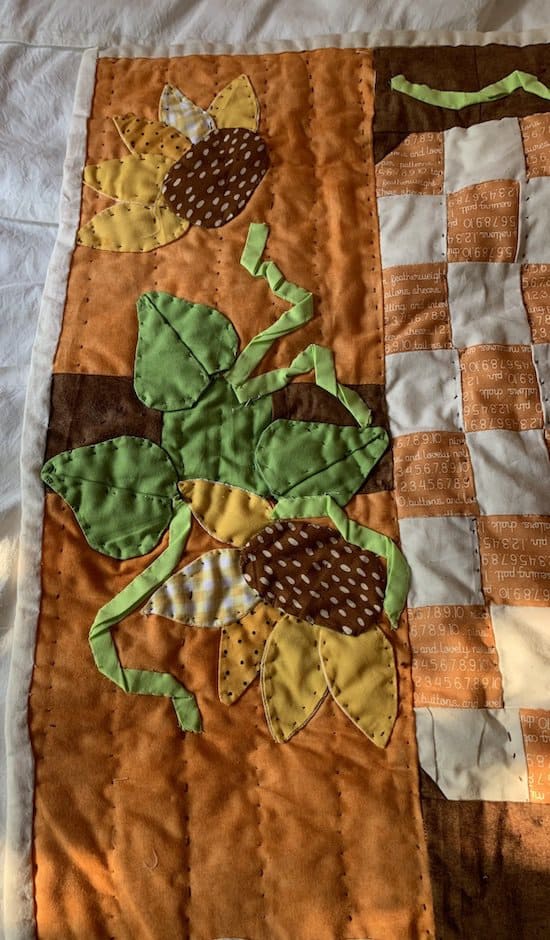
You know how pumpkins have cute trailing vines that wind around and down from the stem to other leaves and other pumpkins growing in your pumpkin patch. I tried to get that look by using some green bias tape. I sewed it by each stem of my pumpins so it looked like a trailing vine. I tucked the unfinished ends under as I appliqued it on. This step is totally optional but I think it gives my pumpkin checkerboard a cute whimsical look. They say less is more but for me I think sometimes more is better!
4 Square Pumpkins
If you just want a checkerboard you can bind and finish your pumpkin checkerboard, quilt it and be done. If you want to make your table runner longer and add more cuteness, then let’s sew on.
- Cut out 4 squares 8 1/2″ x 4″ from your orange fabric. These will become square pumpkins on each side of your checkerboard.
- Cut out 6 squares (like you did for your checkerboard pumpkin and these patchwork squares will join 2 square pumpkins together) 4 Brown and 2 green 3.5 x 3.5″.
- Sew a row of brown, green, and brown patchwork squares that you just cut out. Now sew the same row again using brown, green, and brown squares. Sew each side by side.
- Press your patchwork rows.
- Sew one orange fabric square to the top of your row of your 3 patchwork squares. Sew another orange square to the bottom of your row of 3 patchwork squares.
- Now press.
- Repeat this same process and sew your other 2 orange squares to your remaining row of brown and green patchwork squares.
- Press.
- Sew lenghthwise your 2 square pumpkin quilt pieces you just sewed to the left side of your checkerboard.
- Repeat with your other 2 square pumpkin quilt piece and sew to the right side of your checkerboard.
- Press.
Applique Cute Accents
Here is your artist canvas. Leave your square pumpkins like it is or really jazz it up by appliqueing leaves and flowers to your square pumpkins. Look at the picture of my checkerboard. You can make it as simple or cutesy as you wish. Add some more green bias tape by shaping and pinning it where you want it to be. Then sew it by hand to your square pumpkins.

Finish Your Checkerboard Pumpkin
You can put low loft batting inside your checkerboard if you like. It probs doesn’t need it because it will be sitting on a table and not being used as a blanket. Lay your muslin on a table or floor, wrong side up. Lay your checkerboard pumpkin topper on top of the muslin. Make sure the edge of your muslin is the same measurement (about 1″) all around your topper. )You will be using this extra muslin as your binding.
- Hand quilt your checkerboard using brown Perle Cotton or a color of your choice.
- To hand quilt, use a set of large embroidery hoops. Sew a running stitch from top to bottom with your Perle Cotton.
- Once you finish quilting (you can machine quilt if you prefer but hand quilting is relaxing and adds another accent to such a cute table runner/checkerboard.
- Fold over the edge of your muslin all the way around your checkerboard. The hand stitch hem your checkerboard.
- Press and hurrah it’s done!
These make such a fun creative table runner. Add some checkers (spray pain the red checkers orange or green to go with the black checkers.) You could make this and give it as a wedding or birthday gift. Also add a cute little quilt label to it if you give it away.
You may also like…
If you want to use quilts to decorate your home with for Halloween try this. Quick, easy, and cute enough to hang on your wall or a covered porch How Do You Make A Mini Quilt? Vintage Halloween Mummy
Need a special gift for a child? How about a giving a duo gift that doubles as a game and a blanket? Another patchwork checkerboard and I Spy game…Halloween Checker Game And I Spy
Sew this trick or treat Halloween backpack bag. It’s easy and cute. How To Make A Simple Kids Backpack: Halloween Style
Here is a tutorial for a beginner’s Halloween Quilt. Super adorbs and can also be made into a large Halloween pillow. How Do I Make A Halloween Quilt? For Beginners
Recent Posts
Do you need a quilt to give as a gift and need it like yesterday? Here is a fun quick quilt you can make in a day (maybe less) once you have your supplies. It features homemade raw edge, scrap back...
You know those orphan blocks you just can't bring yourself to throw away? They took some time to make but they just didn't fit in the quilt you were making? Well I've got a solution for using them. A...

