Nothing says amazing more than you making a handmade quilt. And even more amazing, is you giving the quilt you just made as a gift. You can use a farmhouse throw quilt to snuggle up in while reading a book or watching a movie. You could dress up a kitchen table with your throw quilt to make your dining room look cozy and cute. Hang it on the wall for home decor and with a little applique this throw makes a beautiful bold statement wherever you put it. Let’s make a quilt!
- Choose the colors for your quilt. It works well to coordinate your colors by choosing colors that look good together. I chose blues, reds, creamy whites, and some brown.
- Choose quilt blocks with criss cross stars, houses, friendship stars, blocks that sew up quickly
- Add a block you can rinse and repeat a few times that has applique on it.
- Make an easy block by cutting a square and sewing a strip of contrasting fabric on the top and the bottom of it to alternate with your other blocks.
- Sew 2 types of fabric blocks the same size into vertical rows for sashing to put in between your rows of quilt blocks. Makes it look more cohesive.
- Arrange your blocks and sew together row by row vertically one row at a time.
- Add a border to your throw quilt.
- Hand quilt using hoops.
- Bind and be done.
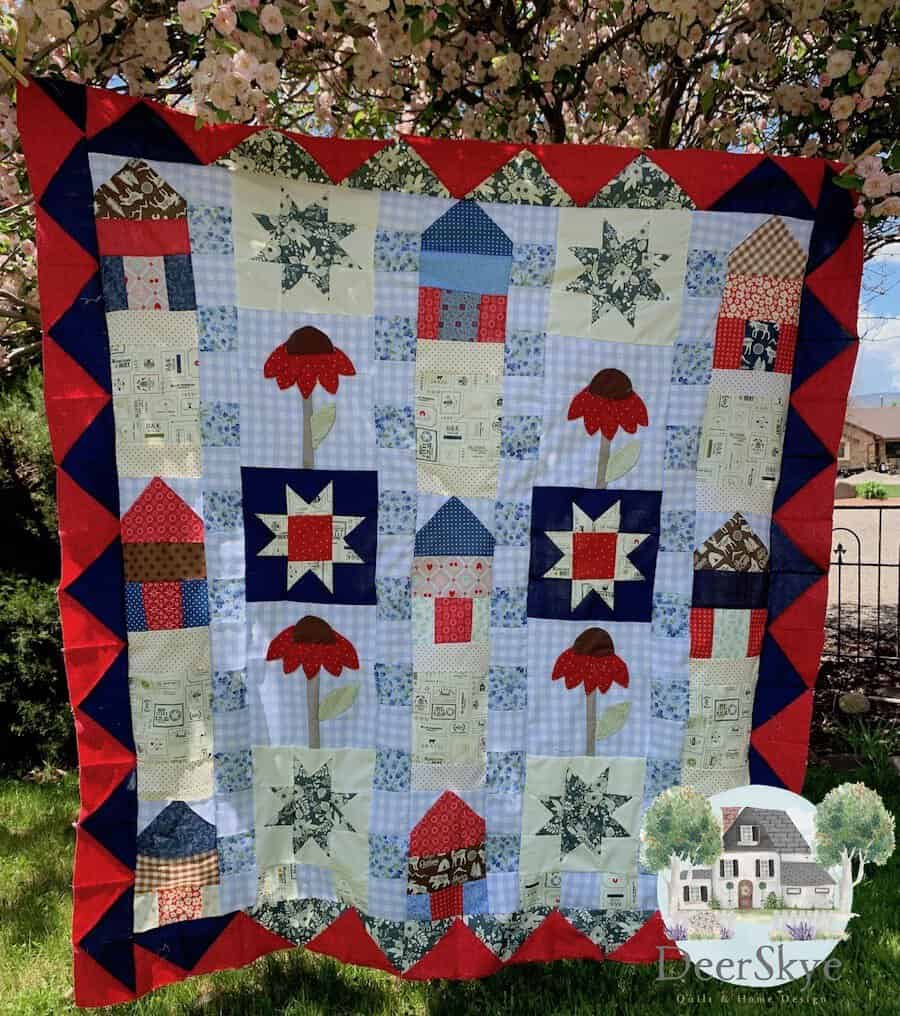
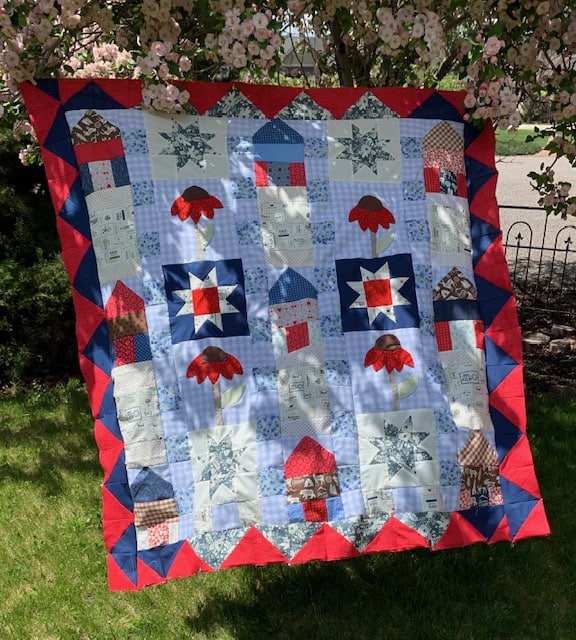
I created my Pemberley Grace throw quilt using reds, creamy whites, and blues and oh ya, don’t forget a few browns. (Did you pick up on the name Pemberley? Yes and yes I am an avid Jane Austen fan…hence and ahhh Pemberley.) Anyway, I actually had made my blue Riley Blake heritage mind eye’s fabric patchy stars a few months ago and was going to use them in another quilt. However they are a favorite of mine. I love the Scandinavian look to the floral Riley Blake fabric and decided to build a throw quilt around them. I also added a couple of dark blue and red patchy stars for contrast and love how it adds to my throw quilt design. I am in the process creating a pattern for this quilt. Finished quilt measures about 52″ across by 57″ long.

Choosing Your Colors
You can use whatever color combo you like. My patchy stars on the top row, middle row, bottom row are blue so choosing other colors for my throw quilt was not too difficult. Reds, other blues, brown is so pretty with blues, and creamy white goes with just about any other color. The way you display your colors in your blocks can really make your design pop! I have no problem putting prints, solids, florals, and checks together. I think busy can be interesting and beautiful if placed in the right place on your quilt.
Quilt Blocks For Your Throw Quilt
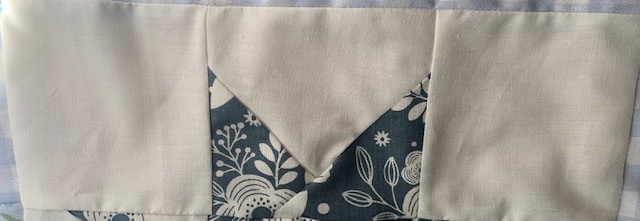
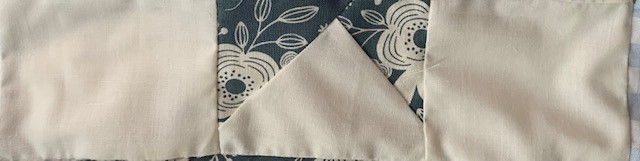
Patchy Stars
If you want to add some patchy stars to your throw quilt, here are the how tos.
- Cut out (8) 4 1/2″ blocks
- Cut (1 )4 1/2″ block for center
- Cut out 8 3 1/2″ blocks for the star points
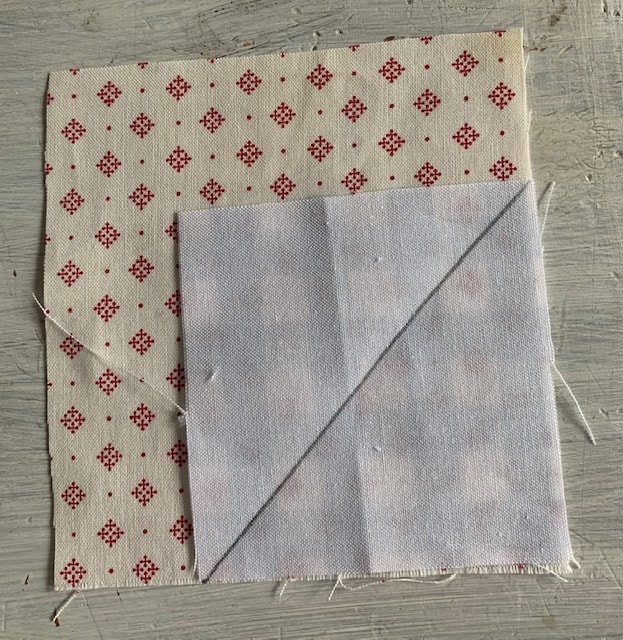
- Take a 4 1/2 ” square and match up a 3 1/2″ square on top of your square in the bottom right corner of your square.
- Sew a diagonal line from the top left side of the 3 1/2″ square to the bottom of your 3 1/2 ” square.
- Fold your 3 1/2 ” square over and crease it. Then cut the underneath extra fabric off so you have your first Patchy Star Point.
- Do this same procedure(sorry this sounds like you are doing surgery but it really is very easy to put these together) on the right side of your 4 1/2″ square. This will make 2 star points of your patchy star.
- Repeat and do this again by making three other squares just like this.
- Now you can put your Patchy Star together.
- Take the 4 1/2″ square you want to be in the middle of your patchy star. Sew it to the right side of your middle square star points facing out.
- Now do the same on the left side of the middle square. Set aside.
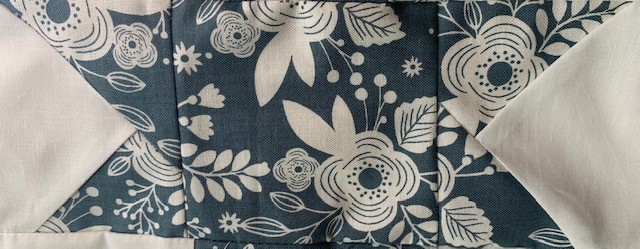
- Sew a 4 1/2″ plain fabric square to one of your star points squares. Sew 4 1/2″ plain fabric square to the other side of your a star points square. Sew this set of squares to the top of your middle row.
- Make one more set of 2 4 1/2 ” plain fabric squares sewn to your patchy star points.
- Match up your three rows so it looks like a Patchy Star and sew them together to make a Patchy Star block.
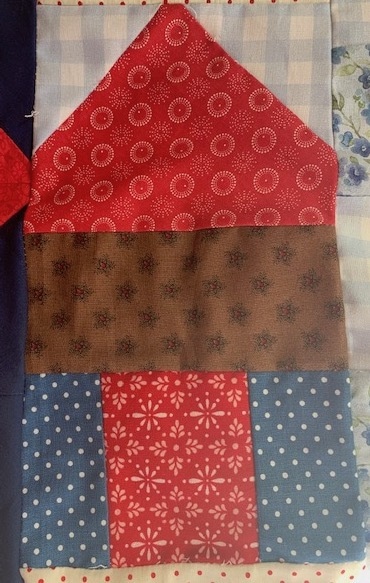
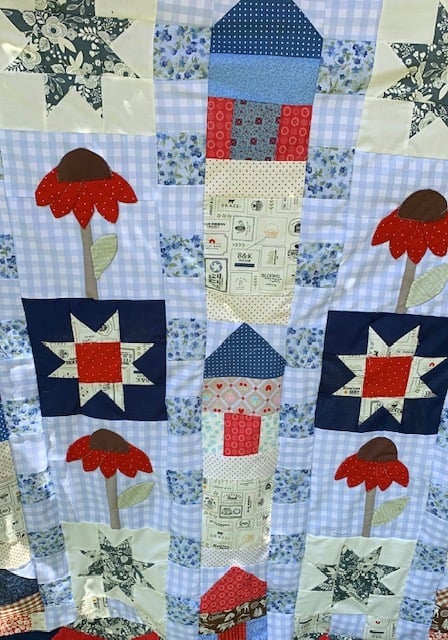
House Blocks
I designed my house block with a basic roof and door. I just wanted something fairly simple and house shaped. Experiment with this. You can make your house as scrappy and simple or as detailed as you want it to be.

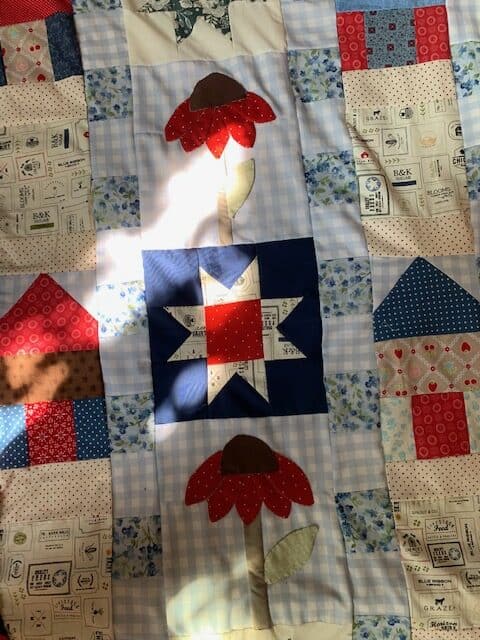
Add Applique
There is something about applique that makes a handmade quilt so charming. I couldn’t resist adding a flower to my Pemberley Grace quilt. I have my own method for doing needle turned applique. Needle Turn Applique Made Easier With No Fusible Web & Stunning Results This flower will be included in my pattern instructions for my Pemberley Grace quilt once I get it created. You can choose your own design to add to your throw quilt. So many options, designs, and possibilities…love having options don’t you?
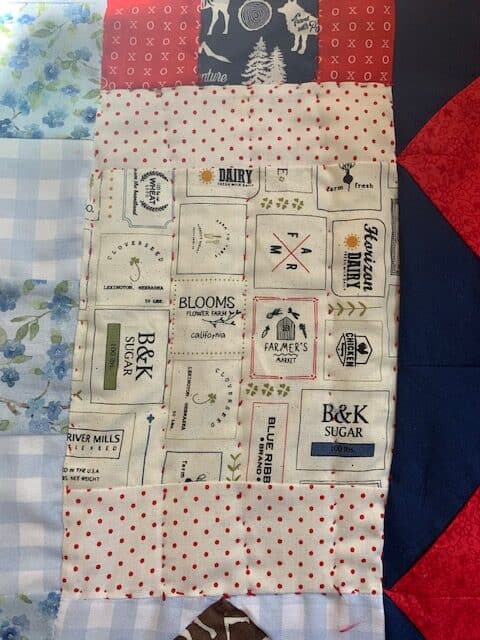
Create Your Own Block
I needed one more quilt block to put between my house blocks. I took a 6 1/2″ square block (I have a square ruler I use a lot for quilting that I measured my squares with) then I sewed to the top and the bottom a red dotted fabric strip. Look at that cute Graze Vanilla Farm Fresh Sweetwater fabric for Moda with the little blocks of farm ads on it. Isn’t it so cute? I loved it when I saw it I knew I had to incorporate it into my Pemberley Grace Quilt. It also comes in the most beautiful blue. I am sure I will have to use both the vanilla and the blue in my future quilting.
Patch It Together With Patchwork
Sashing (strips of fabric in between quilt blocks) helps showcase your quilt blocks. At least that is how I look at it. I will be transparent here. I am not a perfect quilter and that is okay! I love experimenting and free handing and just going for it when I design. I designed four rows of patchwork squares in between my quilt block rows. Once again I loved the blue plaid and the floral fabric and alternating those two fabric choices added so much interest to the overall design of my Pemberley Grace Quilt.
Piece Your Quilt Together-Yay!
Sew your quilt blocks together in rows vertically. Because my blocks were different lengths, it made more sense to sew my blocks vertically rather than horizontally. So houses and my creative blocks alternate for three rows of this quilt. then Patchy Stars and appliqued flowers are sewn together together in two rows of my quilt. I then sewed my patchwork squares in between my rows.
Next…Add A Border
I put a bold border around my quilt. I pulled colors from my quilt blocks to do the border. Instead of using the easiest way to bind a quilt What Is The Easiest Way To Bind A Quilt I chose to bind my quilt with the backing because I want my the points of my border to stay in tact.

Quilt It
Using a large hoop makes hand quilting quite easy. It is relaxing too. Just make sure your backing is smooth on the back of your quilt when you quilt it. Just arrange your quilt in the hoops and flip it over to see if your backing and quilt batting are smooth. Also quilt hoops are adjustable.
Finish Your Quilt By Binding
There are several ways to bind your quilt but choose the method you want to use and bind your quilt. I already mentioned I am using my backing as binding for my Pemberley Grace quilt. This might be a daunting step to your quilting but don’t let it be. Gain confidence in binding a pot holder or smaller project and then attack your throw with gusto and finish your quilt confidently. Have fun! Enjoy the process and get rid of your stress by quilting a little Monday through Saturday and a nice rest on Sunday!
You may also like:
Wondering what to make with leftover quilt blocks? This is a cute and quick way to use those leftovers Something Cute And Quick To Make With Leftover Quilt Blocks
Wondering how to quilt by hand? How To Quilt A Baby Blanket By Hand
Would you like your plants to be healthier? Here is the key: How To Become Your Plant’s Best Friend: Repot It & Tips For Helping Plants Thrive
Recent Posts
Wondering how to become a more confident quilter and how to zero in on what type of quilting really sings to you? How do you identify if you are a maker of quilts and keep believing in your abilities...
Do you need a quilt to give as a gift and need it like yesterday? Here is a fun quick quilt you can make in a day (maybe less) once you have your supplies. It features homemade raw edge, scrap back...