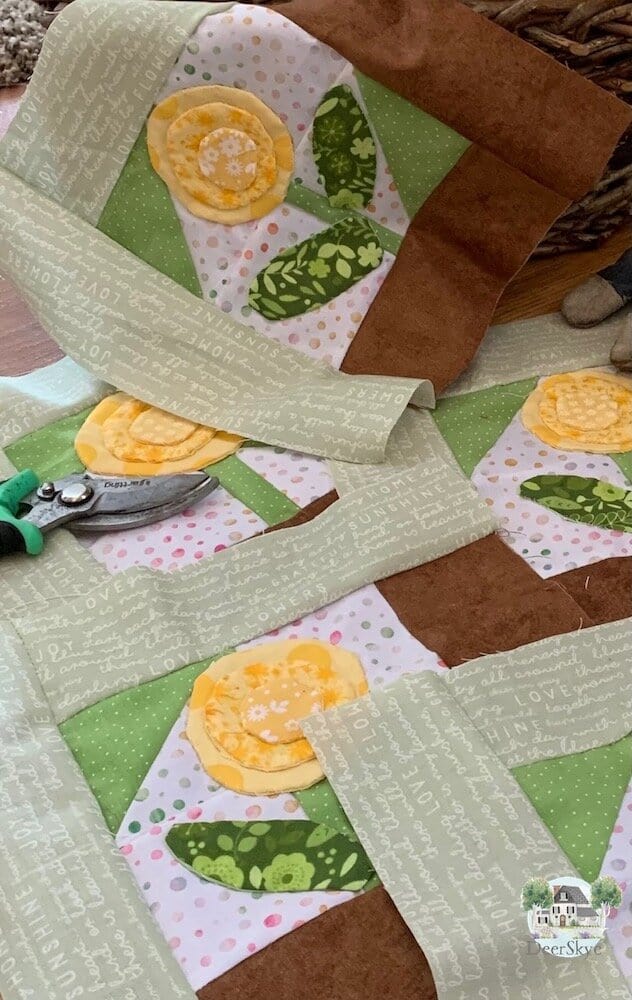
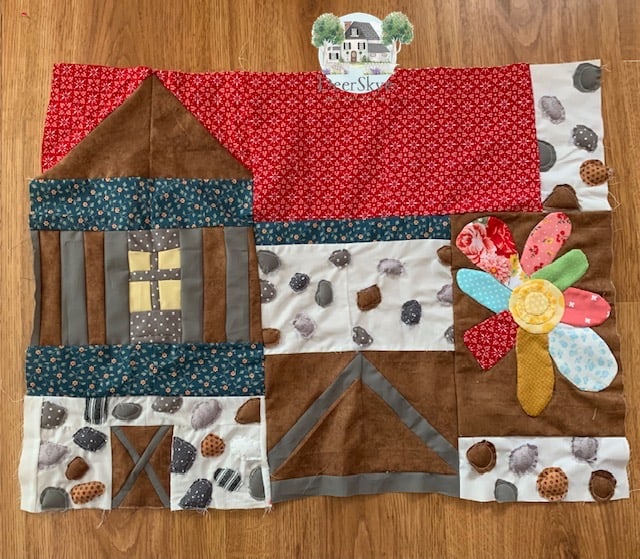
I steered clear of quilt applique for awhile. It seemed like a difficult aspect of quilt making until after trying my hand at a couple of different techniques and coming up with my own method. I wanted it to be simple, with few steps and easier than the techniques I was studying online. So I summoned up my courage and came up with my own technique that has worked well for me. Notice I didn’t say perfect because I think quilting can be imperfect and still be beautiful! It’s all about interpretation. Here is my method.
Try this:
- Cut your applique patterns out of a plastic milk carton. (Cheap and easy to do.)
- Place your plastic patterns on your main fabric and trace around each of your pattern pieces.
- Cut your traced pattern pieces out of your fabric.
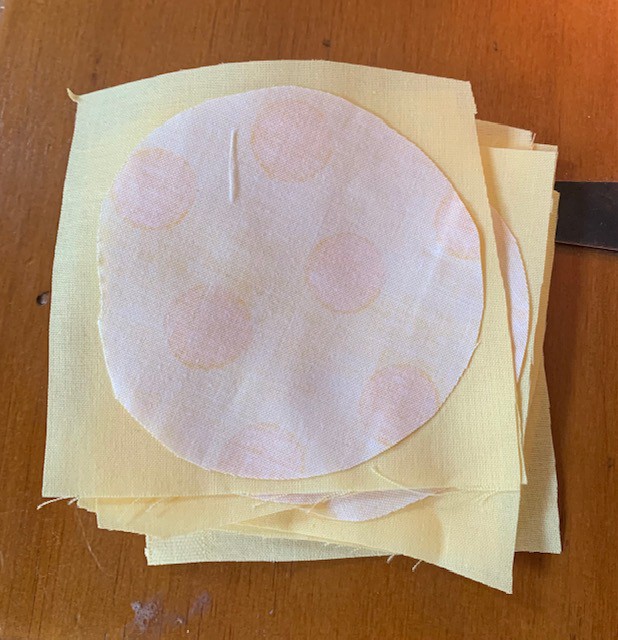
- You will need some lightweight fabric similar in color and lighter than the pattern pieces you just cut out. For each pattern piece, cut out a square or a rectangle slightly bigger than your pattern piece out of the lighter colored and lightweight fabric.
- Place your main pattern piece wrong side up on your fabric square or rectangle. Sew your main fabric piece to your square or rectangle. As you sew, sew next to the edge of your applique pattern piece. Sewing your pattern piece to a square or rectangle slightly bigger than your applique makes it easier to hang on to when sewing the two together.
- Sharp scissors are a must. Cut around the edge of your applique piece next to the outside edge of where you just sewed.
- Make a slit in the backing of your applique piece. (This is the lightweight fabric square or rectangle you sewed your applique to.)
- Use a crochet hook, or scissors to carefully push out the sides of your applique until you get the shape you want.
- You will also need an iron. Once your applique is turned inside out, gently iron around the edge of your applique making sure the backing fabric is turned underneath your applique.
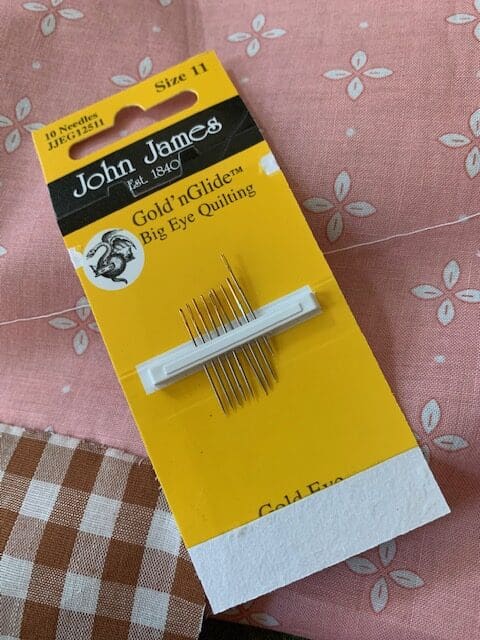
- Use size 11 sewing needles and some neutral colored thread to sew your applique on.
Have you ever been stumped or worried about a problem and you weren’t sure how to fix it? I listen to a lot of useful podcasts and one I really enjoy is the Greg Mckeown podcast. He has many suggestions for stream lining problems and actionable ways to overcome challenges in your work and in your life. Recently he had Alison Jones an author and book coach on to discuss turning chaos into clarity or even creativity. (Hang with me here because this applies to ANYONE) I tried her suggested idea and it really worked! She talked about grabbing a piece of paper and a writing tool and when you have a question you need answered, sit down, give yourself a scant 6 minutes and start writing what you are feeling, frustration, anger, scared, whatever it is get it out on the page. As you write, your thoughts will become clearer and creativity will set in to help you solve or answer your question.
Here is the reason I mentioned the podcast, for a couple of weeks when I went to bed, my mind would not turn off and I would think over and over again about how I could needle turn applique an easier way the many appliques I would be creating for the quilt I was currently working on. At last, creative ideas took over and my problem was solved. At least I think it is easier and the outcome is amazing with smooth edges and easy to applique pieces. Smaller pieces are a bit trickier but can still be done.
It Starts With A Plastic Milk Carton
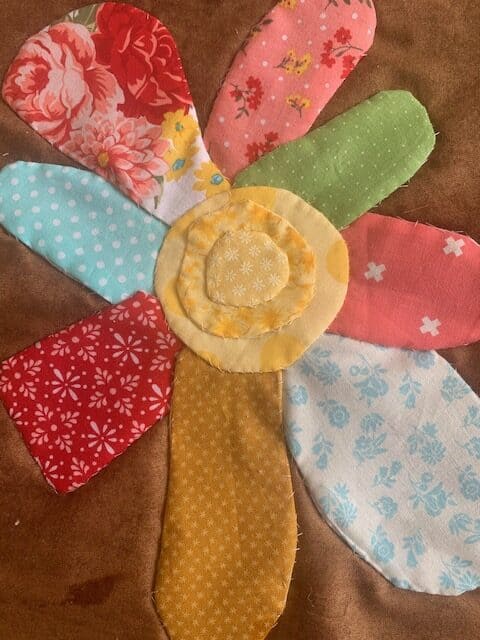
If you are like me, you are always looking for ways to save money when quilting as long as it doesn’t cut quality. Cut your pattern pieces out of a plastic milk carton. It works so great and if you drink milk you buy the container anyway there is no extra expense. Wink, wink! I had seen some varying sizes of plastic shapes for sale to use for quilting that seemed pretty pricey. I needed a round pattern piece for the round flowers I was designing for a quilt. I came up with the idea to trace my pattern shapes out of a milk carton and it worked perfectly for me.
Trace Pattern On Your Fabric
Lay your milk carton pattern piece on your main fabric and trace around it. Then cut it out. Trace your pattern pieces and cut each pattern piece out. If your plastic pattern pieces are hard to see next to your fabric, here is a tip I learned from all my quilt studies. Take a permanent marker and draw around the edge of your pattern pieces. It will enhance your ability to see where to trace your patterns.
Cut Out Squares
Now take a lightweight cotton fabric and place your applique piece on the fabric. Cut out a square slightly or rectangle doesn’t have to be exact just needs to be bigger than your pattern piece cut out of your main fabric. Make sure you use lightweight fabric similar color to what your pattern piece color is. You don’t want it to show through your fabric once you applique it to your quilt block. The square or rectangle makes your applique much easier to hang on to as you sew around it. This also makes your edge smooth once you trim it, turn it inside out then iron it.
Sew Your Main Fabric Applique To A Fabric Square
Take your applique piece and lay it wrong side up on the fabric square you cut slightly bigger than your applique. Right sides should be together. Sew next to the edge of your applique. Now take your scissors and trim around the edge of your applique. Quilters who have been appliquing for years may gasp but I’m telling you I love the finished look of the applique!
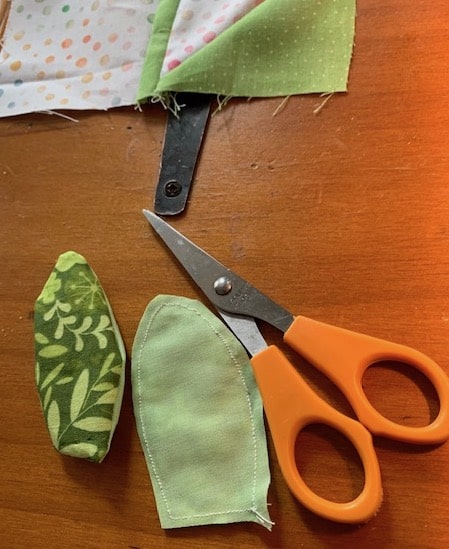
Cut A Slit In The Back Of The Applique
Now take your applique and pull the two pieces of fabric apart enough to make a cut on the back side of your applique. Now cut around the backing fabric of your applique fairly close to the outside of your stitching. Flip your applique inside out. Carefully straighten out the edges of your applique with a crochet hook or your scissors but be gentle.
Go To Press
Take a hot iron and gently press around the edge of your applique. Try to press the edge of your applique so the backing fabric is underneath the edge of your applique. Don’t be too worried if some of the backing shows you can turn it underneath as you sew it to your quilt block. Your applique might seem bulky at this point but never fear. Give it a try. The lightweight backing gives stability to your applique helps your applique stand out after sewing it to your block. Once you press then sew, it lays flatter than your think while making a beautiful appliquéd statement.
Here We Sew
When you see needles that are size 11, you might be shocked. I was! They are so small and short. I didn’t even know if I could hold it in my hand to sew. I was amazed! However that said, once you start sewing with them you will love them. They work great for appliquéing fabric pieces to your quilt blocks. Take your applique and center it where you want to attach it to your quilt. Put one pin in the center of your applique or you can glue your applique where you want it. (I don’t glue mine.)
Stitching Your Applique To Your Quilt Block (This Can Be Fun And Relaxing)
Take small stitches as you sew. Knot your thread and come up through the back of your quilt block. You are going to catch your backing fabric first close to your applique then catch the fold of your applique and bring your needle up through. Again, catch the quilt block fabric next to your applique and stick the needle through the top fold of your applique. Pull your needle through. It will make a little tick mark. Repeat. (This gives your edge a nice rounded look.) You can get into a rhythm of sewing pretty quickly. It can actually be relaxing and fun. Leave your applique sewing where you can pick it up quickly when you need a little break or distraction from your problems. Get into the groove of our sewing on an applique and then go back to whatever you were doing. This can help bring some serenity to a hectic day and help you feel like you have accomplished something in your day. One applique sewn gets you closer to your quilt being completed right?
When my thread gets small and it’s time to change it out, I make a simple knot on the back of my quilt block before cutting my thread and re threading my needle. Lighting is important too. Especially when you try to thread the size 11 needles. Make it pleasant while you sew. Call a friend and chat or watch a movie or listen to music or a podcast. You will be quilting over the top of your appliques once your quilt top is sewn and put together so between hand stitching and quilting over it, your appliques should be secure.
You may also like:
A fun idea anytime you quilt is to add a handmade quilt label. So easy to make here is one idea How Do I Make A Simple Quilt Label?
You don’t have to make a large quilt. You can get started making a mini quilt to use as a table runner or wall hanging. Check this out What Are Mini Quilts Used For? Really Unique Ideas
Here is a really cute and fun gift idea. How about making a giant quilted checkerboard What Can I Make Out Of Quilt Squares? Quick Sew Woodland Animal Checkerboard Game
Recent Posts
Wondering how to become a more confident quilter and how to zero in on what type of quilting really sings to you? How do you identify if you are a maker of quilts and keep believing in your abilities...
Do you need a quilt to give as a gift and need it like yesterday? Here is a fun quick quilt you can make in a day (maybe less) once you have your supplies. It features homemade raw edge, scrap back...