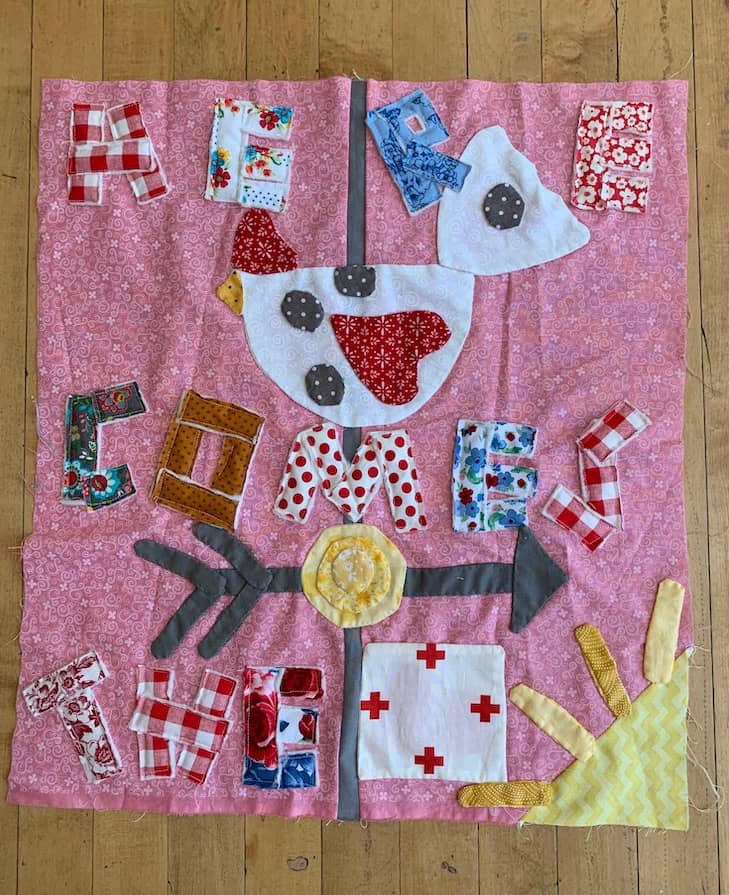
Here is a technique for appliquéing letters to a quilt. This technique makes your letters stand out because they are puffy and have a 3 D look to them. You can use this applique technique to add letters to a quilt that also has turned edge applique on it. This will give the quilt you are making a unique “turn heads” kind of look. You can sew your letters on with even the most basic of sewing machines.
Time to gather the supplies you will need:
- Fabric of choice
- Pattern for letters of the alphabet or make up your own pattern for letters
- Low loft batting
- Sewing Machine
- Sharp Scissors
- Pins
I have been working on a quilt for several months that I am giving to a friend. To say this has taken me hours, months, days is an understatement. It’s a labor of love. This friend suffered a terrible tragedy in her family. Not knowing exactly what to do for her, I decided to make an appliqued quilt for her. I wanted to design something cheery and special so that each time she looked at it, it would make her smile. Giving a quilt to someone can have that effect. It has taken me much longer to create than expected because life happened and we visited my husband’s parents a lot before his sweet mother passed. She was a great example of gifting quilts to her precious grandchildren and others. Never underestimate the value of giving a beautiful quilt to someone might need one. It took a while to think of a saying I could applique on her quilt. Finally the light bulb came on, “Here comes the sun!” Despite her tragedy she is a light to others and I believe there have to be brighter days ahead for her and her family.
Pick Out Your Fabric
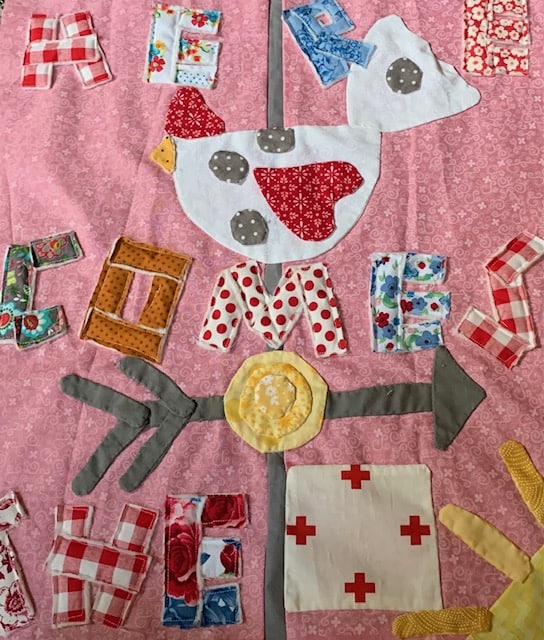
Start by choosing the fabric for the letters you want to applique. The quilt I am making has a lot of colors and fabrics to choose from. I chose fabrics for my letters from the fabrics that I used to make other quilt blocks from for my friend’s quilt. On this quilt, I have both raw edge applique and a unique method of needle turn applique all in the same quilt. You can take a look here Needle Turn Applique Made Easier No Fusible Web & Stunning Results.
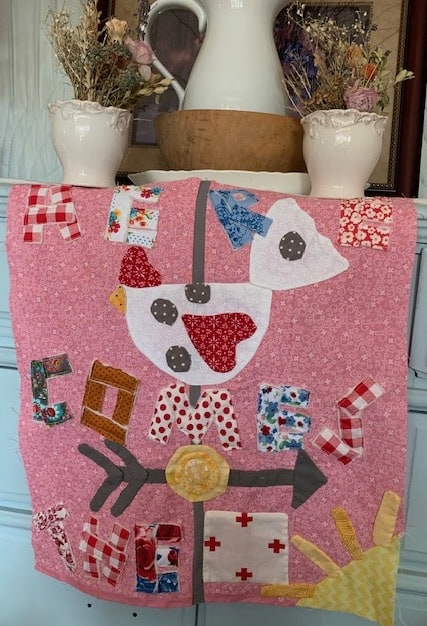
To have a more cohesive look I made sure that one letter from each row was made from the same fabric. (You will notice from the picture above, that my red check fabric is used for the H, the S, and my other H. If you prefer, make all your letters out of the same fabric. My quilt is whimsical in nature so mixing it up with fabrics was definitely in order! This quilt block alone could be used for a mini quilt to hand on a wall but I designed it to adorn the top of my throw quilt.
Pattern For Letters Or Make Your Own
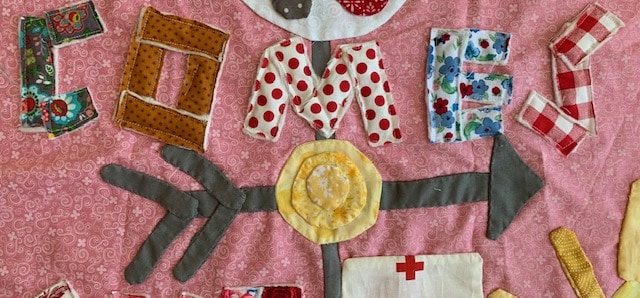
Find a pattern you would like to use for your appliqued letters or make up your own pattern. I cute out an H to begin with since it is the first letter in the saying I am using, “Here Comes The Sun”. I measured the rest of my letters to match the size of my first letter. I tried to make my letters the same height and same width as the H. Speaking of style, I made them all big block letters all capitalized. Funny thing, the word sun didn’t fit on my large quilt block. So I sewed a rounded sun in the corner and turned edge appliqued the rays of the sun instead of spelling it out. Kind of a cute solution to a problem I think haha! (Side note here: never panic if you make a mistake or come up with a weird problem when creating your quilt. It might seem a little frustrating at first but just step away from your quilt, sleep on it whatever you need to do, and then go back to the quilting board so to speak and find a creative solution. With a refreshed look, you can come up with a way to fix it.)
Low Loft Batting
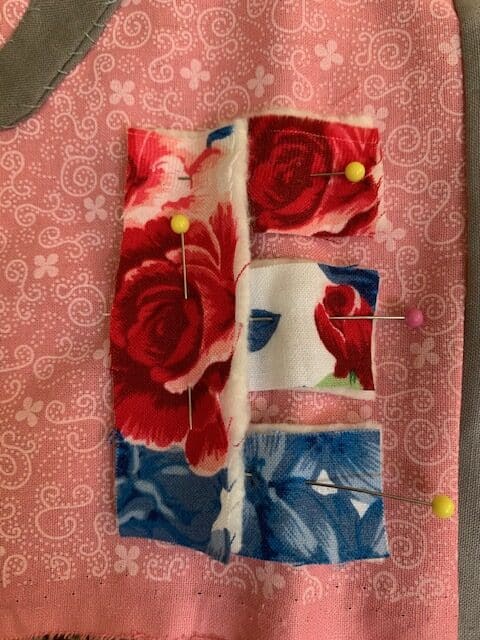
Here is where the puffy to your applique comes in. Trust me! The letters really stand out and look so cute! For each letter you make, you will cut out a letter to match it cut out of low loft batting. The batting will be placed on your quilt block with the fabric letter placed on top of it with right side facing up. Set each letter in rows where you want each to be to get an idea of spacing.
Sew, Sew Here We Go
I used a straight stitch on my letters. A zigzag stitch would work too. Most raw edge applique is sewn with a zig zag stitch on the sewing machine. I liked using a straight stitch for these puffy letters. I like how it looks too. Now that you have your letters ready to go pin them on one at a time. Then sew one at a time. (That way you don’t catch pins as you turn your quilt block when sewing your letters on.) Outline each letter by sewing just inside the edge of each letter. I think machine stitching is best for these letters although if you are doing a mini quilt (do you know what a mini quilt is?) What Are Mini Quilts For? Really Unique Ideas You could use a hand stitch sewn with Perle Cotton thread to attach your letters to your quilt block(s) with. A mini quilt doesn’t get as much use so you could safely do hand stitching with your raw edge applique. Can You Hand Stitch Raw Edge Applique? Then do a running stitch around the inside edge of each letter. So sometimes hand stitching works when you are creating raw edge applique.
Trim Your Puffy Letters
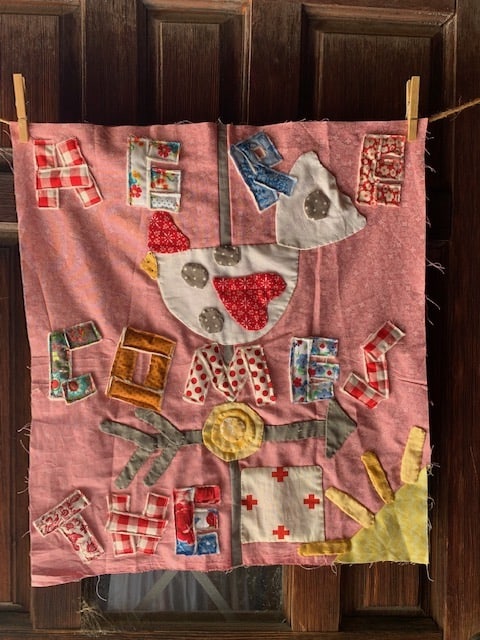
Once your letters are sewn on, carefully trim around each letter. The low loft batting will show a bit outside the edge of your letters when you sew them to your quilt block. Don’t worry about it. Trim your letter where you feel it looks best The puffy look is so charming and magical. I know I use these phrases often but I’m all about enjoying the moment! As far as it fraying, it may. I am not worried about it. I think it will add to the overall look of my quilt block.
Sharp Scissors
It’s important to use sharp scissors when cutting your fabric and cutting your batting letters out. It will help make your life easier when attempting this feat. Also a word about sewing machines. At this point in my quilting, I don’t have a fancy sewing machine. It is a machine that cost me about $100. I have had it a really long time. Probs over twenty years. Just being transparent here but don’t think you can’t sew if you don’t have the latest and greatest sewing machine! I hope to upgrade one of these days but this hasn’t held me back on my sewing journey. I have learned how to love my very basic of sewing machines. My cute Husky Star. We’ve created some pretty amazing things together! Wink, wink and smiley face!
You May Also Like:
Here is a pattern for creating a cute raw edge applique and needle turned applique floral table runner. It’s fun. It’s easy and here you go Fun Easy DIY Quilted Raw Edge Flower Applique Table Runner
Ready to take on a bigger applique project? Try this Make A Farmhouse Throw Quilt With Applique
You can make a cute flower and bunny applique banner. It can be used for Spring, Summer, or Easter and here are the details Fabric Bunny And Flower Applique Banner DIY: How To’s
Recent Posts
Do you need a quilt to give as a gift and need it like yesterday? Here is a fun quick quilt you can make in a day (maybe less) once you have your supplies. It features homemade raw edge, scrap back...
You know those orphan blocks you just can't bring yourself to throw away? They took some time to make but they just didn't fit in the quilt you were making? Well I've got a solution for using them. A...
