Are you looking for the confidence to create a quilt and see it through from beginning to end? Quilt as you go is a great way to start your quilting journey. This method helps you put a quilt together in a very easy creative way. Here is the recipe for making a simple quilt as you go.
- Choose an easy to make quilt pattern.
- Cut out quilt pieces.
- Sew 2 quilt blocks together in your first row of quilt blocks. Repeat this for the rest of your row of quilt blocks depending on how many blocks are in your row. This is for convenience sake.
- Iron Seams open and flat.
- Cut batting to fit each 2 blocks section you sewed together.
- On your sewing machine, sew a straight stitch down the middle where your 2 quilt blocks join up. Outline each individual square with a straight machine stitch this way.
- Decide what pattern you will sew on each quilt block. Outline each shape on your quilt block by sewing around each one on your quilt block. Now add to the sewing you just did, a sewing stitch design of your choice on each quilt block using your sewing machine.
- Once all the blocks are quilted in the row. Sew each set of 2 quilt blocks together side by side to make a row of quilt blocks.
- Repeat that process with each of the rows on your quilt. Sew each row of quilt blocks into rows so you are ready to join the whole quilt.
- On each row you just created, sew in between each quilt block that you added to your row.
- Iron seams open.
- Sew each row together until your entire quilt is sewn together.
- Again iron each seam open.
- Finish with easy backing method or finish by backing your quilt and adding binding to it.
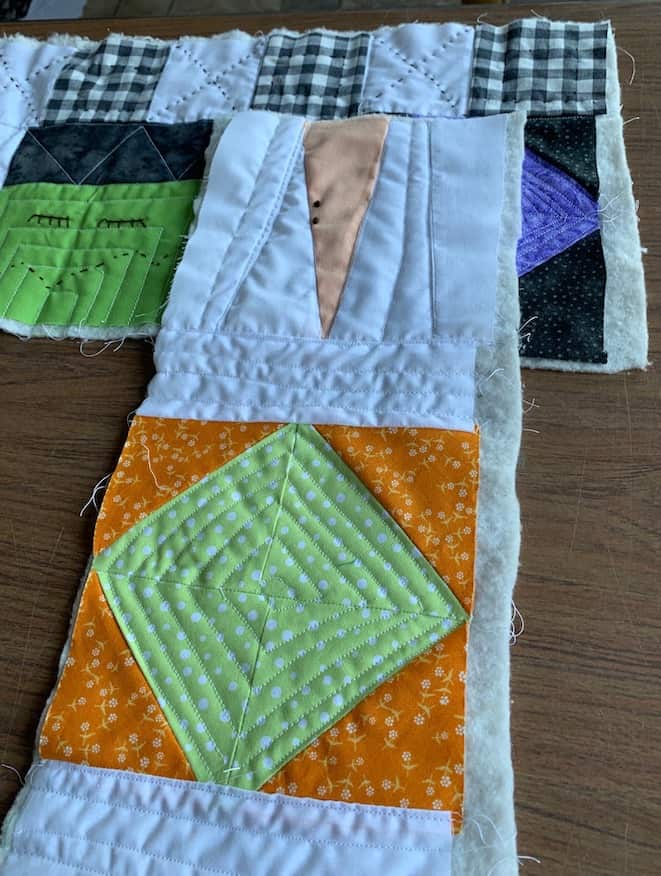
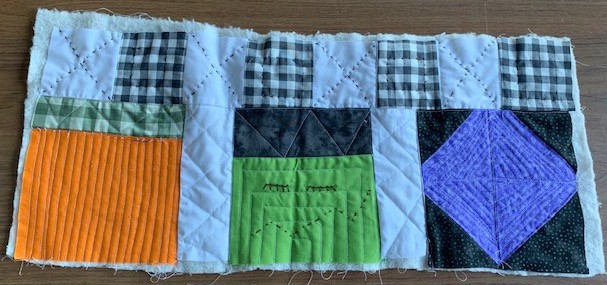
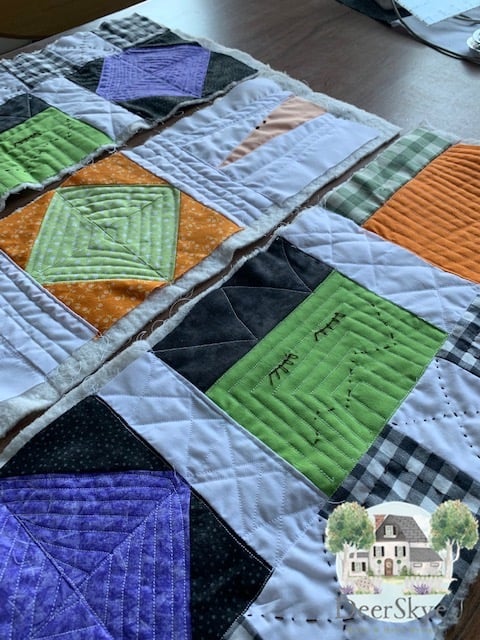
I am not a perfect quilter but I love to create and quilting is a great way to use my creativity! I like to find shortcuts and better cuts so to speak to make quilting easier and enjoyable. I got up the nerve to head to my machine and try quilting as I went or the quilt as you go method. I sewed and quilted a mini quilt in about two days using the quilt as you go method. Designing a quilt is the part that takes me the longest to do. The great thing about using this method was it went so fast and made the whole process easier for me. It also accented my quilt pieces so when I sewed diamond shape quilt block and added straight stitches going round and round in a type of circle it turned into a spider web. Just the look I wanted for my Halloween mini quilt! So it is tried and true and I think it will work for you too. (A whole lot of rhyming words there haha.)
Simple Quilt Pattern
Start this whole process with a very simple quilt pattern. How about my Halloween Monster and Mummy Mash quilt here How Do I Make A Halloween Quilt For Beginners? Pretty simple pattern using only one pattern piece for most of the quilt. You want to start out with a quilt that is easy to make so you don’t end up with a lot of intricate pattern pieces to sew around on your sewing machine. You can do that eventually but for now start with something simple. Even an easy patchwork quilt block would work because you could sew straight lines or even X’s on each square. Just make sure your patchwork squares aren’t too small.
Cut Out Pattern Pieces
Grab your rotary cutter and your self healing cutting mat (called self healing because its sturdy and you won’t cut through it as you cut out your pieces of fabric.) It will also protect the surface of your table or floor. Cut out all of the pattern pieces you will need for your quilt. I have to admit this isn’t my favorite part of quilting but it is absolutely necessary so get to it. To make it more enjoyable though, put on some music you would like to listen to or a movie you’ve been wanting to see. I love listening to a variety of podcasts or listening to a story online while I cut out pattern pieces and work on my quilting projects.
Joining Quilt Blocks
Because the quilt I was making was small I could handle sewing three quilt blocks together to quilt on my sewing machine. However, if you are sewing a big quilt I suggest you only sew two quilt blocks together at a time. Begin with your first row. Sew side by side or put sashing in between 2 or 3 quilt blocks until all the quilt blocks on your first row have been sewn together this way. Stack them on top of each other starting with the beginning quilt blocks in that row to the end pieces. This will make it easy for you and they will be in order when you get ready to sew each row together. Repeat this method for each row of your quilt.
Use Your Iron
Each time you sew seams, you should press them. Press your seams open and flat but don’t press for too long or too hard. You don’t want to distort your quilt block.
Add Batting
Choose the right batting for your quilt. I used low loft batting which means a thin type of bat because number 1, I am going to hang my mini quilt on the wall and number two, this makes it easy for your needle to sew through both thicknesses on your sewing machine. Lay the batting down and cut it slightly bigger than your quilt blocks. Do this same step for each set of quilt blocks you have sewn together. Side note here: if you are a pinner and like the comfort of knowing your quilt blocks and batting are secure go ahead and put a few pins across the top. I didn’t use pins because my fabric was pretty good at staying in place on my batting.
Sew A Straight Stitch Between Blocks
Ok take a deep breath and get ready to sew. Just kidding. It isn’t that scary! Take the first two quilt blocks you have sewn together and sew a straight stitch right down the middle of your quilt blocks. Then sew around the basic outline of the shapes on your quilt blocks. Do this for each set of quilt blocks you have sewn together. Kind of like rinse and repeat.
Iron Again
I love how my quilt blocks look when the seams are ironed open and flat. A good rule of thumb like I already mentioned but it bears repeating, you don’t have to press too hard or give your seams much heat. Just lightly press to achieve a professional look which really shows off your sewing!
Machine Stitch Design
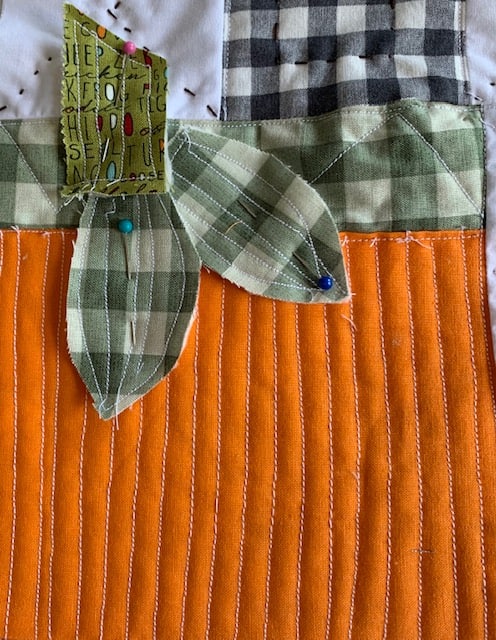
Here is where you can let your creativity flourish! I study the top stitching on quilts that are hand quilted and long arm quilted. I notice the quilted design sewn on the quilt block design. I was inspired by a straight stitch sewn horizontally over and over on a quilt block. I used this for my pumpkin quilt block. I lined my quilting foot up with the edge of my quilt block and sewed the first line. From that line I measured the next sewing line with the width of my sewing foot and “sew” on (pun intended!) until my quilt block was quilted.
I planned out each design I would sew on each of the individual quilt blocks on my mini Halloween quilt before I started machine quilting. I chose to take the easy route on this quilt and used a straight stitch for all of my blocks. You can jump in though and try zig zag or other type of stitches on your sewing machine. Practice on extra pieces of fabric and come up with a design that you think will work for your quilt blocks. Sew all of your quilt blocks that way. I sewed matching quilt blocks with the same design so my quilt would look cohesive. You can even use the same stitch on all of your quilt blocks if you want. Can you say cre-a-tivity? It is key here. You give yourself permission to create the stitching/ quilting design you want on your quilt blocks.
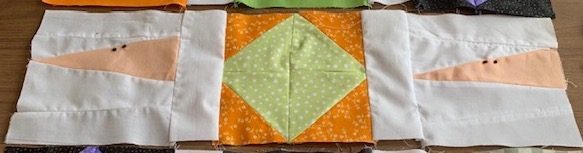
Join Quilt Blocks To Form A Row
At this point, you have your blocks machine quilted and it is time to join the quilt blocks into a row. Sew your two by two or your three by three quilt blocks that are machine quilted and sew them into one row. By now your quilt blocks will be looking “quilty” (not a word but you get my drift). Go ahead and iron the seams open.
Back To Your Sewing Machine
Once you have all of your rows sewn, sew or quilt a straight stitch in between each quilt block like you did when you sewed 2 or 3 quilt blocks together. Iron each seam open.
Sew Rows Together
Your next step equals magic. It puts your quilt topper altogether. Sew each row together starting with the first row and each row thereafter. Can you guess your next step? Ironing right! Iron those seams across your quilt open and flat. Lookin’ good!
Backing Fabric
If you plan to do any hand stitching on your quilt to accent it, then do it now before you add the backing. Maybe that isn’t in your plans but I added little to some of the smaller patchwork blocks I sewed on my quilt. Choose a fabric for your backing. You can do the backing one of two ways.
1st Backing Idea:
- Trim backing fabric to fit your quilt topper.
- Place your backing on a table or on the floor right side up.
- Now place your quilt topper right side on top of your backing fabric. This means your quilt has right sides together.
- Sew on your machine a quarter inch seam all the way around three sides of your quilt. Leave the bottom open.
- Turn your quilt inside out.
- Pin the bottom of the open side of the quilt together, pin, and hand stitch or machine stitch it closed.
- Top stitch all around the edge of your quilt. Or tack a few stitches in the middle of each quilt block using thread that matches the fabric so it isn’t a focal point of your quilt. This stabilizes your quilt and holds the front and back together since the top is already quilted.
2nd Backing Idea
- Lay your backing fabric wrong side up.
- Place your quilted topper wrong side on backing fabric so the right side of the topper is facing up. You have your quilt sandwich ready to go.
- Sew a quarter inch seam around the edge.
- Cut backing fabric to match your quilt topper.
- Then put binding around the edge of the quilt to finish.
Quilt as you go can be a time saver in the long run. It is also rewarding to see what your quilt looks like designed with a quilting stitch you sewed on your sewing machine by you. Take time to practice a few stitches and then apply it to your quilt as you go and as you sew. This is an easy way to complete a quilt.
You May Also Like
Wondering how to choose quilt backing fabric for your quilt? Take a look at What Is Quilt Backing Fabric? Everything You Need To Know
Here is a cute way to make a quilted table runner from a fabric panel. How Do You Make A Table Runner With Panel Fabric?
Quilting tools make all the difference when you get serious about quilting. What Are The Basic Tools Needed For Quilting?
Recent Posts
Wondering how to become a more confident quilter and how to zero in on what type of quilting really sings to you? How do you identify if you are a maker of quilts and keep believing in your abilities...
Do you need a quilt to give as a gift and need it like yesterday? Here is a fun quick quilt you can make in a day (maybe less) once you have your supplies. It features homemade raw edge, scrap back...