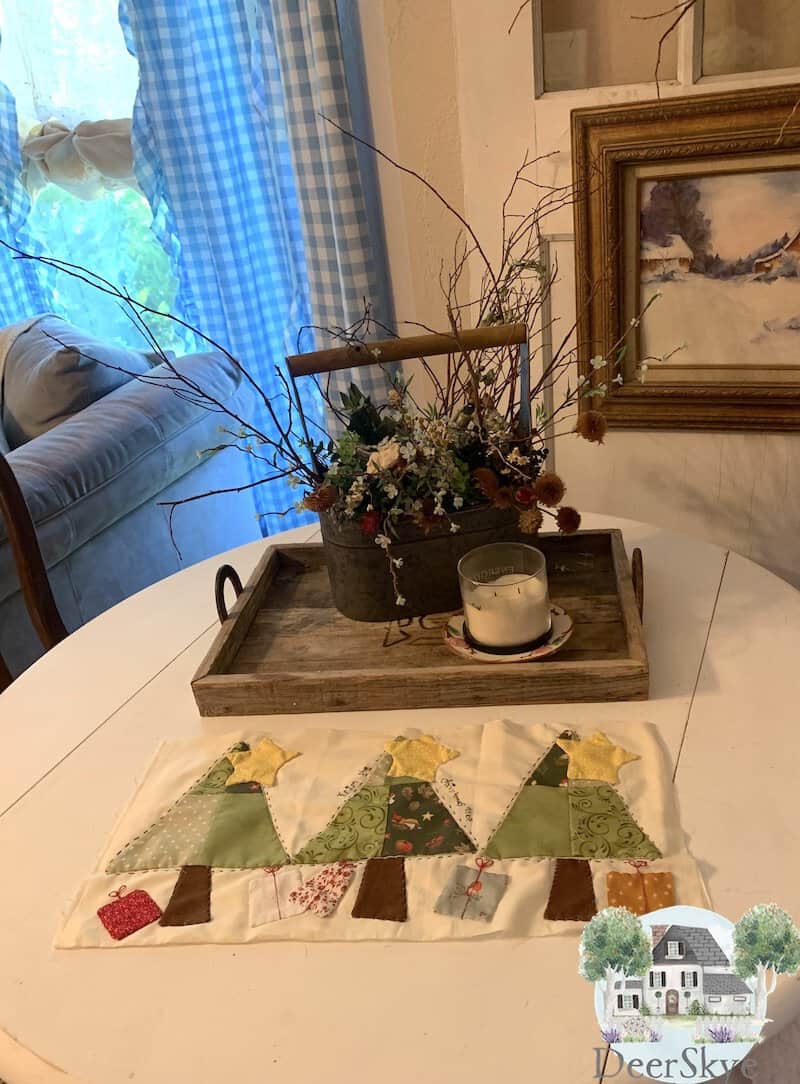
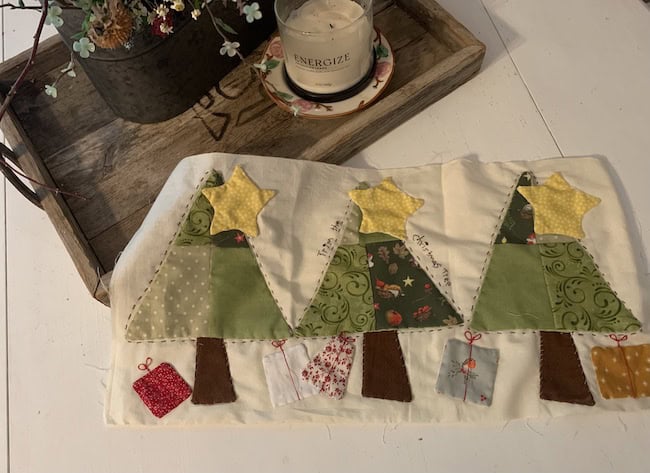
This simple to make Christmas table runner has all the things…slowstitching, patchwork and applique. It is as easy as sewing up some patchwork blocks, cutting them to look like Christmas trees, a dash of applique, and then slow stitching around the trees. This runner can be made in a variety of color ways to use all year round too! You’ll love it so much you may want to make several runners to give as gifts and who doesn’t love a thoughtful handmade gift? You can take this pattern and make other projects with it too.
To Make this fun project:
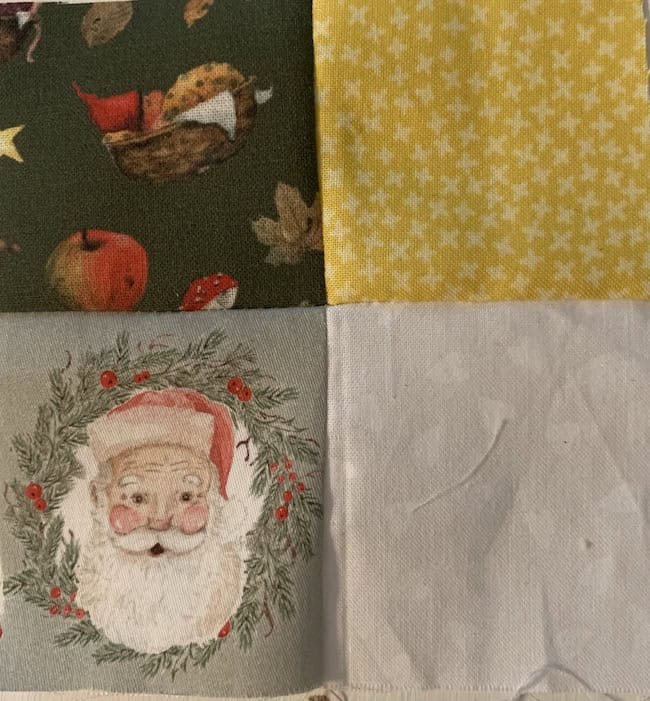
- Choose your fabric colors and a backing fabric for your applique pieces.
- Cut out your patchwork squares.
- Sew your squares together to make 3 four patchwork squares.
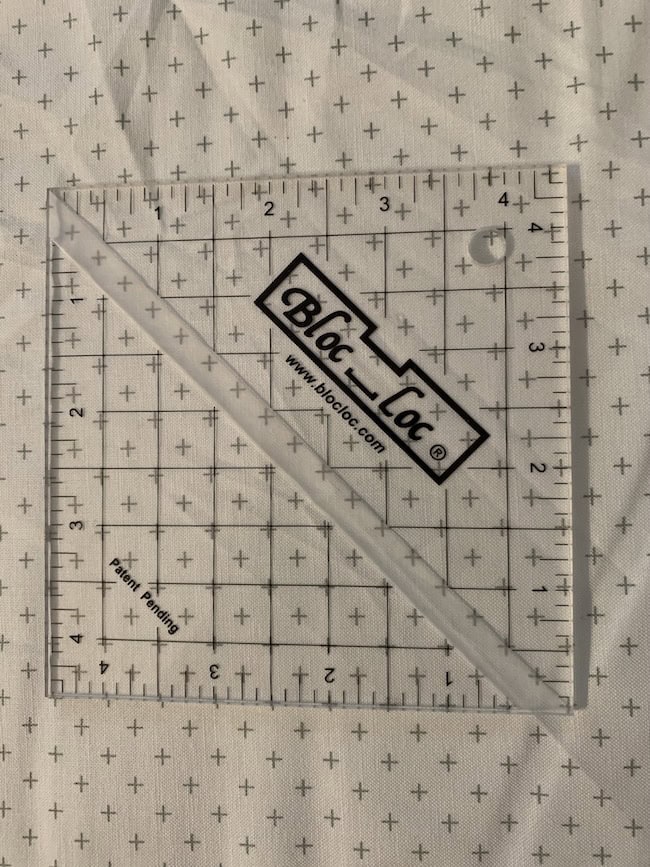
- Grab a ruler and cut your squares to look like trees.
- Cut out the stars, tree trunks, and presents.
- You will need a 21.5″x 11″ piece of muslin or other fabric for your runner.
- Sew backing to your applique pieces and turn right side out.
- Attach your applique pieces by hand stitching to your background fabric.
- Hand sew around your applique pieces with some slow stitching.
- To make your runner more whimsical, add some words by stitching them on.
- Finish Your Table Runner
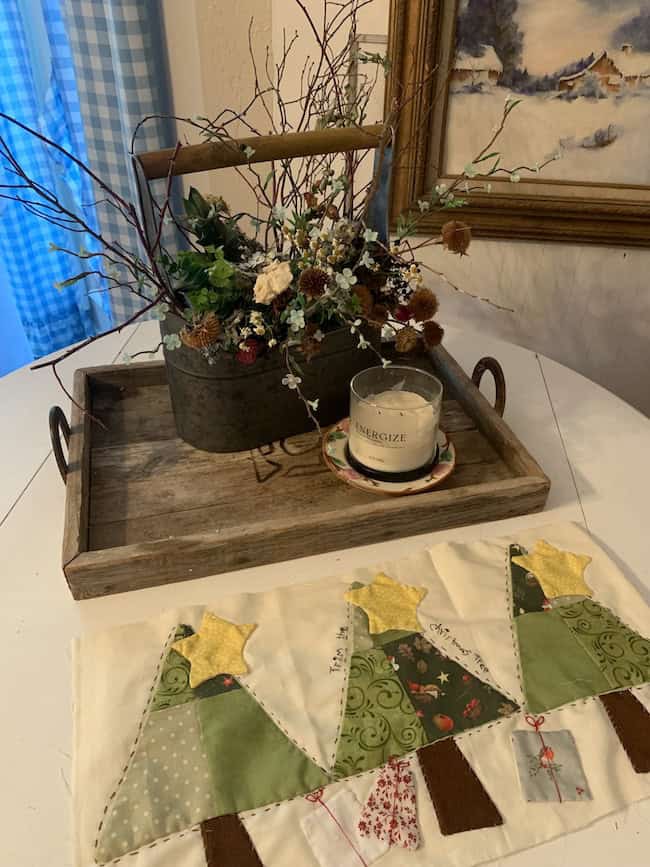
This is a project you can make before Christmas but the beauty of this pattern is that you can turn several of these runners out last minute during December if you need to. It can be made into a variety of Christmas projects like pillows, placed on a mantel, make one tree and frame it, placemats, hot pad, etc… Isn’t this type of pattern the best?

Choose Your Fabric Colors
You can get so creative in this step. Technically this is a Christmas table runner but really you can make your trees so that you could use this runner year round. I used a variety of greens for my trees. You can go with blues, pinks, reds, really the sky is the limit. For my background, I used a simple off white muslin. My trees and presents really stand out that way. Oh and another thing, this is a great way to use up your fabric stash and show off your slow stitches which show up really well and add a cute accent to your runner.
Patchwork Squares
I used a 4″X4″ acrylic square ruler. If you don’t have one, you can make your own pattern out of cardboard or card stock. Cut 4 blocks from four different fabrics you have chosen to make your trees with. Repeat this process three times. You will have (12) 4″x 4″ squares once you finish cutting your blocks all out. (You can make your runner longer by making more patchwork squares. Use a bigger block for your patchwork trees if you want your trees to be bigger and your finished project larger than the one I made.) Using patchwork for your trees adds such a jovial look to your work of art. Because after all, you are creating your own work of art.
Sew Patchwork Squares
Easy peasy make a four patch square by sewing your four blocks together. Two blocks on the top and two blocks on the bottom. You should have three complete patchwork square blocks when you finish. Press each patchwork square so it lies beautifully flat. Don’t you just love to look at and momentarily admire your patchwork and applique work once it is pressed…I must confess I sure do.
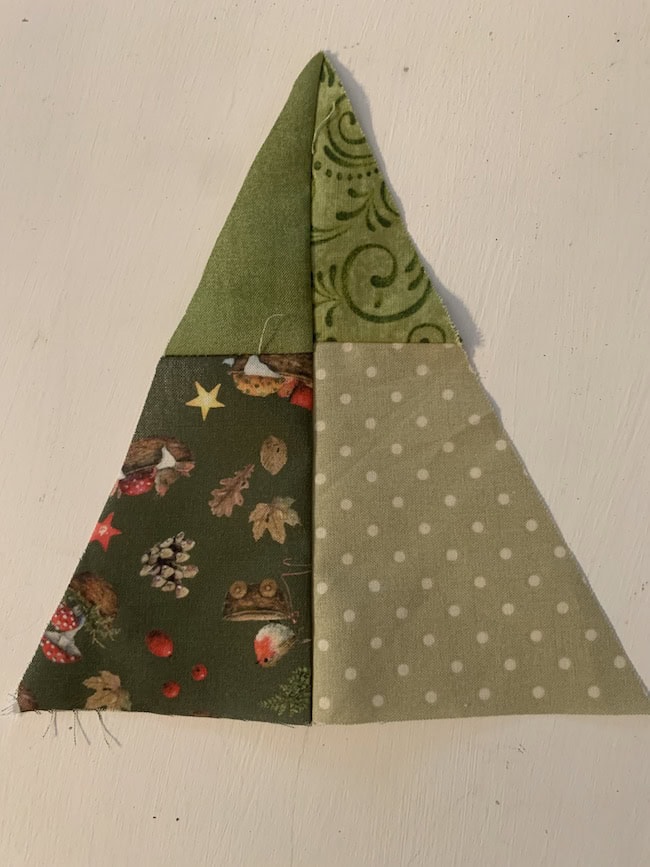
Shape Your Patchwork Into Trees
You will need a ruler for this next step. Don’t panic, just grab a 12″ ruler and this step is also easy to do. Put your patchwork square on your cutting mat. Lay your ruler on the diagonal on one side of one of your squares. Place it at the top in the middle of your square. Then with your rotary cutter cut your square up the side of the ruler. Now do this same step to the other side of your four patch square. You will now have a triangle shape. Do the same to your other two squares. It’s getting exciting as your Christmas trees start to take shape. Haha.
Cut Out Your Other Applique Pieces
Now cut out:
- 3 tree trunks
- 3 stars
- 5 present shapes
I have a special way of doing applique. It isn’t the usual needle turn applique. By taking a little extra time and sewing backing on your applique pieces, I think it actually makes appliquing easier and a bit quicker when attaching it to your quilt. No frayed edges is the best thing of all as a result of this process! I will explain how to do this so read on my friend.
Your Main Fabric For Your Runner
A word about your “artist palette” because this is what your main table runner fabric is. I chose to use muslin for my table runner as already mentioned. You can choose a fabric you like for your main background fabric to attach your appliques to. I really do think of it as an artist’s palette. It should be cut 21.5″ for your length and 11″ for your height so to translate it measures 21.5″ x 11″.
How To Add Backing To Your Applique
Take each of your triangle shape trees and one at a time place your tree right sides together with a piece of scrap fabric cut in a square slightly bigger than your tree shape. Sew a straight stitch on your sewing machine close to the edge of your two fabrics. This will help explain the process How To Make Your Applique Stunning And Bespoke .Cut close to your stitching to trim up the applique shape. Then with sharp scissors make a slit in the back of your scrap fabric and turn your applique piece inside out. With your scissors, slip them inside your applique and carefully push out the edges of your applique all the way around it. Press flat. Make sure your backing doesn’t show around the sides of the applique when you press it. Press so your backing doesn’t show. Do this process to each of your applique pieces.
Enjoy Hand Sewing Your Appliques On
First set the mood so to speak. Put on some relaxing music, watch a movie, or listen to a podcast. Let the slow stitching begin. This part of creating your project can be relaxing and help ease your mind from stress. Place a patchwork tree on the middle of your table runner. Slip one of your tree trunks barely underneath the tree. Pin the tree trunk to your table runner. and sew it to your fabric. Using thread that matches your background fabric, sew small stitches around your tree trunk attaching it to your fabric. Now set your tree on top of the sewn on tree trunk. Place it where you want it to be and then sew and attach it to your runner just like you did the tree trunk.
Continue adding a tree on each side of the tree in the middle so it fits and looks balanced using the same method. Next place your stars where you want them to be. (If you want your stars to be on top of your tree instead of slightly next to the tree like mine, cut your background fabric so it is tall enough for your star to be appliqued on top of the tree.
Sew on presents. I wanted some presents that were a bit wonky and fun so I put my presents tilted to the left and leaning to the right adding movement to my runner. Put your presents where you want them to be. Then applique them on. (For an added whimsical look, I used embroidery thread to make it look like each had ribbon and bow on it. I used a backstitch for the ribbon and the bows I just made a small loop and attached it with a small stitch at the top and in the middle of the bow that went through the back of my fabric.)
Adding More Slow Stitching
One of the easiest slow stitches to use on a quilty project is a very basic running stitch. Take some Perle Cotton or embroidery thread and do a running stitch around each Christmas tree. If you want to get fancy, put some x’s on your stars or do running stitches just inside the edge and around each star. Add a variety of embroidery stitches or keep it very simple. Slow stitches make your appliques stand out.
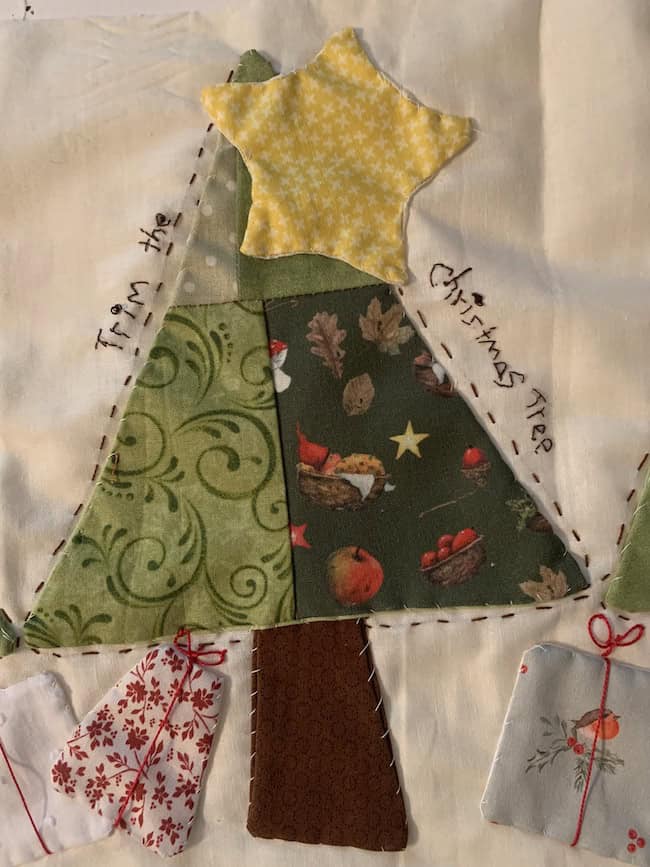
Whimsical Words
Adding a few words to your quilty project adds warmth fun and a whimsical look to it. I used a heat disappering Frixtion pen to write “Trim the Christmas tree” on to my table runner. I used only 1 strand of dark brown embroidery thread and embroidered the words using a simple back stitch. Add whatever phrase or words you think would be cute. Add Some Calm Stitching To Your Quilt Project And Add Instant Charm By Using 2 Embroidery Stitches
Finishing Touches
You can leave your cute table runner as is without quilting it or if you want a finished edge, cut out fabric that measures 21.5″ x 11″ and low loft batting that measures the same. Low loft batting is totally optional because you are only using this as a table runner or maybe a wall hanging so you don’t need batting for it to be warm.
You could also back your table runner with flannel or fleece to make the backing a bit heavier than cotton fabric and you would not need batting to get a thicker effect.
If you choose to use low loft batting, place batting on a table, then place your backing fabric right side up and your table runner topper wrong side up on top of the backing. This means backing fabric and table runner topper are right sides together. Sew a loose running stitch around the edge keeping one short side open and unsewn. Sew with your sewing machine around and through the edge of the three fabrics keeping the same short side you didn’t sew open when you sewed the running stitch unsewn. Use a 1/4″ seam. Then rurn right side out. Smooth and press. Stitch the unsewn side on your machine or unsewn. Or here is another easy way to bind your runner. Bind A Quilt Or Table Runner A Really Easy Way .
You may also like…
Each Halloween season is fun to decorate and why not decorate with a quilt? Here is a cute not so scary strip quilted mini quilt designed especially with Halloween in mind How Do You Make A Mini Quilt? Vintage Halloween Mummy
Looking for a quick and easy scrap quilt to cook up? You could make this as a gift and use colors of your choice. How Do You Make A Simple Scrap Quilt? Swiss Cross Quilt Great Beginner Quilt!
Here is another free pattern for a handmade quilted Christmas Tree runner. How Do You Make A Simple Christmas Table Runner?
Recent Posts
Wondering how to become a more confident quilter and how to zero in on what type of quilting really sings to you? How do you identify if you are a maker of quilts and keep believing in your abilities...
Do you need a quilt to give as a gift and need it like yesterday? Here is a fun quick quilt you can make in a day (maybe less) once you have your supplies. It features homemade raw edge, scrap back...