Valentine’s Day is such a short holiday. I decided to create a decorative sign that you could use all year long if you wanted to. Here is a DIY decoration that has “Wow” factor yet so simple and easy to make. Set this simple Valentine sign made by you DIY on a fireplace mantel, displayed on the wall, in an entryway or many other possible places. Break it out for Valentine decorating and then just move it around your home the rest of the year to remind everyone that sees it that they are loved. Easy to make and you can create it very quickly. Here we go:
Here is your supply list:
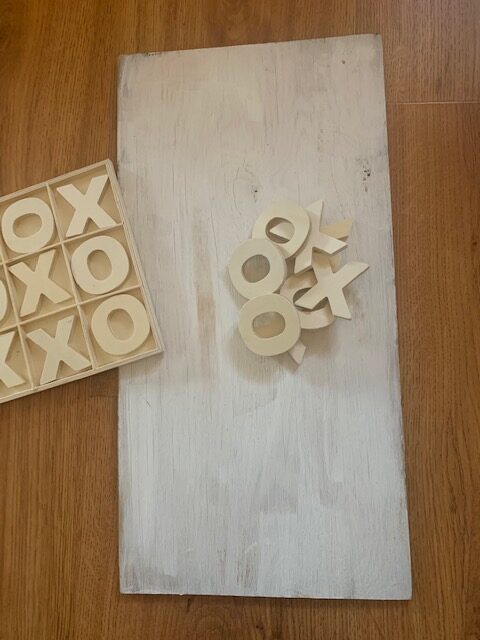
- A piece of plywood. Home Depot sells a piece of 1/4″ plywood 2′ x 2′. Ask an employee to cut the board in half. This gives you enough for two signs.
- Paint the plywood board a color of your choice. Or stain your board. Or there is also the option to leave it unpainted.
- X’s and O’s of wood, felt, stuffed fabric, or made of popsicle sticks, or paint X’s and O’s on, etc…
- Hot glue.
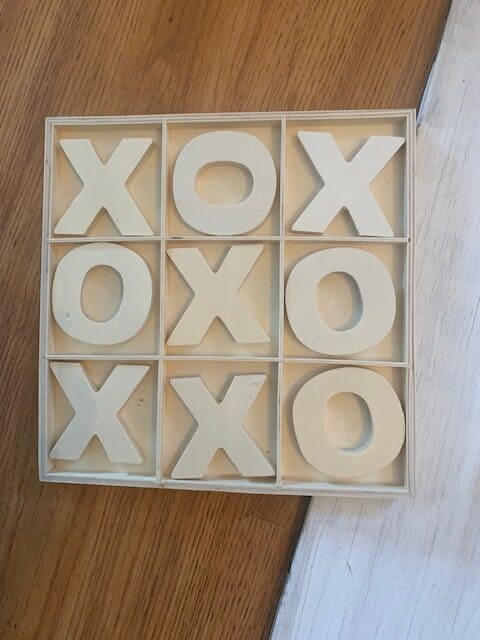
I found some inspiration for this sign at my local Family Dollar store. These wooden X’s and O’s sitting on the store shelf jumped out at me. (You know what I mean.) First I picked up one set and then another because I thought I could use these wooden gems to make a wooden sign with. They were actually a tic tac toe game but for two dollars a piece I could afford to take a chance and see if I could create a wooden sign for Valentine’s Day to decorate with. This fun hugs and kisses sign makes up so fast. It is also such a cute gift to give a friend, a bridal shower gift, or as a birthday gift. Once you get this sign created you will want to make another and maybe another because it is the best when you can make a home decor item that is easy, fun, and so quick to make.

Thin Plywood
I already mentioned you can purchase plywood that measures 1/4″ and is 2 feet by 2 feet at Home Depot. This type of board works great for your simple Valentine sign. It is just the right thickness and it is fairly inexpensive when you cut it in half. This will give you enough for two signs so that makes the plywood about five dollars per piece of plywood after it is cut. (Not too shabby.) I love that you can get a board cut in half while you are at Home Depot. Just ask an employee or ask at the customer service desk for help in getting your board cut in half. They actually do it for free which is definitely a bonus!
Choose Paint Or Stain
Paint or stain your plywood board. There are so many choices when it comes to this. I wanted an aged white look so I chose to paint my board with an inexpensive white paint I bought at Wal-Mart. I sanded my board after painting it to give it an aged look. You can paint your plywood black, white, red, pink, or stain it light brown, gray, whatever suits your fancy. There isn’t one perfect color to use for making your sign. Maybe I should say the perfect color to paint or stain your sign will be the one you choose to use. Or if you want to, you can even leave your board unpainted and paint your wooden X’s and O’s instead. Crafty projects are the best when you have lots of options to design it your way.

Add X’s And O’s
If you can’t find wooden X’s and O’s at your local Family Dollar, try your local craft shop or even scout out Wal-Mart in their craft section. There are other ways to create X’s and O’s if you can’t find wooden letters locally. There is also the option to order wooden letters online. Cut them out of felt or cut them out of some fabric and stuff them with poly fiber. Another idea, create letters out of large popsicle sticks. Make X’s and O’s by cutting the popsicle sticks to the size you want them to be. Make several of each letter to glue on your board. If you would rather, make your X letters and your O letters super big instead of gluing a bunch of letters to your board. Make 1 giant X and 1 giant O and glue the large letters to your plywood. If you just want to paint some X’s and O’s on your board instead of gluing X’s and O’s to your board, pull out your craft paint and paint imperfect X’s and O’s on your plywood board with a paint brush. Practice a bit on paper before then have at it. There are so many different ways to make this sign so don’t hesitate to get your creativity on! Enjoy the process and have fun being crafty creative! Maybe even try making a variety of X’s and O’s signs with some of the ideas I have shared with you.
Put It Altogether
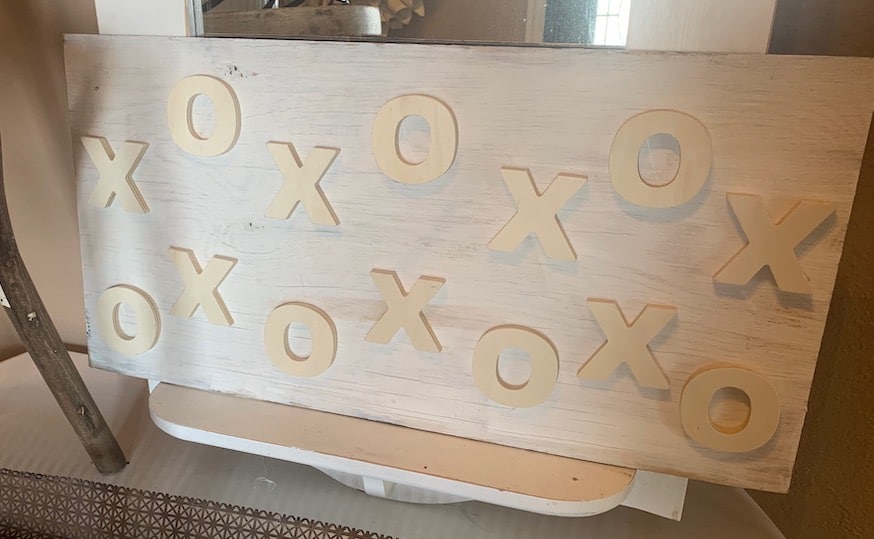
Turn your plywood board horizontal and get ready to glue your your X’s and O’s to your board. Arrange your X’s and O’s on your board the way you want them to look. I decided to make my X’s and O’s kind of crazy and alternated the wooden letters up and down. I think you still get the jist with wacky placed letters. Glue them to your board with hot glue. Yep! It is just that easy! I think the end result is nothing short of cute! If you wanted an easy project to do with your children, they could handle this type of sign making depending on their age and you could actually use a smaller wooden board for their sign. They could give it as a Valentine gift for their school teacher.
Time To Display
Finding a place to put your simple Valentine X’s and O’s sign might be more tricky that you think! Maybe you will want to make several signs (like we talked about) so you can put them in more than one place in your home. Try displaying your Valentine sign on your fireplace mantel. What about putting it on a sofa table? How about displaying your DIY sign in your entry way or hang your sign on the wall in your bedroom. Like I said, there are soooo many great places to display your sign and really it could be displayed all year long because who doesn’t like hugs and kisses?
You may also like
If you are looking for a festive looking heart decor to hang on your front door, try my Free Scrappy Quilted Valentine Heart Pattern For Door Decoration
Here is another cute sign made with the same type of plywood and scrabble letters for your home or great for gifting Home Decor Sign DIY
Need some ideas for making your living room more serene and calm read here Calming Living Room How To’s
Recent Posts
Do you need a quilt to give as a gift and need it like yesterday? Here is a fun quick quilt you can make in a day (maybe less) once you have your supplies. It features homemade raw edge, scrap back...
You know those orphan blocks you just can't bring yourself to throw away? They took some time to make but they just didn't fit in the quilt you were making? Well I've got a solution for using them. A...

