It is always a good idea to have extra food on hand stored properly and ready to use if needed. Ideally you would want to use a cool dark room. However, you can also use a cupboard or armoire as a Prepper Pantry. Here are 6 steps to help you turn a cupboard and drawers into your own Prepper Pantry in.
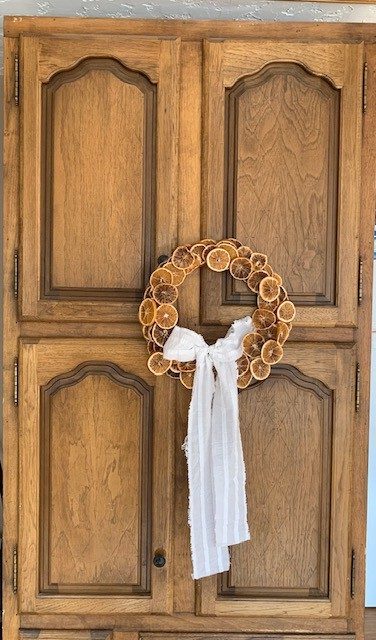
Step 1: Clean out a large cabinet or armoire or set of cupboards and drawers to designate as your emergency Prepper Food Pantry.
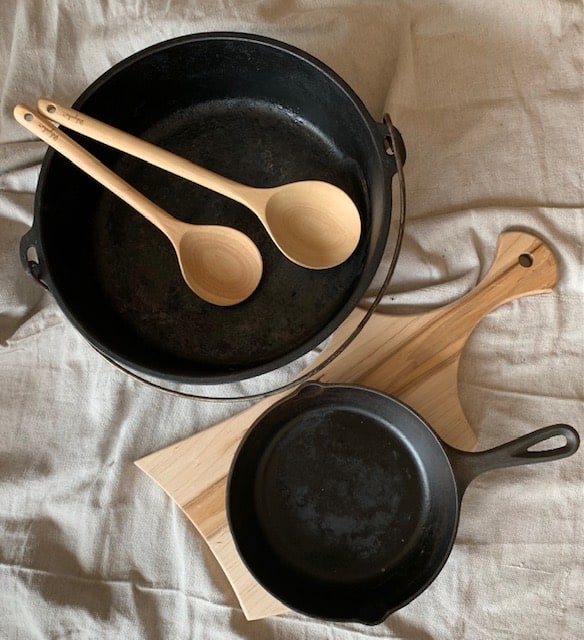
Step 2: Gather alternative cooking equipment and food tools like a dutch oven, propane stove, matches, hand can opener, wheat grinder, etc…
Step 3: Store basic baking supplies and food storage A. Stock sweeteners, fats, spices, flavorings, and baby food supplies. B. Add Grains like wheat, oats, cereals, barley, and cornmeal. C. Add protein foods to your supply including peanut butter, canned meats, and dehydrated eggs. D. Dairy, Soups, gravy mixes, bouillon, and sauce mixes. E. Psychological foods like chocolate chips, candy, boxed mixes, condiments, canned drinks, and desserts are helpful to have on hand. F. Canned and dehydrated fruits and vegetables are great to have in your prepper pantry.
Step 4: Organize non food items in drawers or on shelves that include: paper goods, pharmacy and medical needs like band aids, vitamin supplements, ib profen any prescribed meds.
Step 5: A drawer or shelf just for extra cleansers such as Dawn soap and white vinegar. Bleach. Paper Towels. Toilet paper and hand and bath soap should be stored but probably in another place in your home.
Step 6: Secure your water storage by buying a variety of bottled water, water filter have some Bleach on hand, etc…
A Prepper Pantry is like having your own grocery store in your home. It is food that comes in handy when you face an emergency because it stores longer than your basic groceries. It is peace of mind.We are in the process of remodeling our kitchen…still! We moved a large cabinet with shelves and drawers into our dining room. I will show you how to turn a cabinet into a Prepper Pantry. If you don’t have a large cabinet, clear a few cupboards and drawers in your kitchen, use a closet, under your bed, shelves in your home, a room in your basement etc…, Shop thrift stores for a cabinet that might work for you too. Get creative!
Step 1: Cabinet Prepper Pantry
Wipe off shelves and vacuum and wipe out drawers. Clean thoroughly so you can store food, medications, water, etc… in a safe clean place. Add some extra shelves if you need to. Add some plastic organizers, baskets, bins whatever you have to get your cabinet organized so can turn this piece of furniture into a very useful place to get your emergency food pantry organized.
Deer Skye Quilt and Home Design
Step 2. Alternative Cooking Equipment & Supplies
I’m going off the grid just a bit here with about emergency cooking equipment. You know the little exclamation, “Oh Snap!” when things go wrong. It pays to have options to cook your food if you face power outages or other emergencies that won’t allow you to use your oven or stovetop. You don’t have to have all of these. Just evaluate what you have and maybe what you might want to add to your cooking possibilities.
- Dutch Oven (which can be stored in your cabinet)
- Propane Stove (small or large)
- Backyard fireplace or fire pit
- Backyard Barbecue
- Solo Stove
- Homemade Sun Oven
- Indoor fireplace
- Simple backpacking stoves are available
Cooking Supplies To Store (All of these can be stored in your prepper pantry.
- Matches also throw in some waterproof matches for cooking outside.
- A hand can opener nice and sharp and working comes in handy.
- Hand and electric wheat grinder is great to have!
- Bosch or Kitchen Aid mixer for bread making. (Beats mixing by hand!)
- Glass jars and canning lids for canning food.
- Water Bath Canner
- Glass Canning Jars
Deer Skye Quilt and Home Design
Step 3: Baking Supplies And Food Storage
Please don’t think you need to run around like “the little red hen” trying to store everything all at once. Make a plan and take into consideration the following categories for organizing and getting your pantry stocked and ready to use. Take it one step at at time and just add to your home prepper pantry aka your personal grocery store.
A. Sweeteners: Those would include any kind of sugar you like to use brown sugar, white sugar, powdered sugar, molasses, corn syrup, sugar granules, honey, maple syrup, or artificial sweeteners. Fats: Butter, lard, shortening, Ghee, butter powder, cooking oils, and or cooking sprays that you use. Spices and flavorings: that include any spices that you like to use in addition to salt and pepper. Also flavorings like Vanilla, Almond, etc… and Cocoa. Baby Food you will need to evaluate your baby’s needs when it comes to storing food for your sweet baby. In addition to food you will need baby formula too.
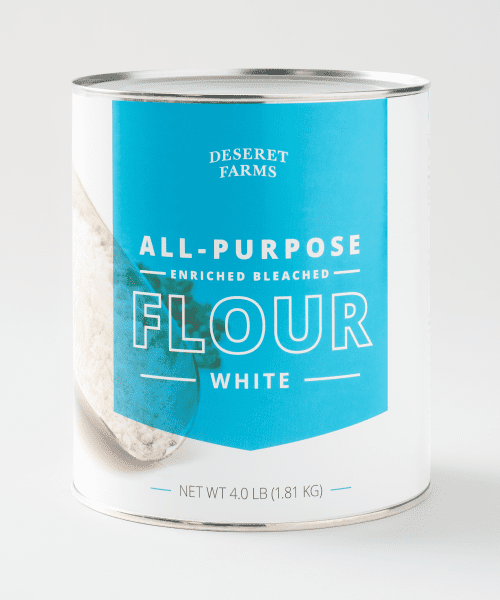
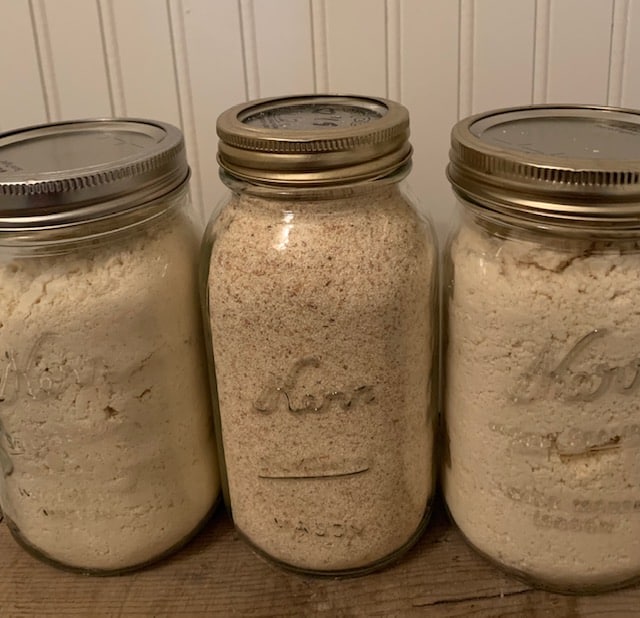
B. Grains are an important staple to store in your Prepper Pantry. Wheats (white wheat is easier on your digestive system), rye, barley, instant oats, oat groats (whole), barley, cornmeal, cereals (that your family eats) ,Cream of Wheat, Farina, Granola, White Rice (brown rice does not store well), Pancake mix, Scone mix, Bread mixes, Spelt, Quinoa, etc…Now you have several options, choices when purchasing grains as far as flour. It is a sound idea to buy some ready to go flour in a can. This lasts about 10 years. Then buy wheat to grind into flour which lasts indefinitely.
C. Add Protein to your Prepper Pantry. There are so many of protein options here: dehydrated meat, canned meats like Vienna sausages, spam, canned beef, chicken, and canned fish like tuna and salmon. Freeze dried or dehydrated meats in #10 cans are useful in your meals. A variety of nuts, peanut butter and other nut butters are great for protein storage as well. Eggs in a dehydrated state are very useful to have on hand too. I have heard but haven’t tried it yet the brand Ova Easy Egg Crystals are excellent and healthy egg replacement for fresh eggs.
D. Dairy, Soups, And Sauces stretch your meal options. Great tasting powdered milks are Morning Moos and Nestle’s Nido Powdered Milk. Powdered milk is great substitute for fresh milk in cooking. It is also a good alternative to drinking milk if you can’t get fresh milk. Soups both dry and canned work well in your Prepper Pantry. Fairly inexpensive and some canned soups are ready to go in a pinch when you don’t have time to heat. Store a combination of dry and already to go soups. Brown and country gravy mixes, fajita, taco, spaghetti, alfredo sauce mixes and chicken and beef bouillon are good to put in your Prepper Pantry.
E. Psychological Foods: This is a thing! Turns out foods that raise your mood and make your food taste better actually can lift your spirits. These would include chocolate chip or anything chocolate for that matter! Coconut, candy, chips, boxed cake or cookie mixes, drink mixes such as lemonade or tang, condiments like Ketchup and mustard,
F. Fruits and Vegetables are vital to your food pantry. I love to can fruits in my water bath canner. I grew up watching my mother can raspberries, peaches, pears, jams, jellies, etc…I followed suit. It is so satisfying to can and to freeze fruits from trees in your yard or strawberry and raspberry plants that grow in your garden. You can freeze your own veggies after blanching them. However veggies and meat must be preserved in a pressure cooker because they aren’t safe to eat if you try to can them in a water bath. If you don’t want to actively can fruits or pressure cook your veggies just buy them from your local grocer. A food dehydrator is a great way to store dried apples, apricots, peaches, etc…It can be very useful. Once dried, put a oxygen absorber in the bottom of a glass jar. Then fill your jar with your dried fruit and put a canning lid (doesn’t have to be new) and a canning ring and twist it tightly on your jar. You can even make your own. There are several tutorials online if you are game to give it a go! Little tip, you can also dry fruit in your own oven.
Step 4: Non Food Items
Organize a drawer to put your medical needs in. Before I go any further, if you have little ones that might try to get into your drawer, either put a drawer lock on it or put your meds up higher. Basic Tylenol, IB Pro-fun, Vitamins, Supplements, Prescribed medications, band aids, ointments, herbal oils, bandages, sun burn ointment, any of your medical needs can be stored in your cabinet or armoire if you have the room. Also store paper goods such as paper plates, eating utensils, napkins, and paper cups in your cabinet drawer or on a shelf. Paper goods are nice to have on hand to save on water. You need to store toilet paper, hand and bath soap but store it in another place because you don’t want your food to taste like soap.
Step 5: Cleansers and Trash Bags
In addition to your food, you will need to have some cleansers stored for your home. Did you know you can make a cleanser from equal parts of Dawn dish soap and White vinegar. Just grab a spray bottle and fill it 1/3 full of these two cleansers. Shake well until mixed. Also baking soda works great to clean stubborn pot and pans and toilets and showers. Clorox bleach is good to store to disinfect with. Also cleaning wipes. Add to your cleansers trash can liners both kitchen size and larger. They are a necessity and would store easily in a drawer of your pantry or in a plastic organizer on a shelf in your cupboard.
Step 6: Water Storage For Cooking
Storing your water in your cabinet is optional. You could store some bottled water on a shelf of your Prepper Pantry. You will need to find other places in your home to store it though because it will take up a lot of space. Like under your beds, in closets, get thinking. Where do you have some extra space where you could put some shelves to store water on? A word of safety, don’t ever store your water directly on a cement floor. There are additives in cement that will seep into your water. Not a healthy thing.
Pick up some bottled water when you find it on sale. If your city water is treated, you don’t need to add anything else to your water when you store it. I use pop bottles to store water in too. I wash them out with a drop of dish soap and the thoroughly rinse them. Once they are clean, I put water from the tap in the bottle. (Now some take this an extra step by cleaning pop bottles with a solution of water and clorox bleach and then air dtying them.) I only use the dish soap method. Technically storing water like this, you should rotate every 6 months by dumping water out of your pop bottles and refilling it again with tap water.
Only use clear pop bottles though not the colored bottles. One more idea, filling your empty glass mason food jars is ideal. Every time I go to Walmart I try to pick up a jug or two of Arrowhead or Crystal Glacier Water. These are great for longterm storage. You can also use a water filter. There are a lot excellent filters out there so research what will work best for you and your family. Boiling water is the safest method for disinfecting your water by getting it to at least 212 degrees Fahrenheit. If you live where your elevation is higher, you may need to boil a little longer. There are other ways to keep your drinking and cooking water safe so do your research.
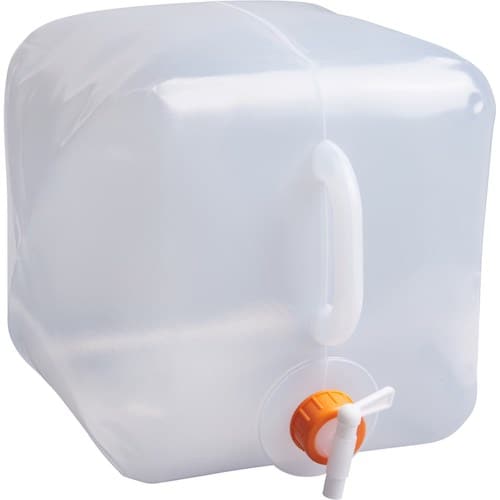
5 gallon water cubes are something to consider too! You can lay it on its side on your counter with the spicket down so you can easily access the water to drink or cook with.
You May Also Like
Does your walk in pantry need help? What Do You Do With A Walk In Pantry?
Updating your kitchen style and wondering if French Country is still a thing? Are French Country Kitchens Still In Style?
Whether you are creating a new kitchen or just want to step up the look of your cabinets and drawers with knobs and handles here is An Easy Guide For Choosing Cabinet Hardware.
Recent Posts
Do you need a quilt to give as a gift and need it like yesterday? Here is a fun quick quilt you can make in a day (maybe less) once you have your supplies. It features homemade raw edge, scrap back...
You know those orphan blocks you just can't bring yourself to throw away? They took some time to make but they just didn't fit in the quilt you were making? Well I've got a solution for using them. A...

