Fresh garland makes such an inviting and beautiful display when created for your home. The aroma alone will make your home smell sooo good! You can make your own garland. It takes a little time but with a little know how you can gather greens from your yard like various boughs of pine, cedar, juniper, a variety of eucalyptus, rosemary, fresh bay leaves, boxwood, whatever you have on hand or can find locally to create your garland masterpiece. Once you get the hang of it you will want to put them all over your home inside and out!
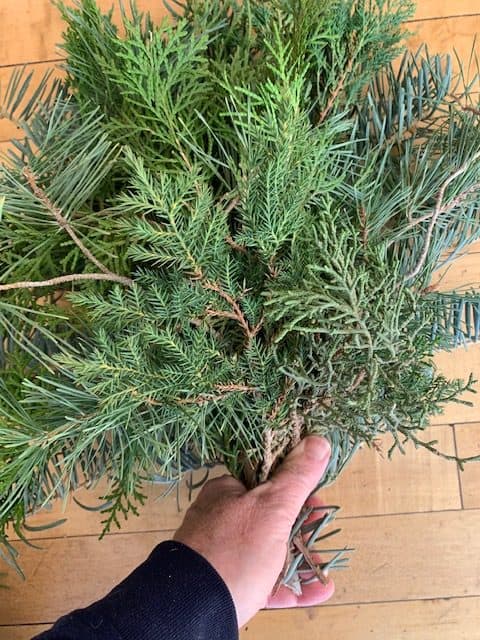
You want to gather a variety of greens that have different textures, and variations of color. Putting your garland together, you will also need a few tools to assemble your garland like clippers, garden gloves, a rope the length you want your garland to be, laundry basket, glue gun for gluing added decor, and florist wire. Also, you will need the greens you have gathered, different types and sizes of pinecones, juniper berries or other berries, twigs, dried oranges for added interest, and ribbon. Last but not least a spray bottle filled with water. You can also make a swag while you are at it because you can use the same technique for making a Christmas swag small or large to hang in your home or outdoors.
Choice of Greenery
You can use greens in all shapes, sizes, and textures for making a garland or swag. I count myself blessed because I have a nice variety of greens growing in my yard. When my hubby and I bought our home eight years ago, we fell in love with the yard. Full of pines, evergreens, junipers, cedar, and quaking aspen, we felt and still feel that we are in tree and greenery heaven! I love making wreaths, garlands, and swags especially around the holidays and sometimes for weddings when I am asked to design.
If you look carefully around your yard, you can use a variety of greenery that may be growing in your yard. You can use herbs like rosemary, bayleaf, or even thyme. Greens have different “shelf life” which means some greenery lasts longer than others. You can test it out by picking some greenery and setting it on your counter. It is better to use greenery that will still look good as it dries. Junipers, and pine boughs, some cedars tend to last longer.
Eucalyptus works well in garlands.There are several different types. The types I like to use are seeded eucalyptus and silver dollar. They add a beautiful texture different from other greens and they are easy to add to other greenery. They also last a long time and if you buy fresh, it will dry naturally in your garland and still look beautiful!

Putting Your Garland Together
- Start by gathering or purchasing your greenery. If you are foraging from you own yard or other outdoor place, take a laundry basket with you. Make sure you have your clippers and garden gloves. Clip your greenery long enough that you can wire it together with your other greenery.
- Clip the greenery you think you want to put in your garland. Clip several pieces of each type of greenery you choose because you will need more than one piece of greenery to make your garland. Make sure you clip each piece long enough to wire it together. Try to cut each piece about the same length you want it to be.
- If it is warm enough outside to make your garland great! You can work in your own backyard. If it is a bit nippy though, I like to take mine inside and spread it out in my kitchen.
- Put your greenery in piles, on the floor in your kitchen or laundry room. Stack each kind of plant in its own like pile. (Hopefully that makes sense!) Then you can easily grab a piece for each bundle you make for your garland.
- Make greenery bundles by taking a piece of greenery from each pile and stack them on top of each other. Play with the order that you stack them in because it will change the look of your bundle. Wire the bundle together. It might take a few tries to get your greenery stack just the way you want it. That is the fun of it though. You can get as creative as you want in the design! If you don’t like how a piece of greenery looks in your bundle, set it aside. Continue to repeat the same order of the greenery stack you just made. Make enough bundles to cover the full length of your rope.
- Have a spray bottle handy. From time to time, spray your greenery bundles with water to help keep it fresh as you work with it.
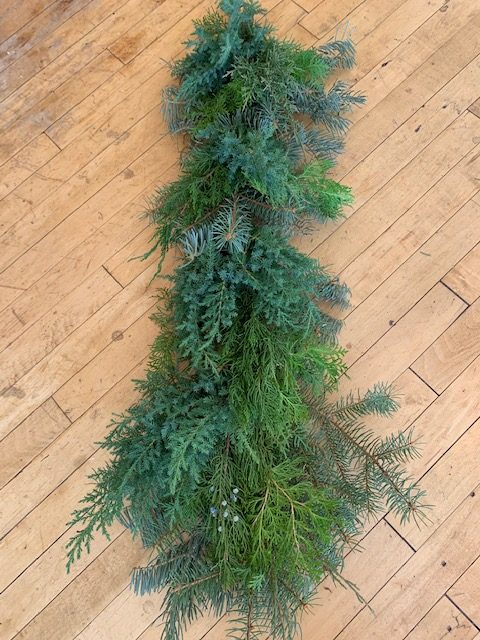
- Take your first bundle of greenery and wire it to the beginning of your rope. Take the next bundle of greenery and barely tuck the bundle under the end of the first bundle and wire it to the rope. Continue until your rope is covered with your bundles to the end of the length of rope.
- Now decorate your greenery by wiring or hot gluing pinecones, berries, dried oranges, twigs, etc… This finishes off your garland and gives you a beautiful professional look to it. You can add faux decor to it. Your berries do not have to be fresh. Even Christmas ornaments look so festive in a garland.
Ideas For Where To Put Your Garland
You might want to determine where you want to hang or place your garland before you create it. However you can always make more if it isn’t long enough for the place you want to put it. There are so many possibilities! Your fresh garland will last longer outside but it will still last for a good couple of weeks to a month inside if you spray it every so often with water. Also an easy way to hang it is to grab some command strip holders to hang your garland with if you can’t tack small nails for hanging.
- Put it down your kitchen table for a festive look and place some candles or battery operated tea lights every so often down the length of your garland. Little twinkle lights added make it more magical!
- Hang your garland outside on railings.
- Wind it around your porch posts.
- How about hanging garland above your front door.
- Fireplace mantels. (Be careful not to get it to close to the open fireplace box.)
- Add garland to an outside decorative bench.
- Hang it inside above doorways.
- Hang it on your porch swing.
- Decorate your free standing mailbox with it.
- Put it in window sills and add a chunky battery operated candle to it.
- Adding lights to your garland always makes it look extra magical and beautiful!
I could keep on going because like I said the possibilities are endless!!!! You get the picture though! What a beautiful way to decorate your home inside and out. You don’t have to just use it for the Christmas season either. Decorate your garland with spring decor, summer decor, any time you want to make an extra special decor statement.
Would be great when you have baby showers, bridal showers, or any party really if you want to go the extra mile with your decorating.

Craft A Swag With Greenery
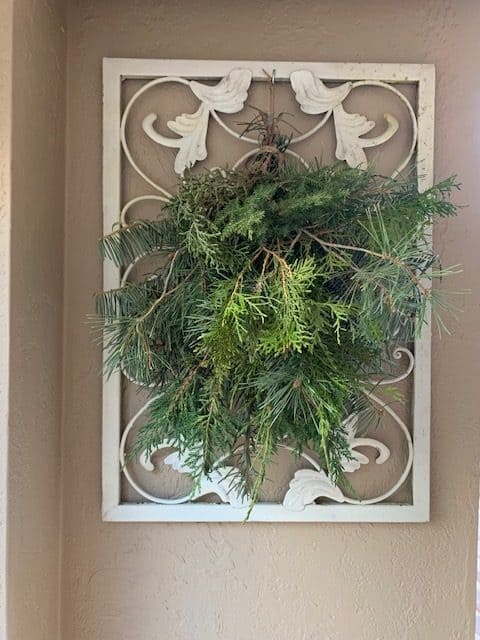
Truth be told this is easier than making a garland and you use the same steps as the garland but you only make one bundle. Yep! That’s it! Only one bundle. Gather the greenery you want for your bundle. I suggest you clip your greenery longer than you did for your garland. You want your bundle to hang down at least twelve inches or more when it is finished and hung.
Put your bundle together. Add pinecones, berries, oranges, whatever you plan to add or not add then tie a ribbon around where you wired your bundle together. You could also hot glue it. Whatever suits your fancy! Then hand the swag from where you wired everything together. The greenery will face downward.
Again the possibilities are endless for hanging swags.
- Attach to fence posts
- Mailboxes
- Porch posts
- Wire on brick columns
- Outside or indoor windows
- Front doors
- Grandfather clocks
- Attach to the back of dining room chairs
- Hang on each side of a doorway outside or in.
You can also give them as gifts to your friends and family if you want to give something handmade and special. You can actually amaze people with this gift!
You might also like to check out how to Make A Unique Indoor Garden and also if you are a diyer like us, you might enjoy our post on How Do You Make A Simple Quilt ?
Recent Posts
Do you need a quilt to give as a gift and need it like yesterday? Here is a fun quick quilt you can make in a day (maybe less) once you have your supplies. It features homemade raw edge, scrap back...
You know those orphan blocks you just can't bring yourself to throw away? They took some time to make but they just didn't fit in the quilt you were making? Well I've got a solution for using them. A...

